
How to Scan and Pentest Your Homelab (2026 Guide)
Stop guessing if your self-hosted infrastructure is secure. Use Shodan, Greenbone OpenVAS in Docker, and Trivy to audit your homelab like a professional.

So let's say you worked hard setting up your environment, you are happy you finally have things humming along... You locked it down a reasonable amount. You’ve deployed the SWAG reverse proxy. You've even got CrowdSec watching the perimeter. But in the world of technical network defense, there is one golden rule: If you aren't actively scanning your own network, someone else is.
A truly hardened homelab isn't defined by what you think you secured - it’s defined by what an aggressive, automated subnet scan actually uncovers.
Here's how to see what the bots & script kiddies see, easily.
This is part of my Homelab Observability series:
Homelab Observability
Logging & Threat Maps
Part 1: Building a Homelab Mini-SIEM with Grafana, Loki & Promtail
Network Visualization
Part 2: Mapping Your Network Topology with Homelable
Security Auditing
Part 3: Auditing the Castle - Scan & Pen-Test Your Homelab
Active Defense Forensics
Part 4: Verifying CrowdSec - Logs, Alerts & the Web UI
This guide is your step-by-step framework to transition from a passive sysadmin to an active security auditor. We are going to deploy an array of entirely free and open-source (FOSS) tools to launch perimeter checks against your public IP, hunt down internal container vulnerabilities, and run a comprehensive, bare-metal infrastructure audit.
Phase 1: External Network Security Audit (Shodan)
Before looking inside your network, you need to see exactly what automated botnets see when they poke at your home IP address!
1. Shodan & Censys "Ghost" Scan (Cost: Free!)
Good news: Checking if your own IP is exposed on Shodan is 100% free. You only pay if you use their enterprise monitoring alerts or deep API query tools. You may have to make an account though.
- The Action: Go to
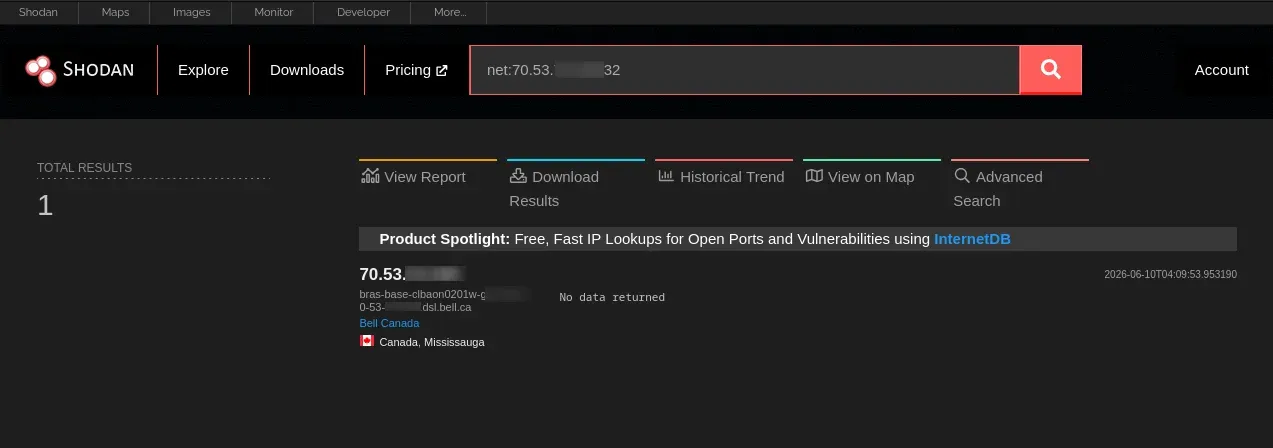
shodan.ioand typenet:YOUR_PUBLIC_IP/32into the search bar. Do the same atsearch.censys.io. - The Audit Goal: If any results appear showing open administrative ports (like Port 22, 80, or your router's login page), you have a critical port-forwarding leak. Your external footprint should ideally return entirely dark, or show only your hardened Port 443 Nginx reverse proxy wrapper. You want to see basically nothing like this:
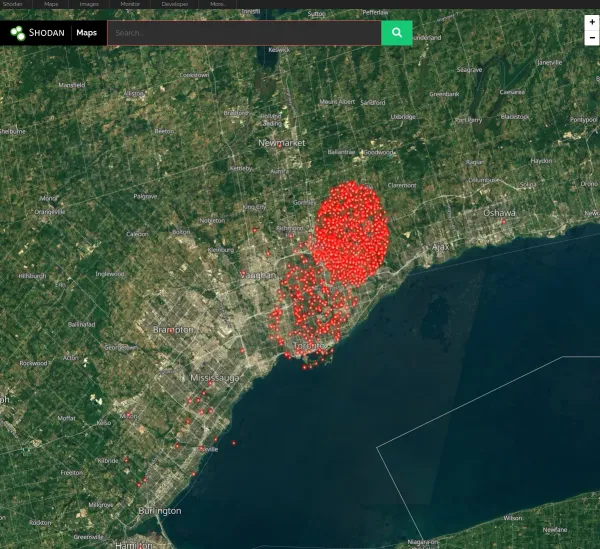
Here's how easy and dangerous Shodan is. If you change that from a singular IP scan at /32 to a /21 and see a few of your ISP's modems and customers, you might run into something like this:

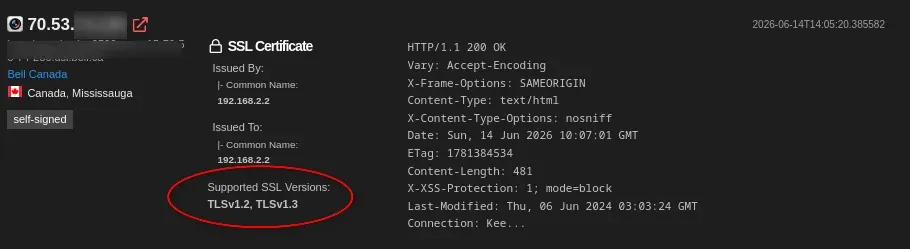
Which leads to...

This is educational & just to demonstrate how easy it is, to spot things that are just sitting wide-open on the internet, with almost no skill at all.
2. Qualys SSL Labs Scanner
If you expose services via a reverse proxy (SWAG), your encryption protocol configuration must be completely airtight.
- The Action: Run your public domain name (e.g.,
plex.yourdomain.com) through the Qualys SSL Server Test. - The Audit Goal: If your configuration doesn't instantly score an A+, your TLS cipher suite is outdated. Look for failures like TLS 1.0/1.1 exposure or weak Diffie-Hellman exchanges.
This is what you want to end up with:
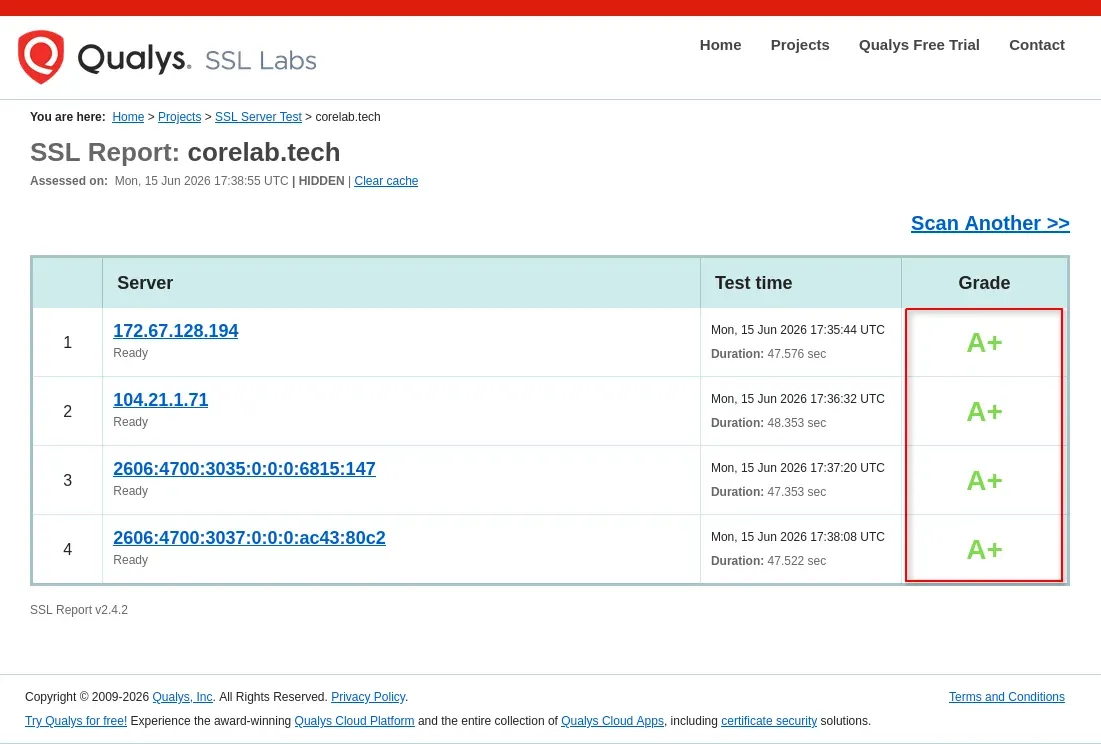
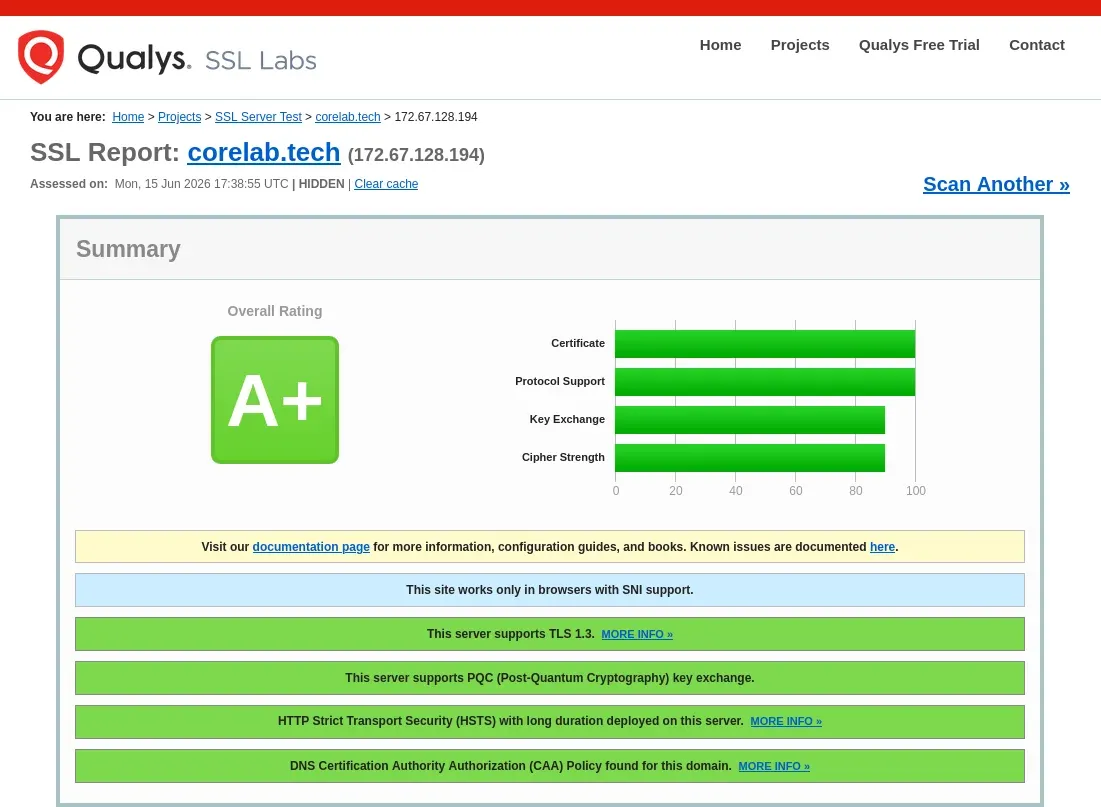
Follow my guide here ➡️ for details on how to get an A+ with NGINX/SWAG.
 Core Lab Joe

3. GRC ShieldsUP!
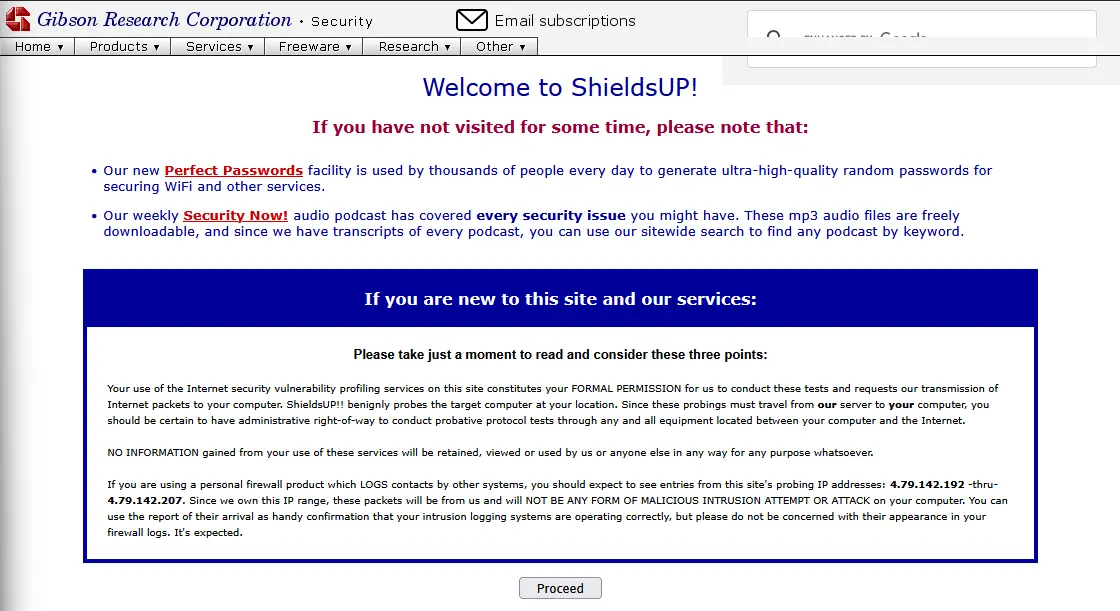
The oldest, most reliable quick packet-drop validator on the internet.
- The Action: Run the Common Ports and All Service Ports test.
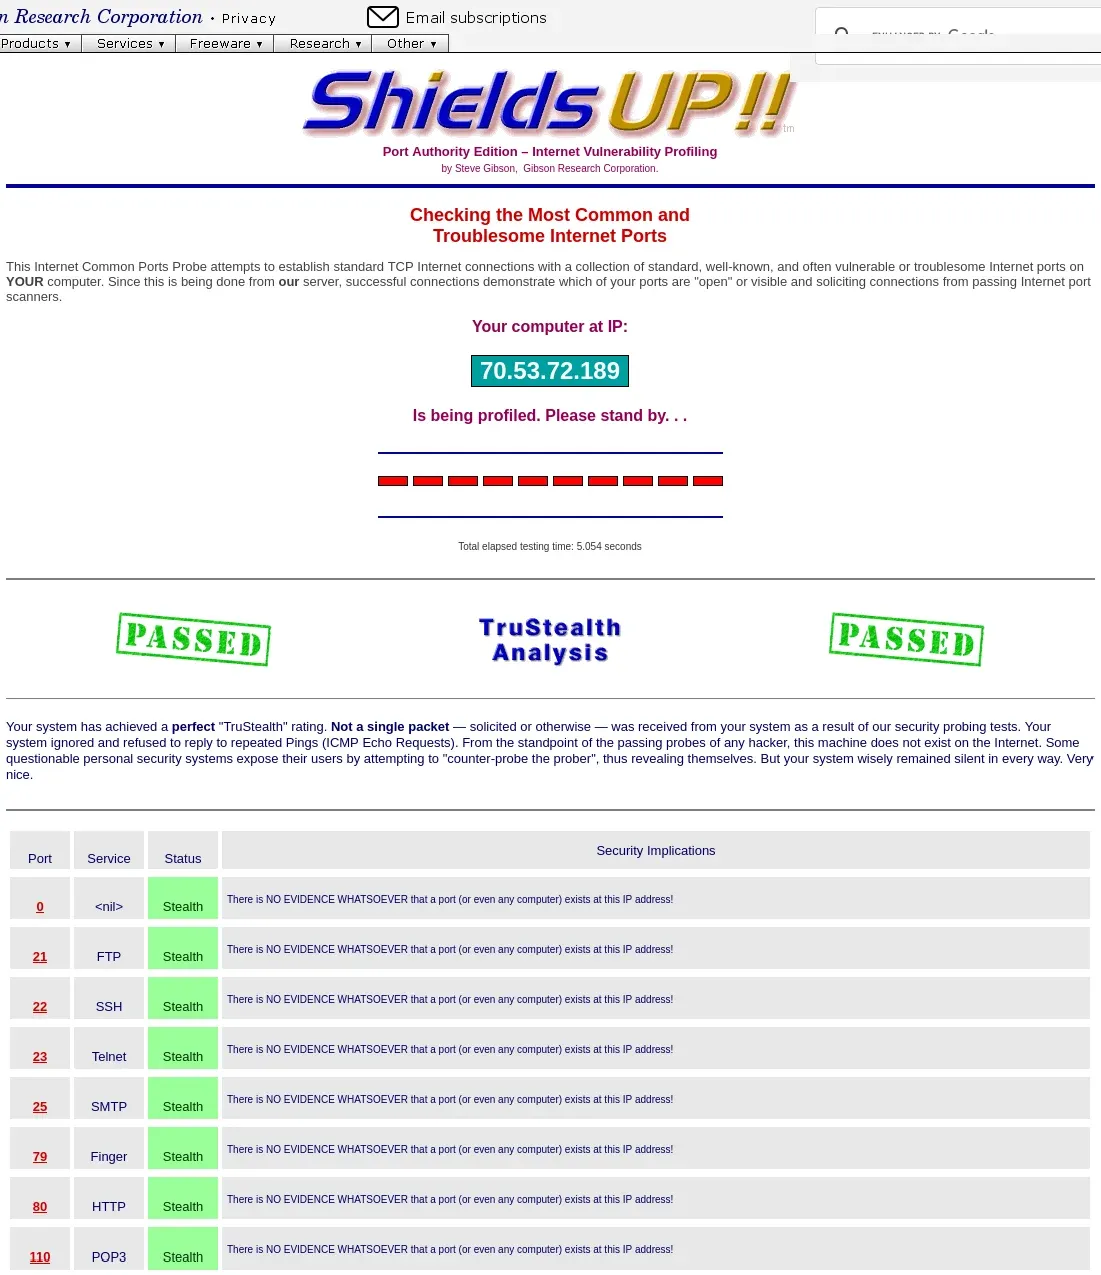
- The Audit Goal: Your firewall should achieve a perfect score of "True Stealth." This means your OPNsense or perimeter box isn't just closing unneeded ports—it is completely ignoring inbound requests, leaving the port dropping into a silent timeout rather than replying with a
RST(Reset) packet.
Phase 2: Internal Vulnerability Scanning (OpenVAS)
Once the perimeter is verified, you must take an "Assume Breach" posture. If an attacker compromises a smart lightbulb on your IoT network, what can they actually see or reach? All they need is to pivot by using port 22 (SSH) to login to another device on your network!
[Attacker Vector: IoT/Flat Network] ──(Nmap Scan)──> [Vulnerable Subnets/Docker Sockets]
Moving Past Nessus Essentials to Greenbone OpenVAS (GVM)
Why the pivot? Over the last couple of years, Tenable has aggressively crippled the free version of Nessus Essentials (limiting it strictly to 16 IP addresses and stripping advanced compliance checking), making it frustrating for growing homelabs.
- The 2026 FOSS Alternative: OpenVAS (via the Greenbone Community Containers). It is 100% open-source, completely unrestricted, and lets you run enterprise-grade vulnerability definitions against every machine, VM, and container in your house.
This Phase is where we have some fun firing up another container!
OR - The Lightweight Route: Nmap Subnet Sweeps
NMAP has been a tried and true way to poke at things for a long time by now, and requires very little in the way of resources to use.
# Sweep a local subnet to discover active hosts and guess their OS signatures
sudo nmap -sS -O -T4 192.168.10.0/24How to Deploy Greenbone OpenVAS via Docker Compose🔬
To run a true, unthrottled enterprise vulnerability assessment against your home network, we will deploy the official Greenbone Community Container stack. This puts an entire suite of CVE network scanners, vulnerability feeds, and historical reporting assets directly into your homelab.


OpenVAS Hardware & System Resource Requirements
OpenVAS is a heavyweight security engine. During an active credentialed or uncredentialed network sweep, it spins up dozens of concurrent network processes and handles complex cryptographic checks.
Do not attempt to run this stack continuously on low-tier hardware. The vulnerability feed compilation alone will exhaust constrained nodes.
- Minimum Requirements: Allocating at least 4 CPU Cores and 8GB of RAM to this container stack (or its host VM) is highly recommended to prevent out-of-memory errors during database indexing.
- Operational Tip: Spin this stack up on-demand when performing your monthly or quarterly audits, then shut it down completely when finished.
📦 The Greenbone Community docker-compose.yml Stack Configuration
Create a dedicated directory for your auditing infrastructure on fast storage if possible, a normal SSD will do, does not have to be cutting-edge NVME. (e.g., /ssd/containers/security/greenbone/) deploy this as a separate stack to everything else you have. It's HUGE, and well-deserving of it's own stack, and being kept in a tidy compose of it's own. Paste the following configuration file or download their compose directly.
Download from Greenbone: curl -f -O -L https://greenbone.github.io/docs/latest/_static/compose.yaml --output-dir "$DOWNLOAD_DIR" OR use my slightly modified compose:
📄 View Full YAML Configuration (Click to Expand)
name: greenbone-community-edition

services:
  vulnerability-tests:
    image: registry.community.greenbone.net/community/vulnerability-tests
    environment:
      FEED_RELEASE: "24.10"
      KEEP_ALIVE: 1
    networks:
      - greenbone_net
    volumes:
      - vt_data_vol:/mnt

  notus-data:
    image: registry.community.greenbone.net/community/notus-data
    environment:
      KEEP_ALIVE: 1
    networks:
      - greenbone_net
    volumes:
      - notus_data_vol:/mnt

  scap-data:
    image: registry.community.greenbone.net/community/scap-data
    environment:
      KEEP_ALIVE: 1
    networks:
      - greenbone_net
    volumes:
      - scap_data_vol:/mnt

  cert-bund-data:
    image: registry.community.greenbone.net/community/cert-bund-data
    environment:
      KEEP_ALIVE: 1
    networks:
      - greenbone_net
    volumes:
      - cert_data_vol:/mnt

  dfn-cert-data:
    image: registry.community.greenbone.net/community/dfn-cert-data
    environment:
      KEEP_ALIVE: 1
    networks:
      - greenbone_net
    volumes:
      - cert_data_vol:/mnt
    depends_on:
      cert-bund-data:
        condition: service_healthy

  data-objects:
    image: registry.community.greenbone.net/community/data-objects
    environment:
      FEED_RELEASE: "24.10"
      KEEP_ALIVE: 1
    networks:
      - greenbone_net
    volumes:
      - data_objects_vol:/mnt

  report-formats:
    image: registry.community.greenbone.net/community/report-formats
    environment:
      FEED_RELEASE: "24.10"
      KEEP_ALIVE: 1
    networks:
      - greenbone_net
    volumes:
      - data_objects_vol:/mnt
    depends_on:
      data-objects:
        condition: service_healthy

  gpg-data:
    image: registry.community.greenbone.net/community/gpg-data
    networks:
      - greenbone_net
    volumes:
      - gpg_data_vol:/mnt

  redis-server:
    image: registry.community.greenbone.net/community/redis-server
        deploy:
      restart_policy:
        condition: any
    networks:
      - greenbone_net
    volumes:
      - redis_socket_vol:/run/redis/

  pg-gvm:
    image: registry.community.greenbone.net/community/pg-gvm:stable
    deploy:
      restart_policy:
        condition: any
    networks:
      - greenbone_net
    volumes:
      - psql_data_vol:/var/lib/postgresql
      - psql_socket_vol:/var/run/postgresql
    depends_on:
      pg-gvm-migrator:
        condition: service_completed_successfully

  pg-gvm-migrator:
    image: registry.community.greenbone.net/community/pg-gvm-migrator:stable
    deploy:
      restart_policy:
        condition: none
    networks:
      - greenbone_net
    volumes:
      - psql_data_vol:/var/lib/postgresql
      - psql_socket_vol:/var/run/postgresql

  gvmd:
    image: registry.community.greenbone.net/community/gvmd:stable
    deploy:
      restart_policy:
        condition: any
    networks:
      - greenbone_net
    volumes:
      - gvmd_data_vol:/var/lib/gvm
      - scap_data_vol:/var/lib/gvm/scap-data/
      - cert_data_vol:/var/lib/gvm/cert-data
      - data_objects_vol:/var/lib/gvm/data-objects/gvmd
      - vt_data_vol:/var/lib/openvas/plugins
      - psql_data_vol:/var/lib/postgresql
      - gvmd_socket_vol:/run/gvmd
      - ospd_openvas_socket_vol:/run/ospd
      - psql_socket_vol:/var/run/postgresql
    depends_on:
      pg-gvm:
        condition: service_started
      scap-data:
        condition: service_healthy
      cert-bund-data:
        condition: service_healthy
      dfn-cert-data:
        condition: service_healthy
      data-objects:
        condition: service_healthy
      report-formats:
        condition: service_healthy

  gsa:
    image: registry.community.greenbone.net/community/gsa:stable-slim
    environment:
      MOUNT_PATH: "/mnt/web"
      KEEP_ALIVE: 1
    healthcheck:
      test: [ "CMD-SHELL", "test -e /run/gsa/copying.done" ]
      start_period: 5s
    networks:
      - greenbone_net
    volumes:
      - gsa_data_vol:/mnt/web

  gsad:
    image: registry.community.greenbone.net/community/gsad:stable
    deploy:
      restart_policy:
        condition: any
    environment:
      GSAD_HTTP_ONLY: "true"
      GSAD_API_ONLY: "true"
      GSAD_FOREGROUND: "true"
    networks:
      - greenbone_net
    volumes:
      - gvmd_socket_vol:/run/gvmd
    depends_on:
      gvmd:
        condition: service_started

  gvm-config:
    image: registry.community.greenbone.net/community/gvm-config:latest
    environment:
      ENABLE_NGINX_CONFIG: true
      ENABLE_TLS_GENERATION: true
    networks:
      - greenbone_net
    volumes:
      - nginx_config_vol:/mnt/nginx/configs
      - nginx_certificates_vol:/mnt/nginx/certs

  nginx:
    image: registry.community.greenbone.net/community/nginx:latest
    ports:
      - 8443:443
      - 9392:9392
    networks:
      - greenbone_net
    volumes:
      - nginx_config_vol:/etc/nginx/conf.d:ro
      - nginx_certificates_vol:/etc/nginx/certs:ro
      - gsa_data_vol:/usr/share/nginx/html:ro
    deploy:
      restart_policy:
        condition: any
    depends_on:
      gvm-config:
        condition: service_completed_successfully
      gsa:
        condition: service_healthy
      gsad:
        condition: service_started

  # Sets log level of openvas to the set LOG_LEVEL within the env
  # and changes log output to /var/log/openvas instead /var/log/gvm
  # to reduce likelihood of unwanted log interferences
  configure-openvas:
    image: registry.community.greenbone.net/community/openvas-scanner:stable
    networks:
      - greenbone_net
    volumes:
      - openvas_data_vol:/mnt
      - openvas_log_data_vol:/var/log/openvas
    command:
      - /bin/sh
      - -c
      - |
        printf "table_driven_lsc = yes\nopenvasd_server = http://openvasd:80\n" > /mnt/openvas.conf
        sed "s/127/128/" /etc/openvas/openvas_log.conf | sed 's/gvm/openvas/' > /mnt/openvas_log.conf
        chmod 644 /mnt/openvas.conf
        chmod 644 /mnt/openvas_log.conf
        touch /var/log/openvas/openvas.log
        chmod 666 /var/log/openvas/openvas.log

  # shows logs of openvas
  openvas:
    image: registry.community.greenbone.net/community/openvas-scanner:stable
    networks:
      - greenbone_net
    volumes:
      - openvas_data_vol:/etc/openvas
      - openvas_log_data_vol:/var/log/openvas
    command:
      - /bin/sh
      - -c
      - |
        cat /etc/openvas/openvas.conf
        tail -f /var/log/openvas/openvas.log
    depends_on:
      configure-openvas:
        condition: service_completed_successfully

  openvasd:
    image: registry.community.greenbone.net/community/openvas-scanner:stable

    deploy:
      restart_policy:
        condition: any
    environment:
      # `service_notus` is set to disable everything but notus,
      # if you want to utilize openvasd directly, remove `OPENVASD_MODE`
      OPENVASD_MODE: service_notus
      GNUPGHOME: /etc/openvas/gnupg
      LISTENING: 0.0.0.0:80
    volumes:
      - openvas_data_vol:/etc/openvas
      - openvas_log_data_vol:/var/log/openvas
      - gpg_data_vol:/etc/openvas/gnupg
      - notus_data_vol:/var/lib/notus
    # enable port forwarding when you want to use the http api from your host machine
    # ports:
    #   - 127.0.0.1:3000:80
    depends_on:
      vulnerability-tests:
        condition: service_healthy
      notus-data:
        condition: service_healthy
      configure-openvas:
        condition: service_completed_successfully
      gpg-data:
        condition: service_completed_successfully
    networks:
      greenbone_net: {}
      default:
        aliases:
          - openvasd
  ospd-openvas:
    image: registry.community.greenbone.net/community/ospd-openvas:stable
    deploy:
      restart_policy:
        condition: any
    hostname: ospd-openvas.local
    cap_add:
      - NET_ADMIN # for capturing packages in promiscuous mode
      - NET_RAW # for raw sockets e.g. used for the boreas alive detection
    security_opt:
      - seccomp=unconfined
      - apparmor=unconfined
    command:
      [
        "ospd-openvas",
        "-f",
        "--config",
        "/etc/gvm/ospd-openvas.conf",
        "--notus-feed-dir",
        "/var/lib/notus/advisories",
        "-m",
        "666",
      ]
    networks:
      - greenbone_net
    volumes:
      - gpg_data_vol:/etc/openvas/gnupg
      - vt_data_vol:/var/lib/openvas/plugins
      - notus_data_vol:/var/lib/notus
      - ospd_openvas_socket_vol:/run/ospd
      - redis_socket_vol:/run/redis/
      - openvas_data_vol:/etc/openvas/
      - openvas_log_data_vol:/var/log/openvas
    depends_on:
      redis-server:
        condition: service_started
      gpg-data:
        condition: service_completed_successfully
      configure-openvas:
        condition: service_completed_successfully
      vulnerability-tests:
        condition: service_healthy
      notus-data:
        condition: service_healthy

  gvm-tools:
    image: registry.community.greenbone.net/community/gvm-tools
    networks:
      - greenbone_net
    volumes:
      - gvmd_socket_vol:/run/gvmd
      - ospd_openvas_socket_vol:/run/ospd
    depends_on:
      - gvmd
      - ospd-openvas

volumes:
  gpg_data_vol:
  scap_data_vol:
  cert_data_vol:
  data_objects_vol:
  gvmd_data_vol:
  psql_data_vol:
  vt_data_vol:
  notus_data_vol:
  psql_socket_vol:
  gvmd_socket_vol:
  ospd_openvas_socket_vol:
  redis_socket_vol:
  openvas_data_vol:
  openvas_log_data_vol:
  gsa_data_vol:
  nginx_config_vol:
  nginx_certificates_vol:

networks:
  greenbone_net:
    driver: bridge
    name: greenbone_net
nginx container! I modified the ports: so they were not locked to localhost only, as that only helps if you will be accessing your vuln scanner on the SAME machine. I run mine on a server and access it over it's web interface.
Changed from:
ports:
- 127.0.0.1:443
- 127.0.0.1:9392
to
8443:443 (I was already using 443, so used 8443)
9392:9392
Running Your First Internal Security Scan
Once your compose file is saved, initialize the deployment:
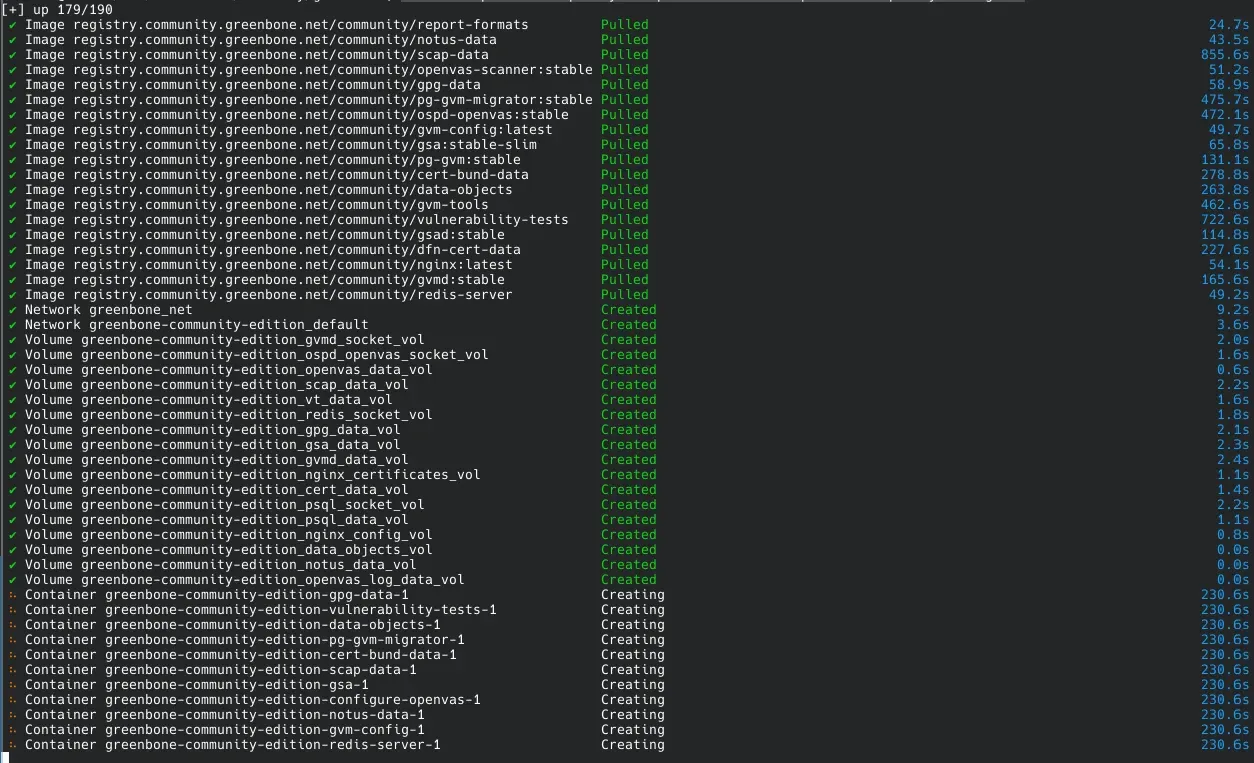
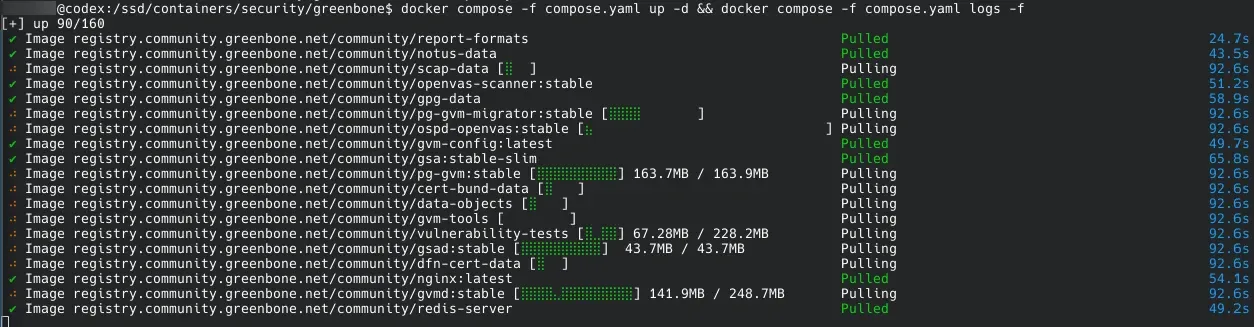
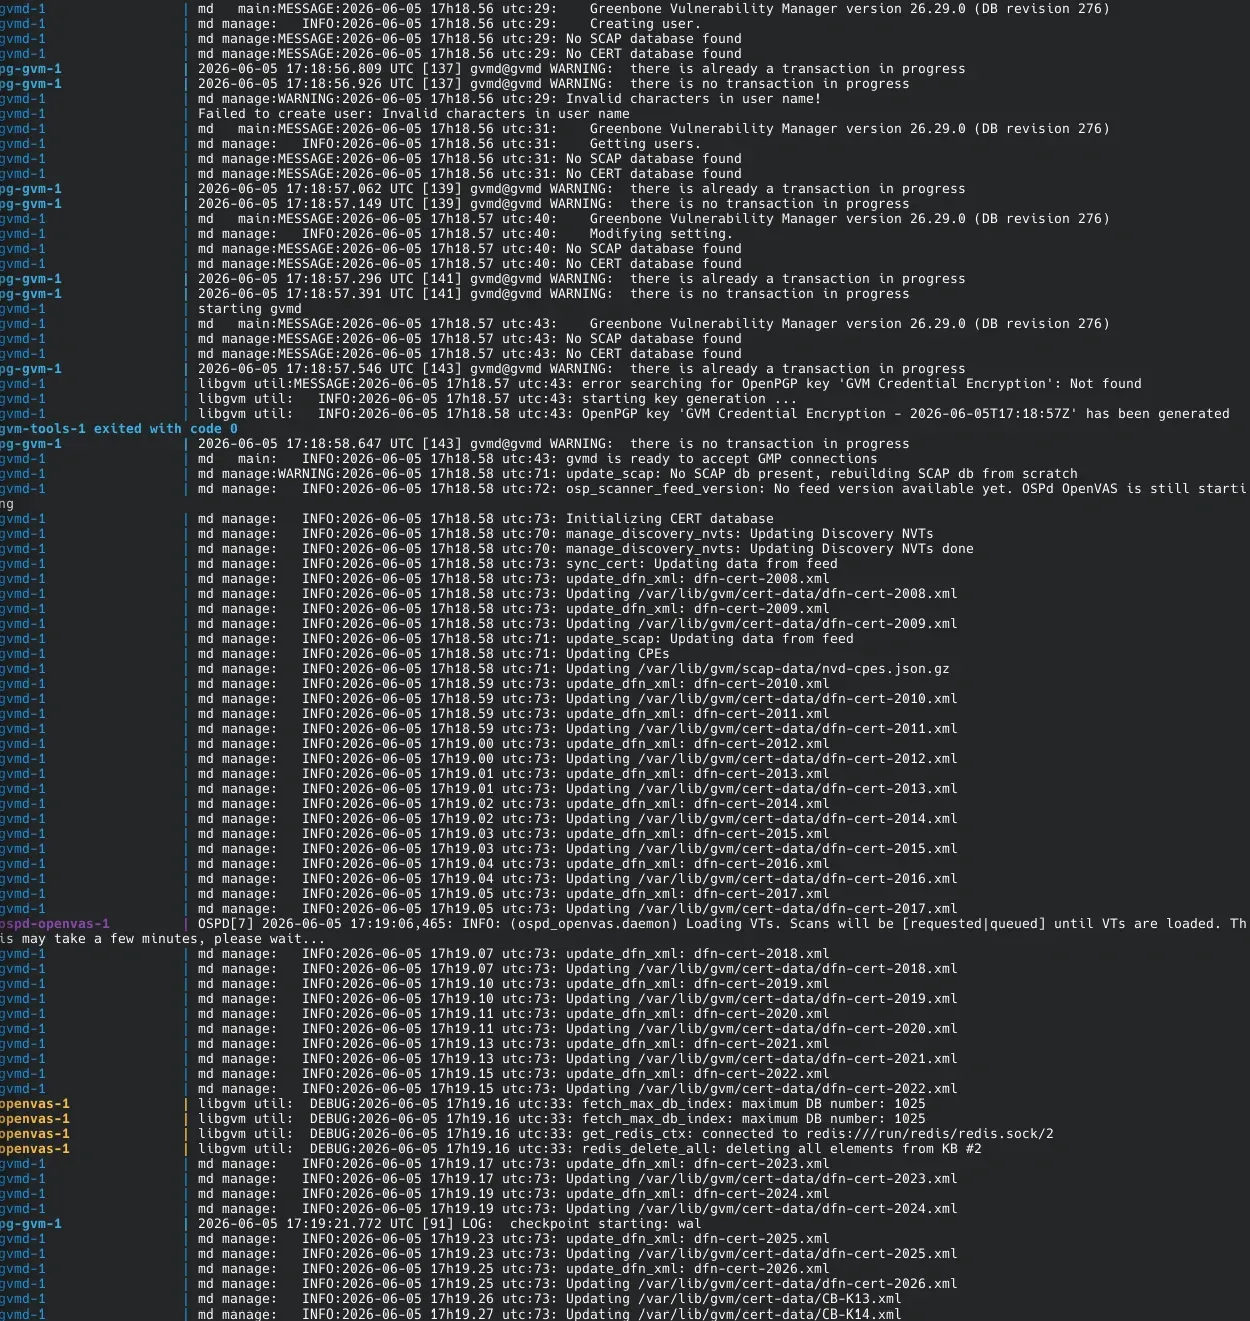
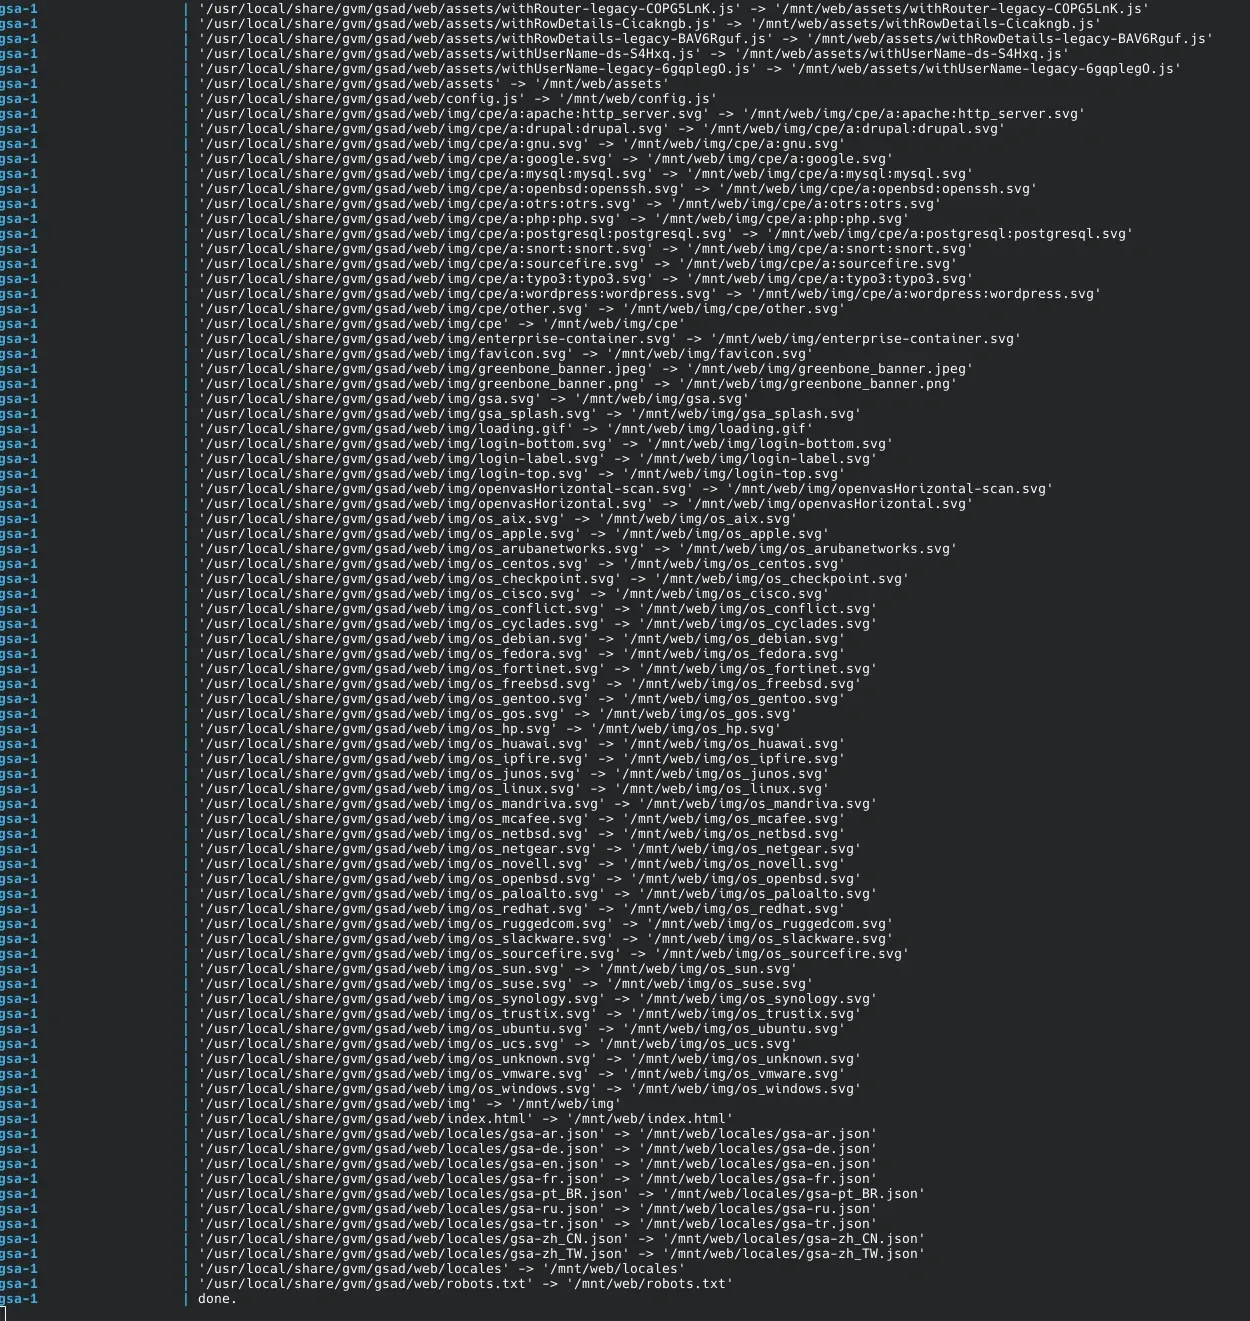
docker compose up -dPATIENCE - It will take AWHILE to download, expand & fully set itself up. Even on a ssd with a Ryzen 3700X, 64gb ram and 1.5gbps internet, it took about an hour to download the images, unpack, and then download all the feeds!
Here's an idea of how intense the startup of this stack is!
⏳ Step 1: Navigating the Initial Feed Sync
When you run OpenVAS for the very first time, the feed-sync container will automatically ping the Greenbone Community Feed servers to download tens of thousands of current vulnerability tests (VTs), SCAP data, and CERT advisories.
- Do not start scanning immediately. This initial download and database ingestion can take anywhere from 15 to 1 hour depending on your storage speed (SSD vs. HDD) and network connection. I say again - patience!
- You can monitor this initial setup progress by tailing the manager logs:
docker logs -f gvmdAlternatively, navigate to Administration ➔ Feed Status inside the Web UI. Do not attempt to configure a scan until all status fields switch to a green Current state.
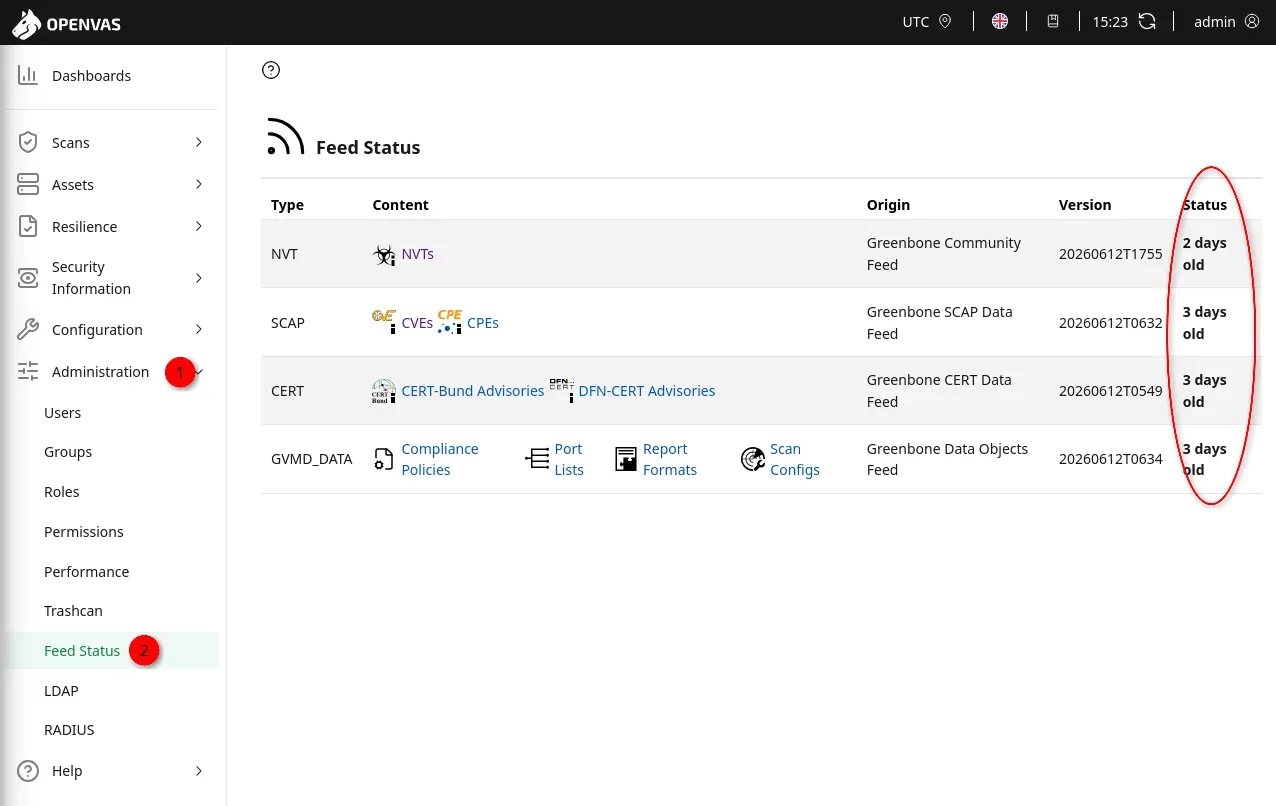
Once the logs show that the database sync is finalized and idle, you are ready to log in.
🔐 Step 2: Target Configuration & The "Alive Test" Gotcha
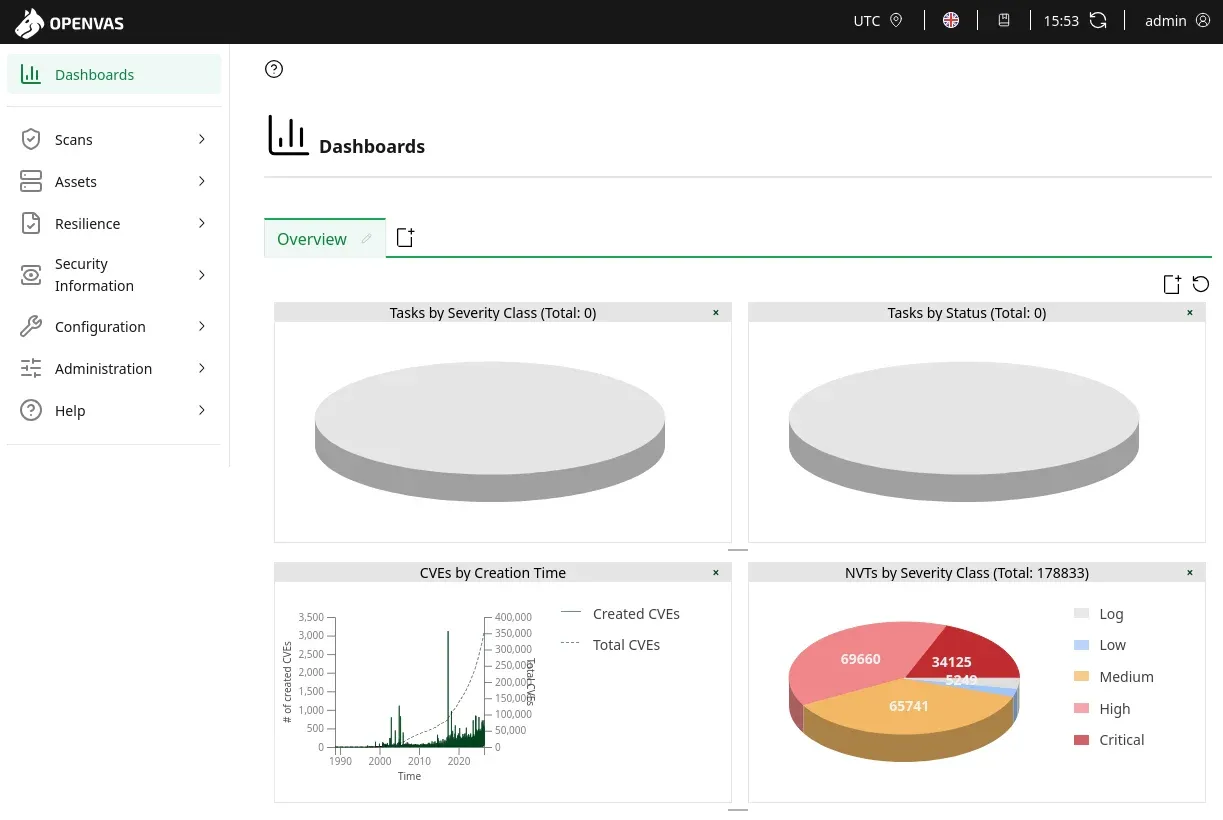
- Open your web browser and navigate to your local server's IP address on port
9392(e.g.,http://192.168.10.50:9392). - Log in using the default credentials defined inside your Compose file environment blocks:
- Username:
admin - Password:
admin(Make sure to change this asap). You cannot change the default admin pw from within the webgui, you have to do it via CLI so what I did was clone the admin, make a new user for me, and use that.
- Username:
Step 3: Configuring Your Scan Target
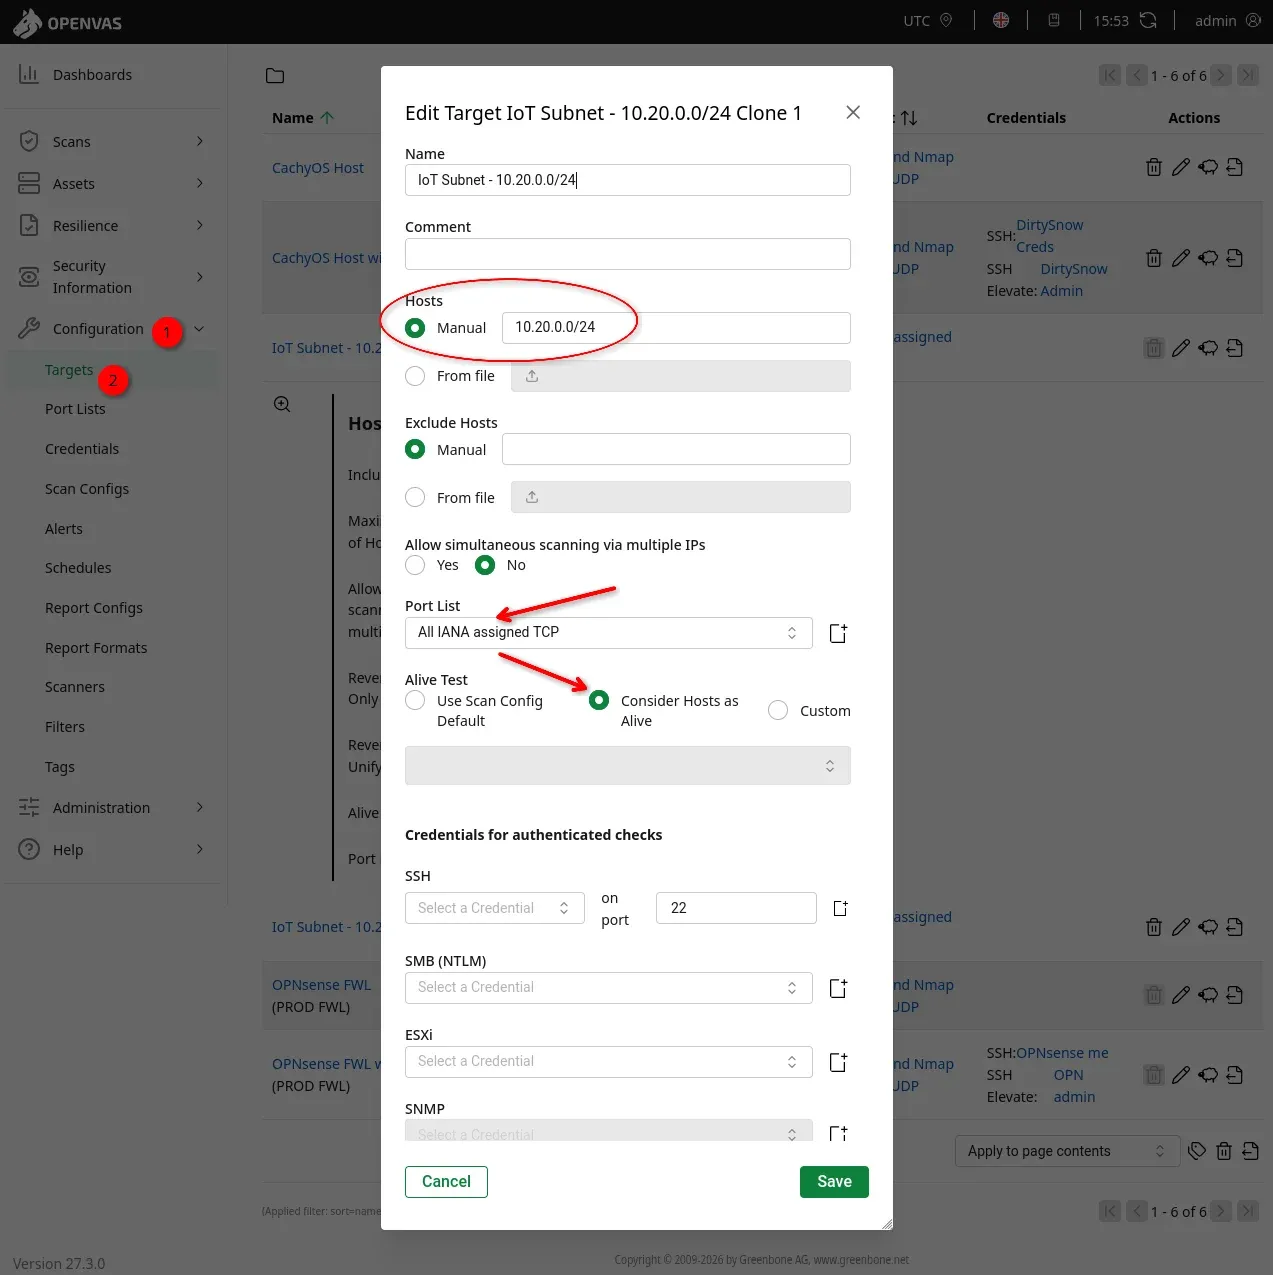
- Navigate to Configuration ➔ Targets and click the New Target icon (blue star).
- Enter your internal subnet ranges (e.g.,
192.168.10.0/24for your management plane, or192.168.50.0/24for your IoT VLAN). - Enter your primary target network space.
⚠️ Additionally, if your network utilizes a local intrusion prevention engine like CrowdSec, ensure you explicitly whitelist your OpenVAS scanner IP address inside your parser configurations (
s02-enrich), or the scanner will be blocked minutes into its sweep.- Hit Save.
Here's what that looks like:
Step 4: Configure Your First Actual Scan!🎯
Navigate to Scans ➔ Tasks, create a new task pointing to your configured target, and select your scan type:
- System Discovery: Best for fragile IoT subnets, smart appliances, and IP cameras. It maps active ports, OS fingerprints, and grabs service banners without launching disruptive exploit scripts.
- Full and Fast: Best for authenticated audits against core servers, Linux VMs, and NAS environments to map unpatched CVEs.
Hit the green Play button to begin the scan. When complete, OpenVAS will output a detailed, prioritized risk matrix identifying exposed containers, weak TLS configurations, and vulnerable system kernels.
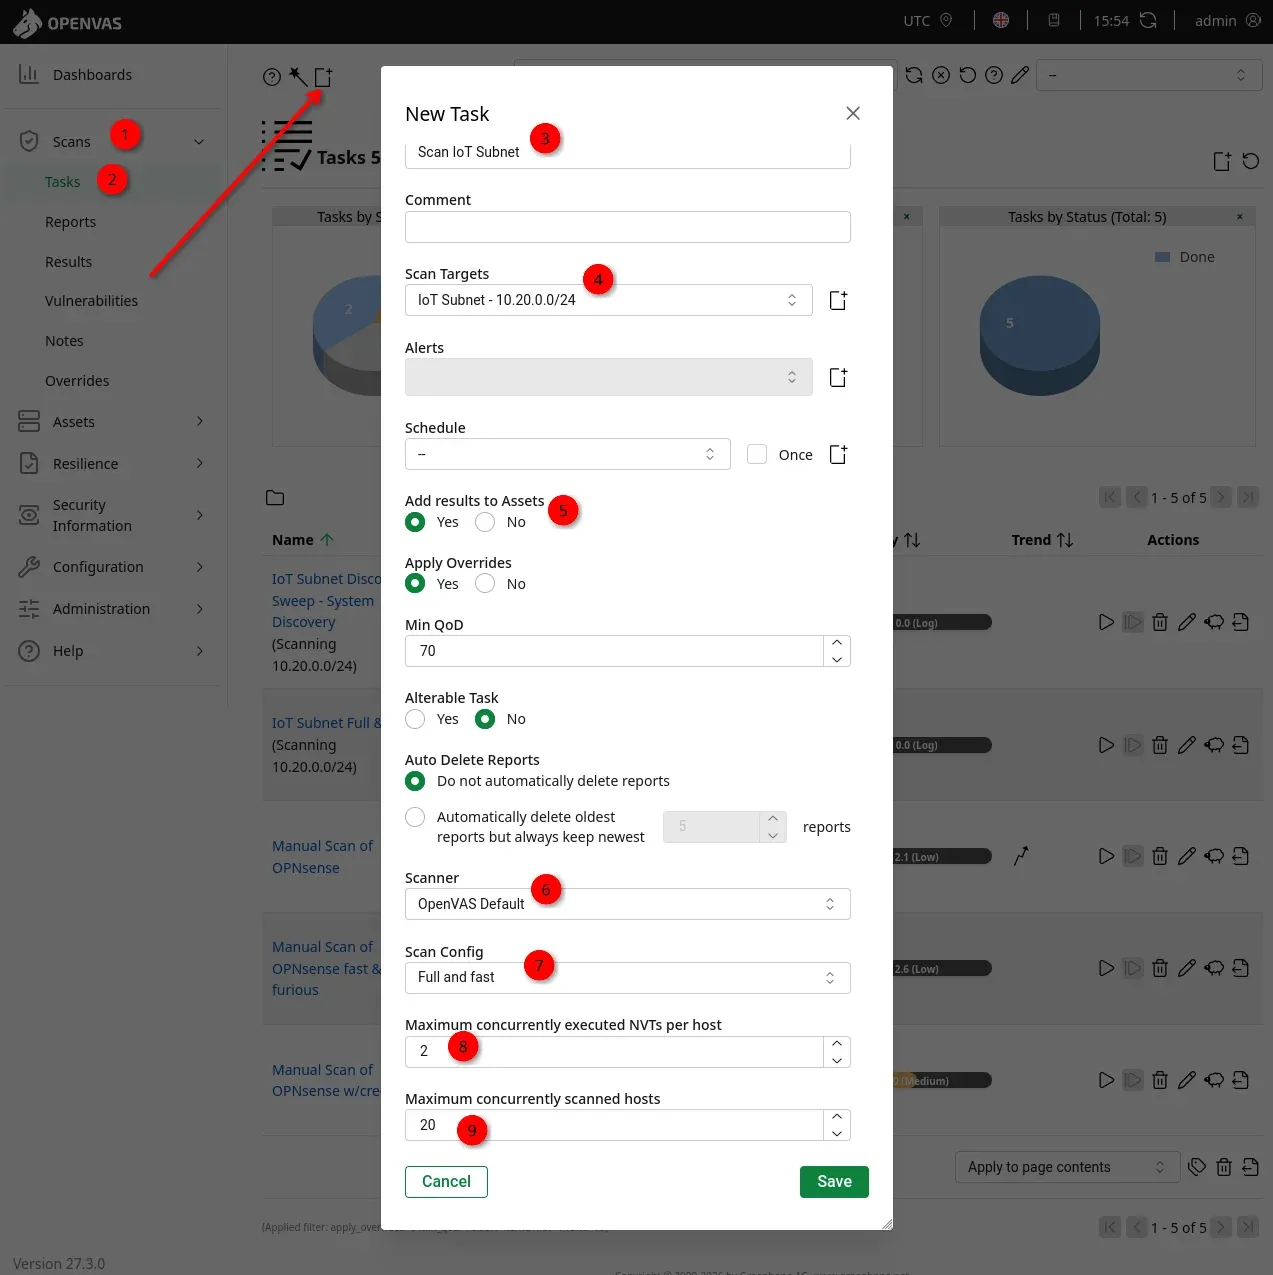
Now you click Save and you can then press the "Play" button and begin your first scan!
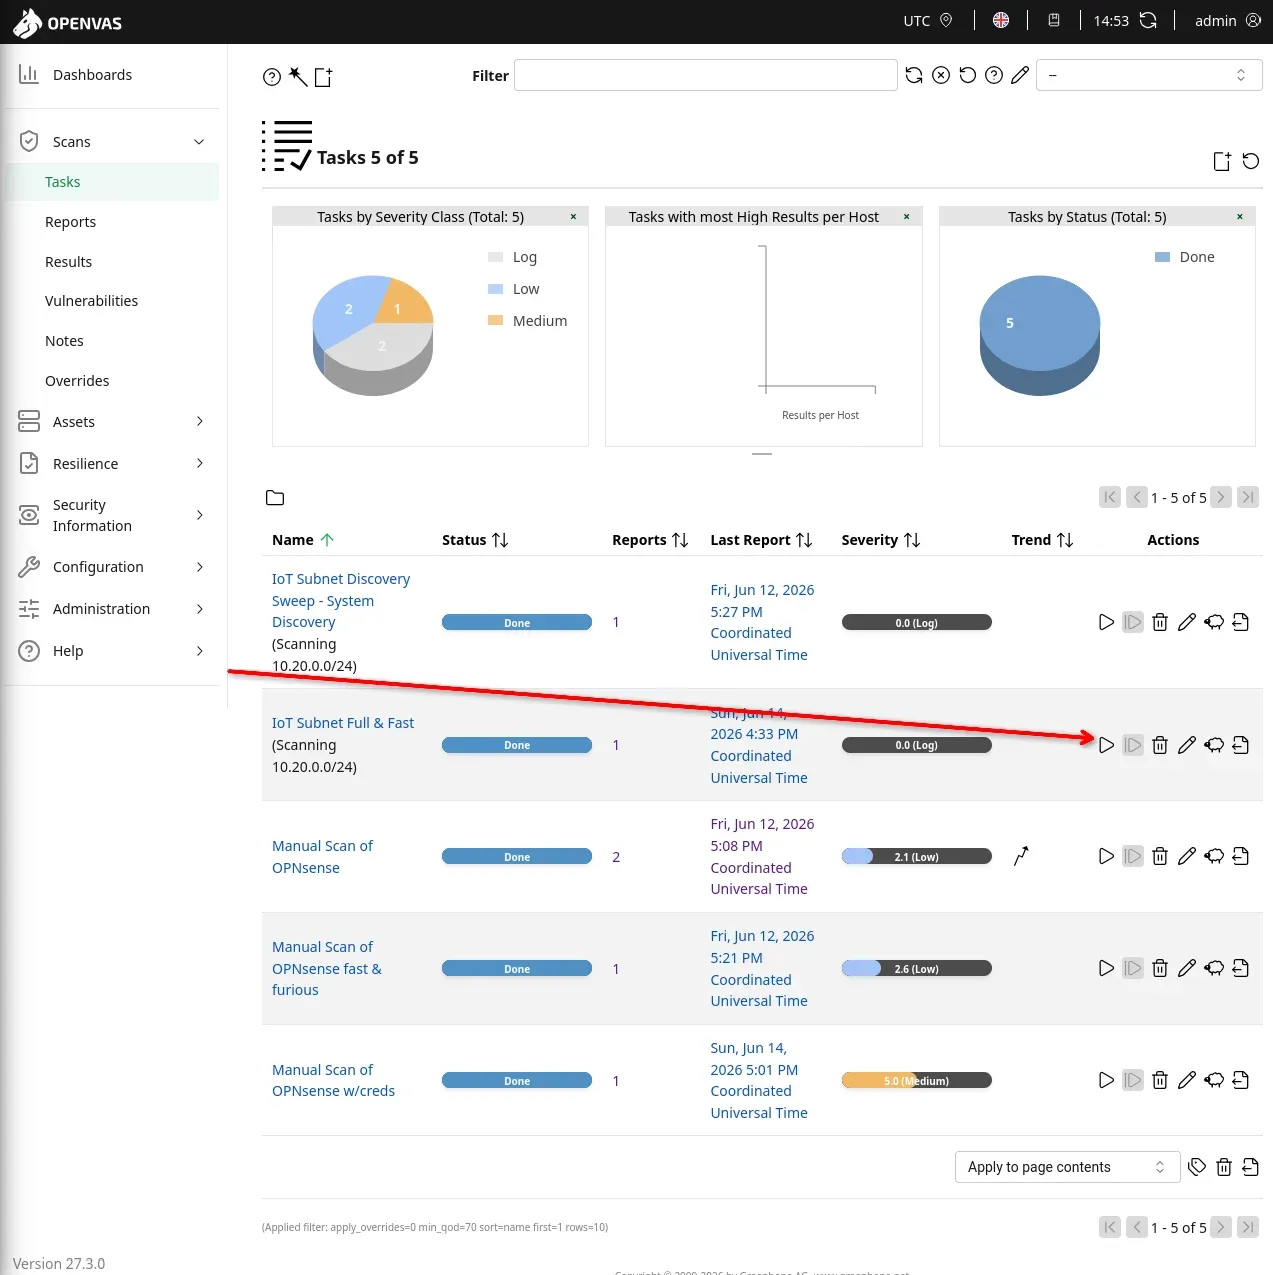
OpenVAS will systematically sweep every asset on that subnet, probe every open TCP/UDP port, run fingerprinting analysis against active service banners, and map them directly against known vulnerability databases. When it finishes, it drops a clean, color-coded report showing you exactly which containers or legacy server kernels are missing critical security updates.
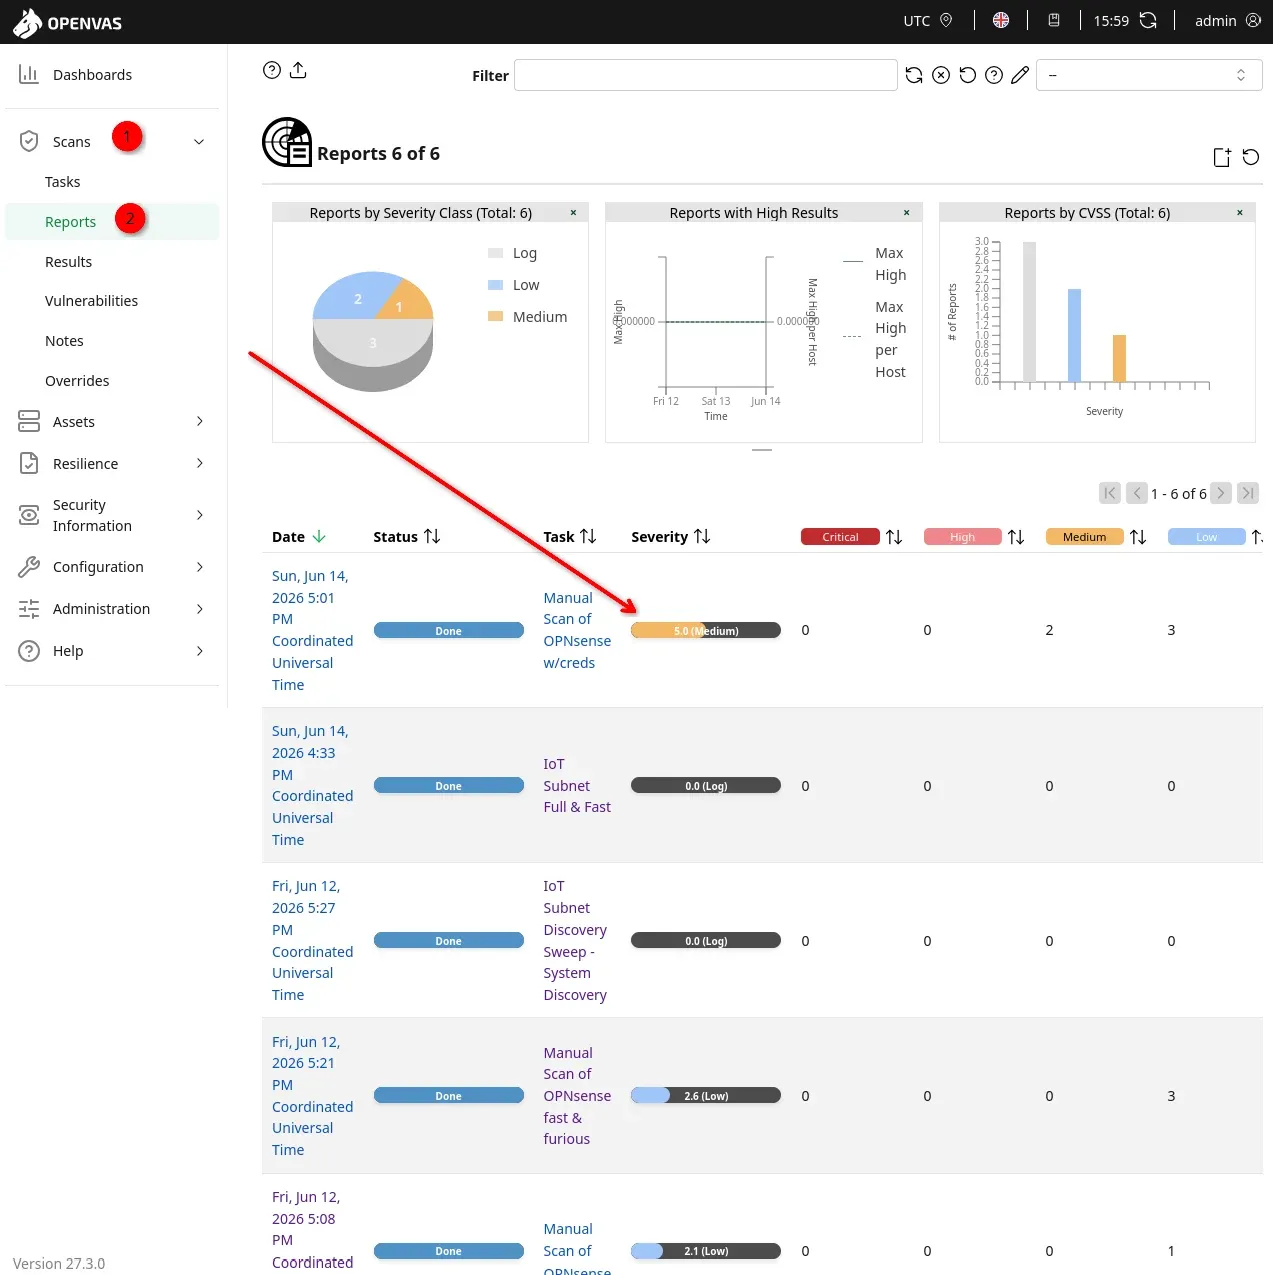
I also scanned my own OPNsense instance! As expected both the credentialed and uncredentialed scan did not come up with anything concerning, as the medium rating was from a default / expired SSL cert not used, and a DNS snooping cache vulnerability that's only possible inside my own network.
Auditing Beyond the Network: Containers & Host OS
Trivy: Local Docker Image Vulnerability Auditing
Network scans catch open ports, but they don't look directly inside your application filesystems. Since modern homelabs run heavily on Docker, you should audit the raw base images powering your stack.
Using Trivy (by Aqua Security), you can scan an entire container filesystem for unpatched security issues before deploying it into production:
- The Tool: Trivy by Aqua Security (FOSS).
- The Command: Running
docker run aquasec/trivy image lscr.io/linuxserver/swag:latestreads the container filesystem and lists every single unpatched software vulnerability inside that image! This is a quick, easy and dirty one to determine if you're comfortable using a specific image or not.
📋 Phase 3: The Core Lab Security Audit Checklist & Scorecard
Bring your audit to a close by verifying your baseline configurations across these three distinct defensive layers:
Layer 1: The Bare-Metal & OS Host
- [ ] The SSH Hardening Check: Is password authentication completely disabled in
/etc/ssh/sshd_config? (Are you using SSH Keys exclusively?) - [ ] Root Mitigation: Is direct root login disabled? Does your media user require a custom
sudopassword string? - [ ] The Auto-Update Check: Is
unattended-upgrades(Debian) or automated package syncing active to patch kernel exploits daily?
Layer 2: The Docker Isolation Layer
- [ ] The Socket Leak Check: Are any public-facing containers mounting
/var/run/docker.sockwith read/write access?
:ro not full permission to /var/run/docker.sock!- [ ] The Privilege Check: Are containers explicitly running with fixed
PUID/PGIDvalues instead of executing inside the container namespace as root? - [ ] The Network Segmentation Check: Are database backends completely isolated on internal custom bridge networks, or are they lazily exposed to your flat local network?
Layer 3: Identity & Access Management
- [ ] The "Blast Radius" Authentication Check: Does every web UI exposed to the internet sit behind a centralized single-sign-on (SSO) gateway like Authelia with mandatory hardware-key/TOTP MFA?
- [ ] The Orphaned API Check: Are old API tokens for Radarr, Sonarr, or Cloudflare still active on services you stopped using months ago?
Use the security scorecard to determine how good of a job you're doing to lock things down!
Frequently Asked Questions (FAQ)
1. Why does my OpenVAS subnet scan finish in 1 second with zero hosts found?
This is almost always caused by a Layer 2 vs. Layer 3 routing mismatch. By default, OpenVAS uses an ARP ping to discover active hosts. Because ARP is a Layer 2 broadcast protocol, these packets cannot cross your router or firewall into an isolated VLAN (like an IoT network). To fix this, edit your Target configuration in the Greenbone UI and change the Alive Test setting to Consider Alive. This forces the engine to bypass the ping check and immediately begin TCP/UDP port discovery.
2. Can I run OpenVAS on a Raspberry Pi or low-powered mini PC?
No, it is highly discouraged. OpenVAS (Greenbone Community Edition) is an enterprise-grade security framework. Compiling, unpacking, and indexing tens of thousands of vulnerability feed signatures into its PostgreSQL database will exhaust system resources on low-tier hardware. The stack requires a minimum of 4 vCPU cores and 8GB of RAM to prevent out-of-memory (OOM) crashes during operation. For lightweight scanning, use standard Nmap sweeps instead.
3. Will running an internal vulnerability scan crash my smart home and IoT devices?
It can. Consumer IoT firmware stacks (found in smart plugs, IP cameras, and connected kitchen appliances) are notoriously fragile. Subjecting them to an aggressive vulnerability scan with heavy web-application fuzzing can overwhelm their lightweight Wi-Fi microcontrollers, causing them to freeze or drop off the network entirely. When auditing IoT subnets, always use the System Discovery or Host Discovery scan configurations rather than a "Full and Fast" vulnerability exploit sweep.
4. Why does CrowdSec keep banning my Docker host when I start an OpenVAS scan?
A vulnerability scanner looks exactly like an automated botnet executing a port-scanning or aggressive crawling attack. CrowdSec’s heuristics will instantly flag the thousands of rapid connection requests generated by OpenVAS and drop a local firewall ban. To fix this, you must explicitly add your OpenVAS/Docker host IP address to a local whitelist parser (located in /etc/crowdsec/parsers/s02-enrich/) using a strict YAML array format, then restart the CrowdSec service.
5. How often should I run a security audit on my homelab?
For a typical homelab environment, running a comprehensive perimeter and internal scan once per quarter is an industry best practice. However, you should run localized image scans using tools like Trivy or network scans via Nmap whenever you deploy a major architecture change, introduce a new third-party container, or modify your core OPNsense firewall rules.
Written by
On this page
What's Next?


Cybersecurity Threat Intel: What the Critical PHP RCEs and Tailscale Disclosures Mean for Homelabbers
The past 72 hours delivered a brutal one-two punch: critical PHP RCEs ('php2shell') followed by a 12-hour-old Tailscale SSH socket vulnerability disclosure. Here is my technical breakdown and how I hardened my homelab.