
How to Integrate Ghost CMS with Home Assistant Natively (2026 Guide)
If you run your own Ghost publication and already have Home Assistant somewhere in your rack, VM cluster, or homelab, there is now a surprisingly good (and fun) reason to connect the two!
Ghost has officially released a native integration for Home Assistant, meaning your publication metrics can now appear directly inside your dashboards, automations, wall panels, mobile notifications, and even physical hardware projects! I don't track Ghost's or Home Assistant's roadmap but I thought this was a wonderfully surprising partnership.
This is not a community hack or a fragile webhook chain. It is now built directly into Home Assistant.
For self-hosters, this is one of those oddly perfect overlaps: your content platform can finally become part of the rest of your infrastructure.
📊 What the Native Ghost + Home Assistant Integration Tracks
Once connected, Home Assistant polls your Ghost API every 5 minutes to pull live metrics directly from your site database, exposing them as standard entities:
- Audience Data: Total members, paid subscribers, and free members.
- Financial Metrics: Monthly Recurring Revenue (MRR) and Annual Recurring Revenue (ARR) (Note: Requires an active Stripe connection).
- Content Volume: Total published posts and current draft counts.
- Newsletter Performance: Email open rates, raw click volumes, total sends, and click-through rates.
- Federated Traffic: SocialWeb/ActivityPub followers and following metrics (if running Ghost 6.x or newer).
Because Home Assistant exposes these as native sensor states, they behave exactly like a smart thermometer, a motion sensor, or a power meter. You can map them into automated routines, map them to physical LEDs, or aggregate them alongside your existing infrastructure stats.
That means you can:
- Add your subscriber count to a Home Assistant dashboard
- Trigger a phone notification when you gain a new paid member
- Flash an RGB strip in your office when a newsletter goes live
- Put your MRR on a tiny ESPHome display in your office
- Track publication growth beside your server uptime, Plex/Jellyfin stats, and UPS battery level
For anyone already running a homelab-centric Ghost blog, this crosses the line from “neat gimmick” into “actually useful.” I mean, it's fun and helps 'gamify' running your own website!
If you've not setup your own Home Assistant yet, NOW is the time! Check out my guide, you'll be up and running in no time!
 Core Lab Joe
🛠️ Step-by-Step Setup: Adding Ghost to Home Assistant
The configuration process is refreshingly straightforward and completely free for self-hosters.
Step 1: Verify System Prerequisites
The integration requires Ghost 6.0 or later. If you use Ghost(Pro), this is already live. If you are self-hosting your instance via Docker or a bare-metal stack, pull down your latest images and run your container database updates before proceeding.
Step 2: Create a Ghost Admin API Integration
Inside Ghost Admin:
- Go to Settings → Integrations
- Under Custom Integrations, click Add custom integration
- Name it something like
Home Assistant - Copy the:
- API URL
- Admin API Key
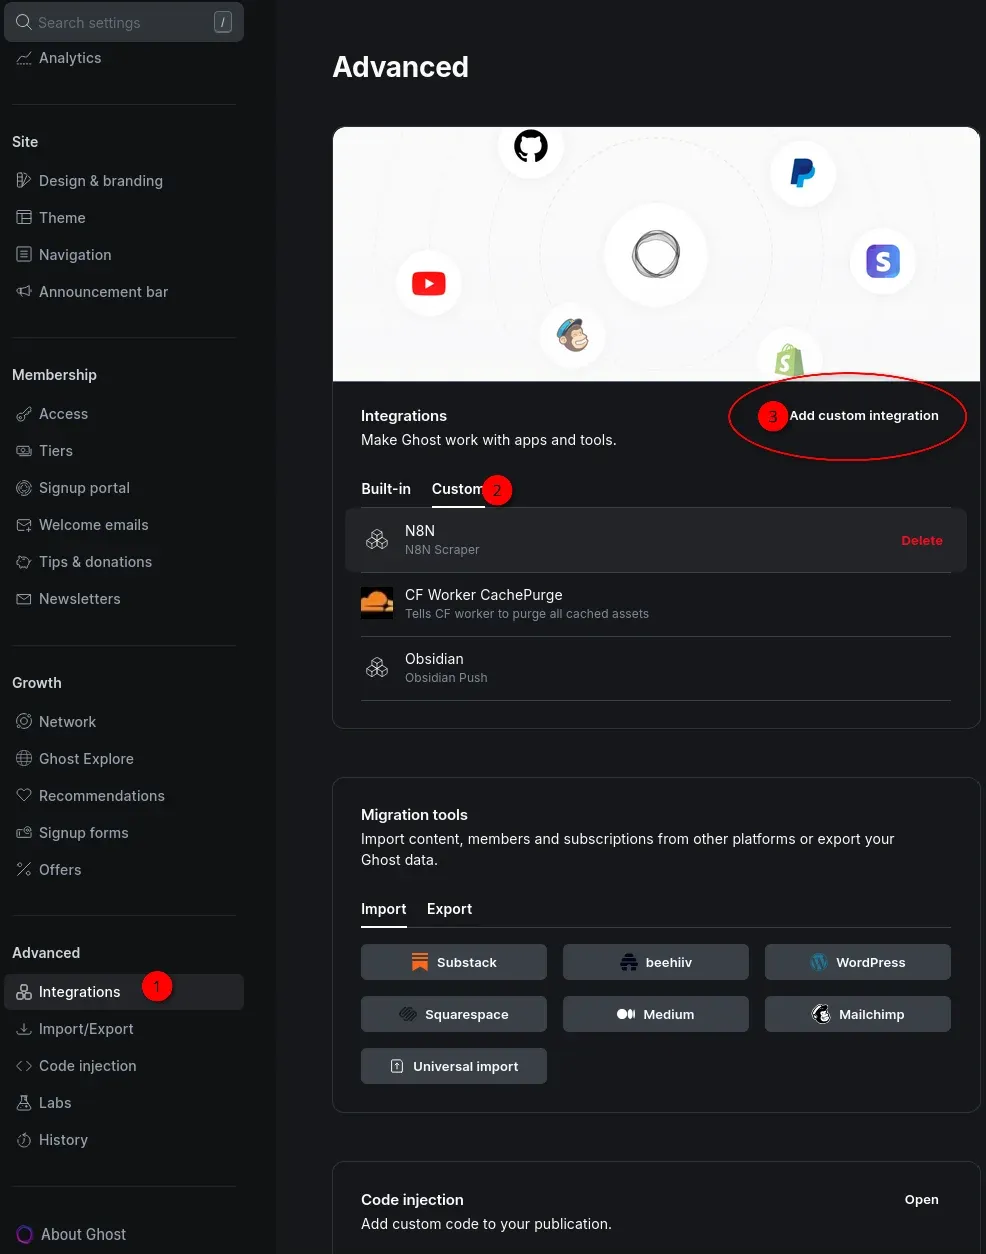
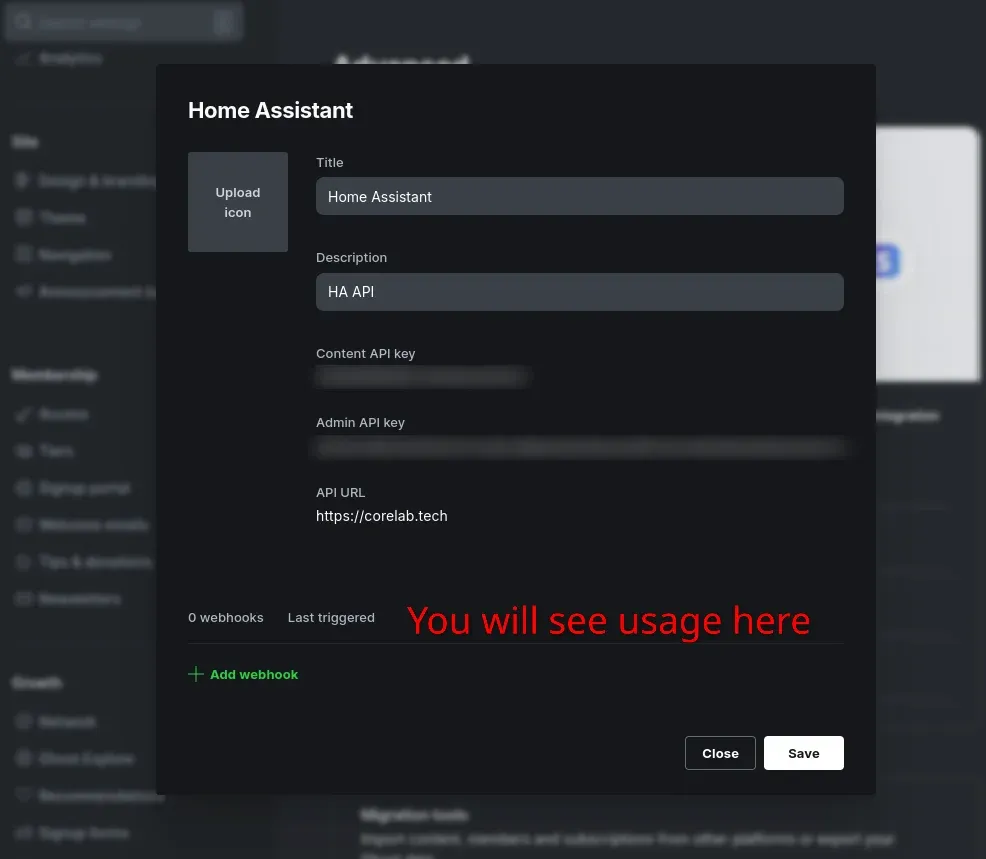
Screenshot 1 - Add custom integration, screenshot 2 - Copy that Admin API key!
Step 3: Initialize the Integration in Home Assistant
As of the Home Assistant 2026.3 release core update, this component is entirely native. No HACS installations or custom repositories are required.
- Navigate to your Home Assistant interface and go to Settings → Devices & Services.
- Click Add Integration in the bottom right corner.
- Search for Ghost and select it.
- Paste your credentials into the prompt fields:
- URL: Input your full domain (e.g.,
https://corelab.tech/) - Admin API Key: Paste the long custom string generated in Step
- URL: Input your full domain (e.g.,
- Hit submit.
Within a few seconds, your system will auto-populate with your new publication entities, mapping names like sensor.ghost_total_members, sensor.ghost_paid_members, and sensor.ghost_mrr.
Step 4: Deploying Entities to a Dashboard
To verify the data pipeline, go to Settings → Devices & Services → Ghost and click Add to Dashboard. You can assign the standard card entities to any layout panel you prefer and customize their visual arrangement later.
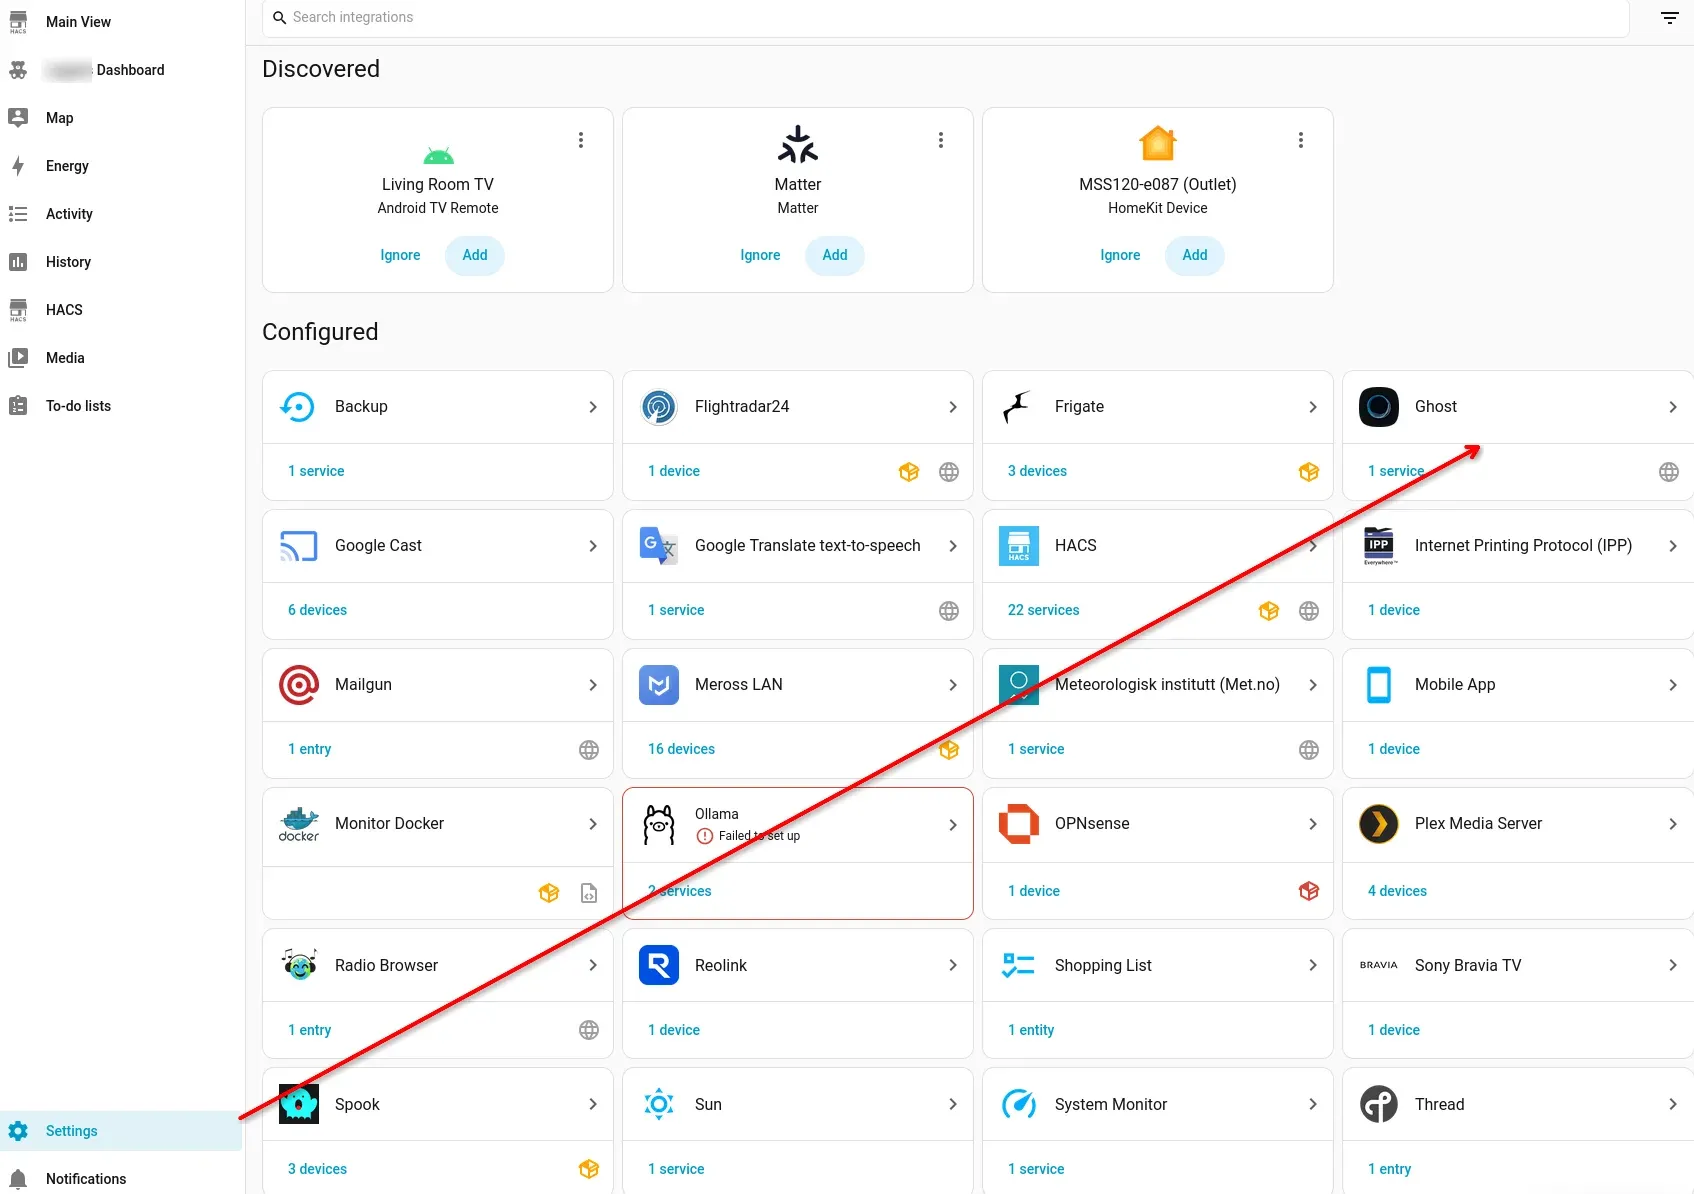
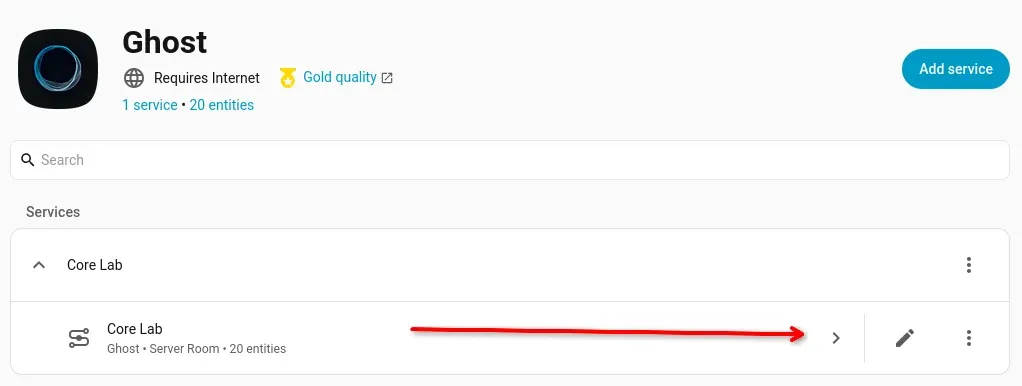
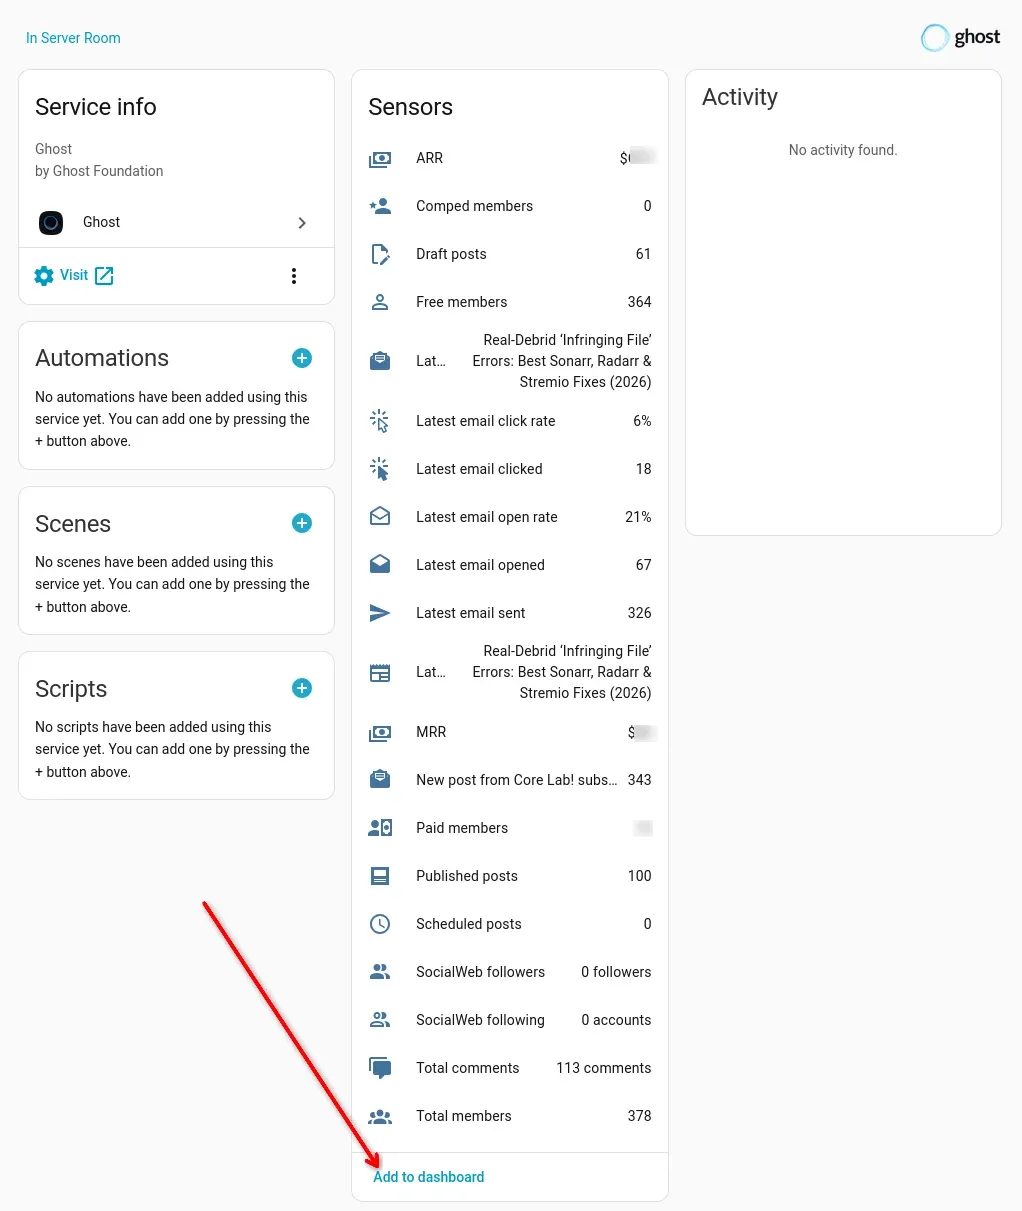
Once you click add to dashboard, pick whichever one you'd like it to show up on, can change it later very easily!
🏢 Dashboard Strategy: The Creator Command Center
This is where the platform crossover becomes highly valuable (In my opinion). You can arrange your cards to view your technical server health AND your business health simultaneously!
By utilizing section views, you can build a unified Creator Ops panel. Imagine looking at a single dashboard display monitoring:
- Site Health: WAN Gateway IP status, Domain SSL certificate expiration days, and rolling container uptime percentages.
- Growth Metrics: Net-new weekly subscriber counts, current MRR targets, and newsletter engagement metrics.
- Hardware Overhead: True NAS pool storage capacities, active UPS battery runtimes, proxy connection logs, and host CPU temperatures.
This layout allows you to view your platform audience alongside the immediate hardware metrics sustaining it, while keeping your high-risk core infrastructure management layers cleanly isolated.
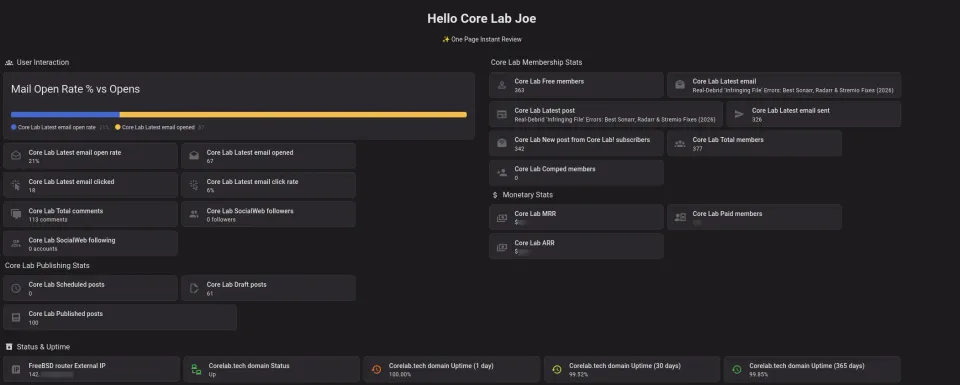
Creator Command Center
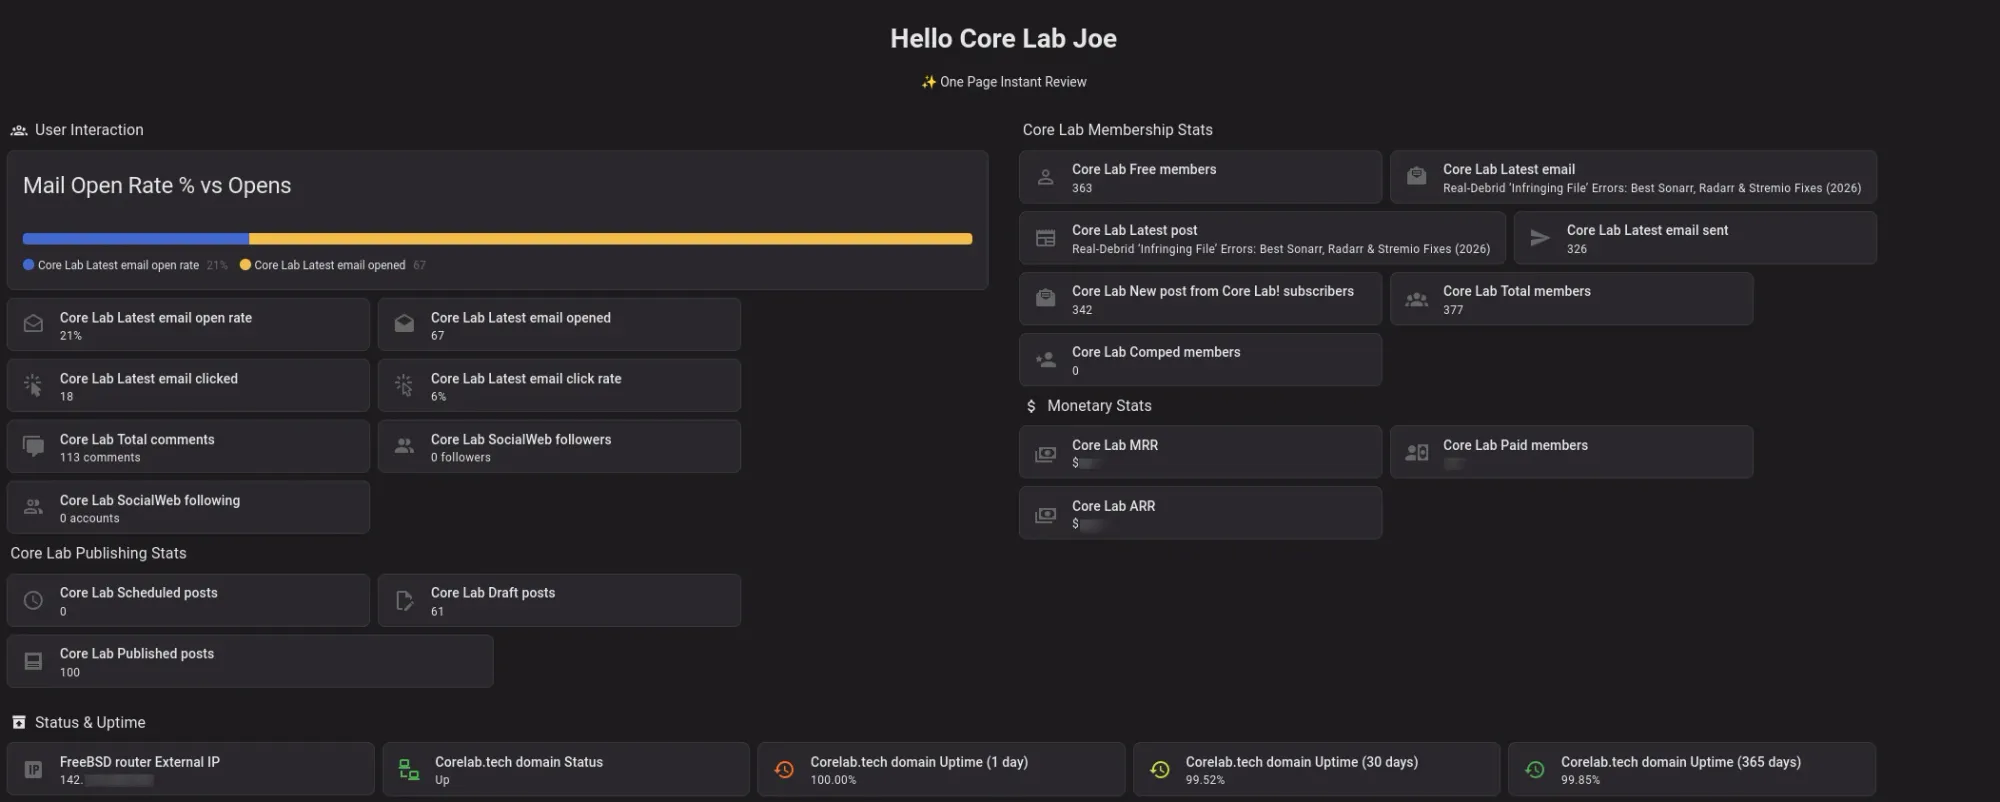
You can see above, where I kind of grouped things I thought were relevant and created some more visual cards. Once you play around with HA cards you quickly get a feel for what visuals you like, and what data is important to you. For me, user interaction with Core Lab is my top priority and I wanted to see that first, along with the newsletter stats.
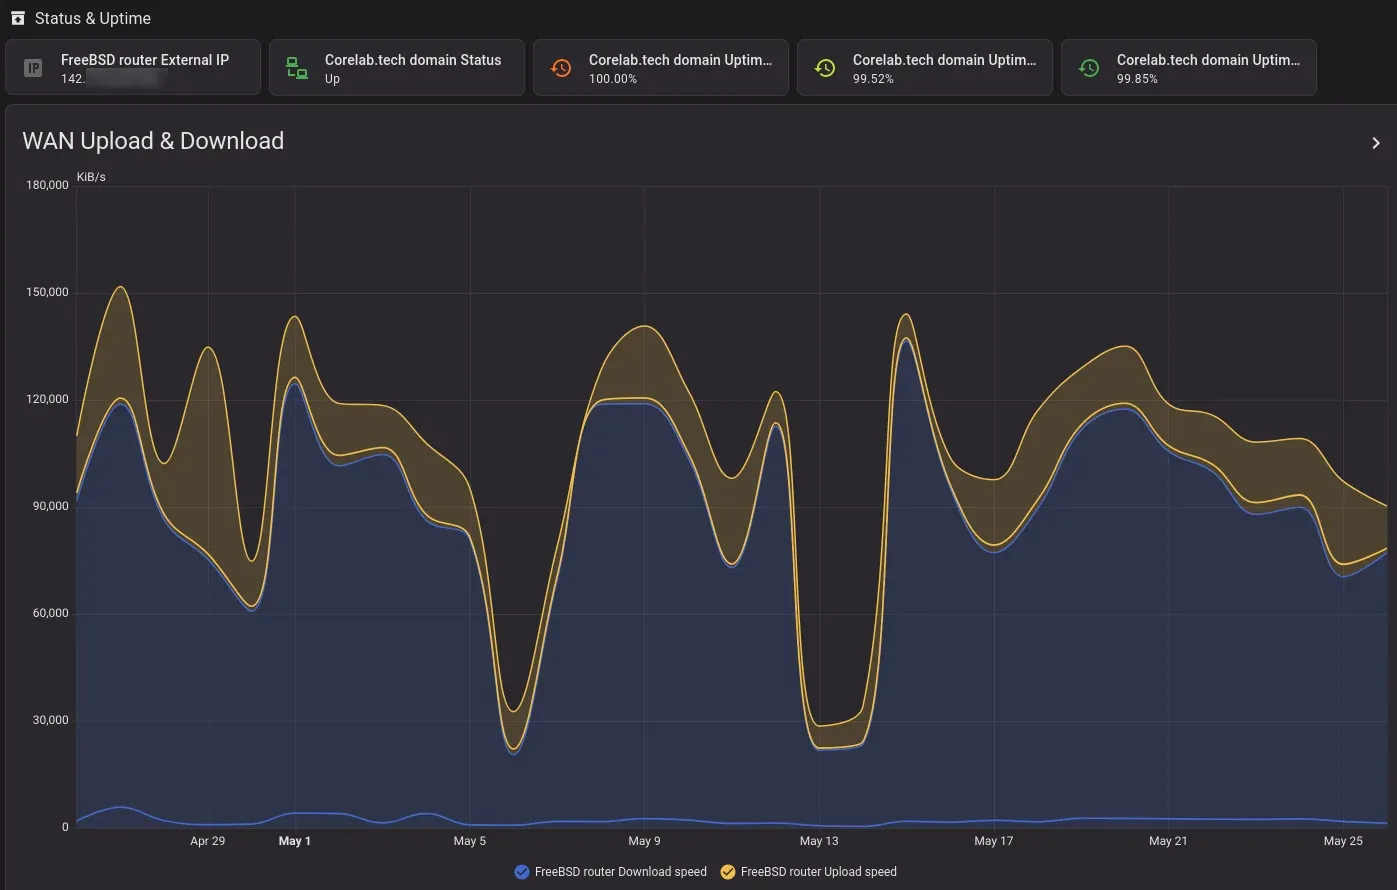
This is pretty neat, as you see I have my WAN IP, if the domain is online, and various lengths of 'uptime'. Not bad eh? My goal is to get that 365 day uptime to 99.9% vs the current 99.85% it's at presently 😉
You could create a similar dashboard showing:
- Paid members
- MRR
- New subscribers this week
- Newsletter open rate
- Latest post count
And pair it with your existing homelab dashboard that already tracks:
- NAS status
- UPS battery
- Docker containers
- CPU temperature
- Internet uptime
That creates a single “creator ops” dashboard where your site and infrastructure live together. I kept my "infrastructure" (homelab) separate from my Core Lab Site info though. I might just... Do that soon.
🕹️ Gamifying Growth: Milestone Automation Tutorials
Tracking data is useful, but building automated actions around milestones is what makes Home Assistant so powerful. Let’s build a fun automation that celebrates hitting a major operational milestone - such as welcoming your 25th Paid Subscriber - by flashing your office light fixtures in an RGB loop. Ridiculous, and fun!
Here's a gallery of pictures and below that will be the description of how to build it.
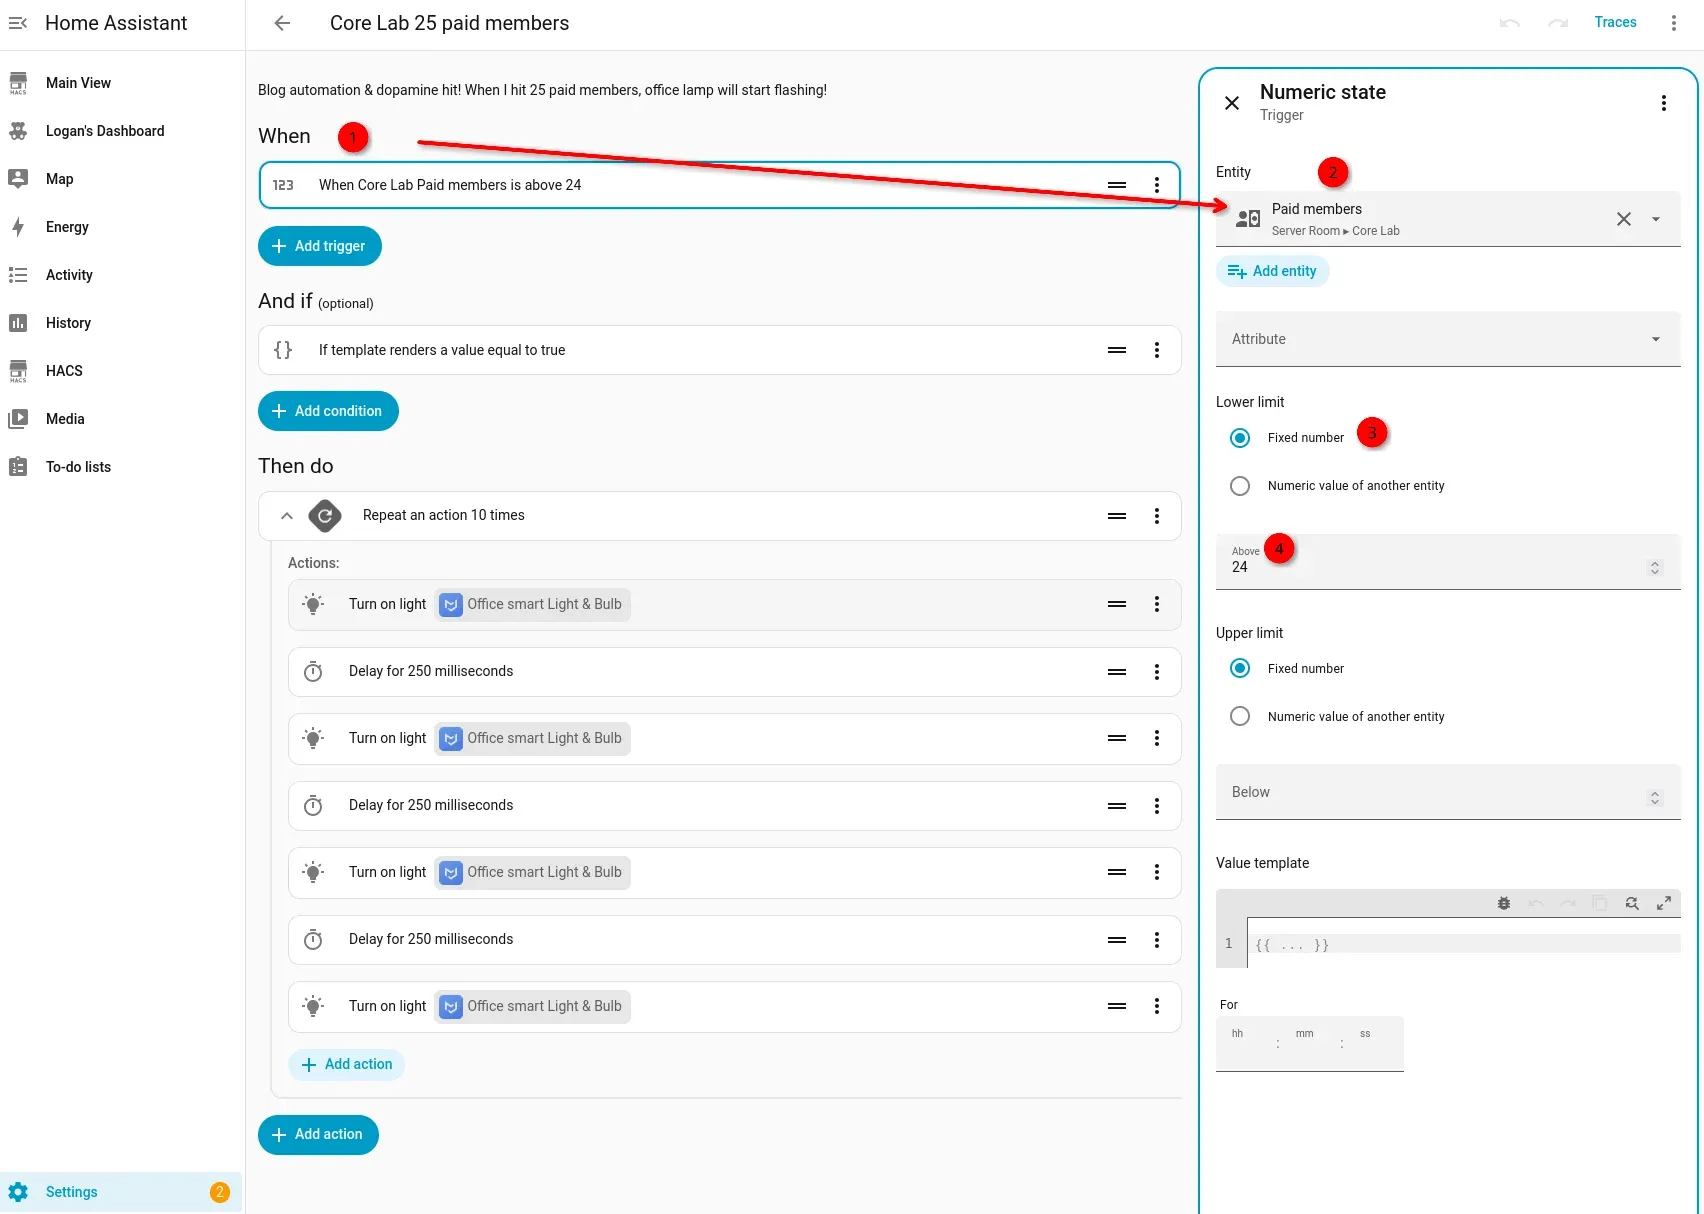
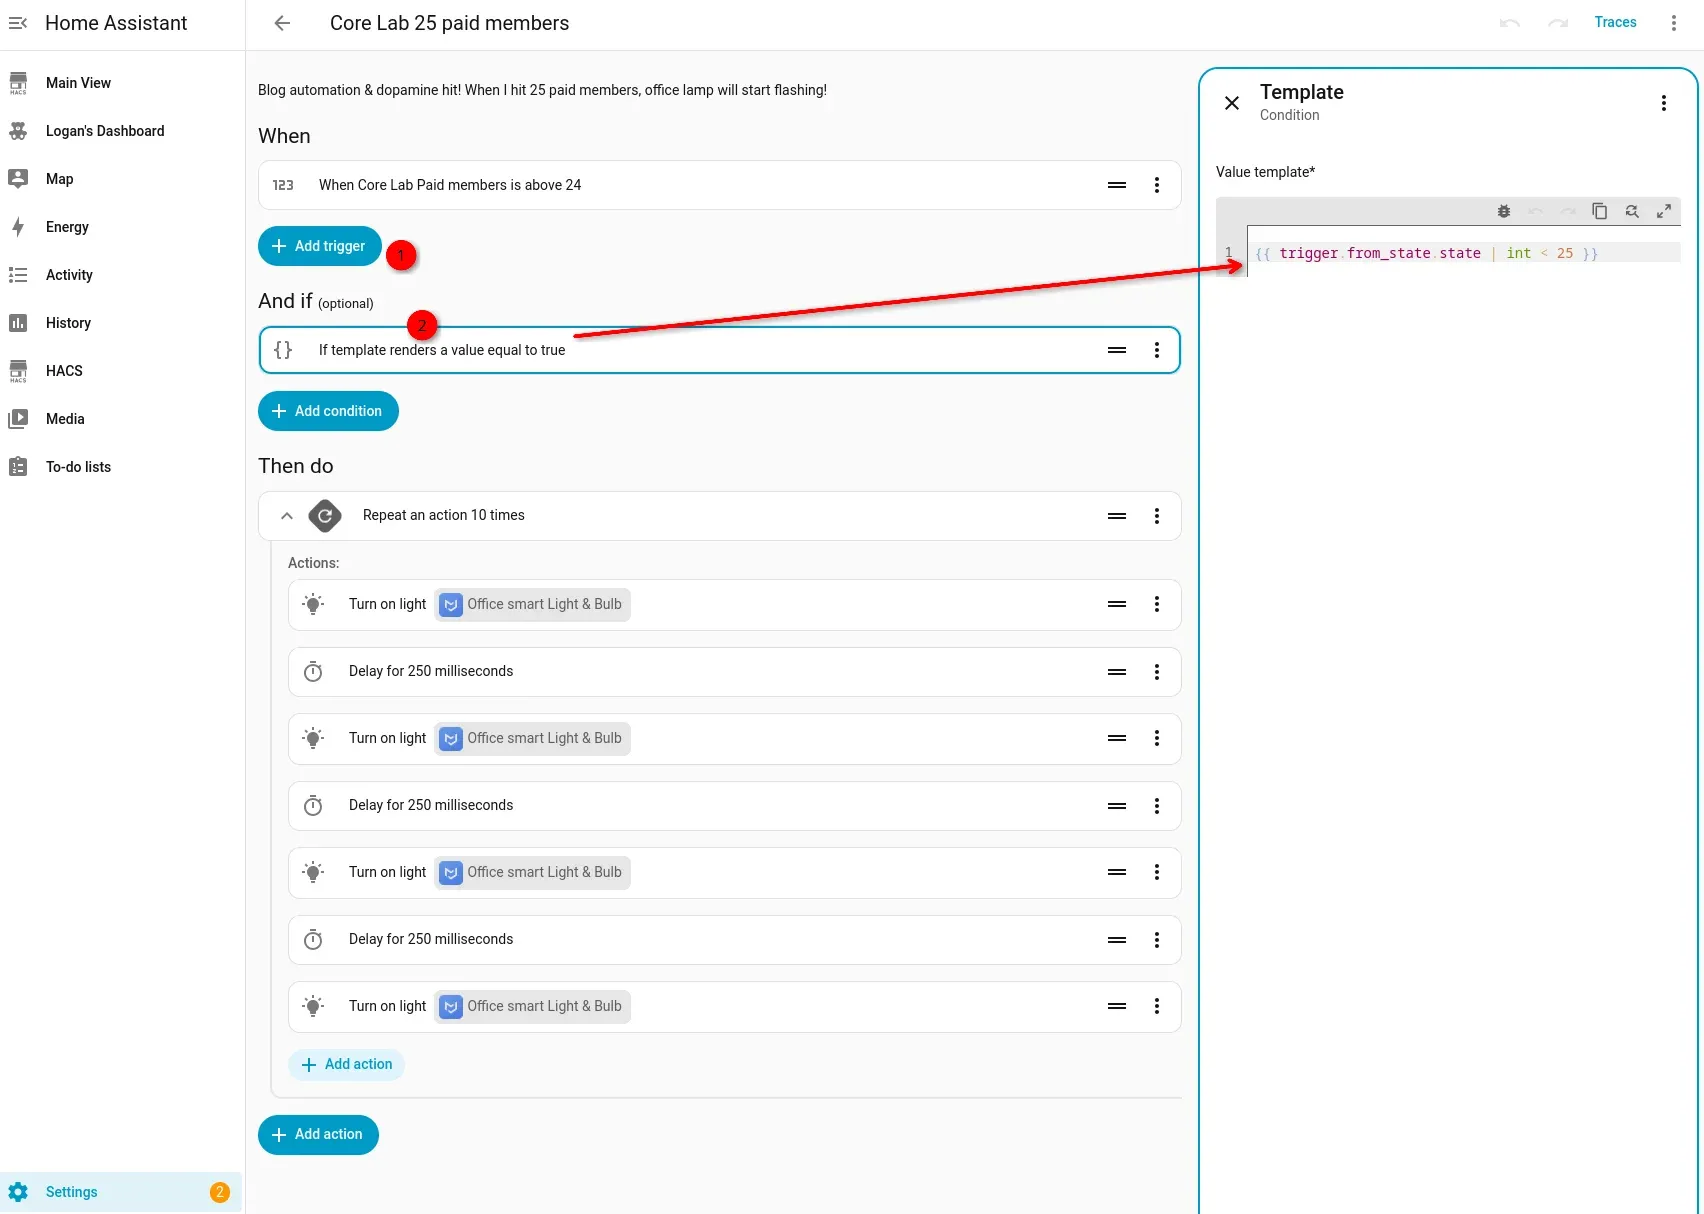
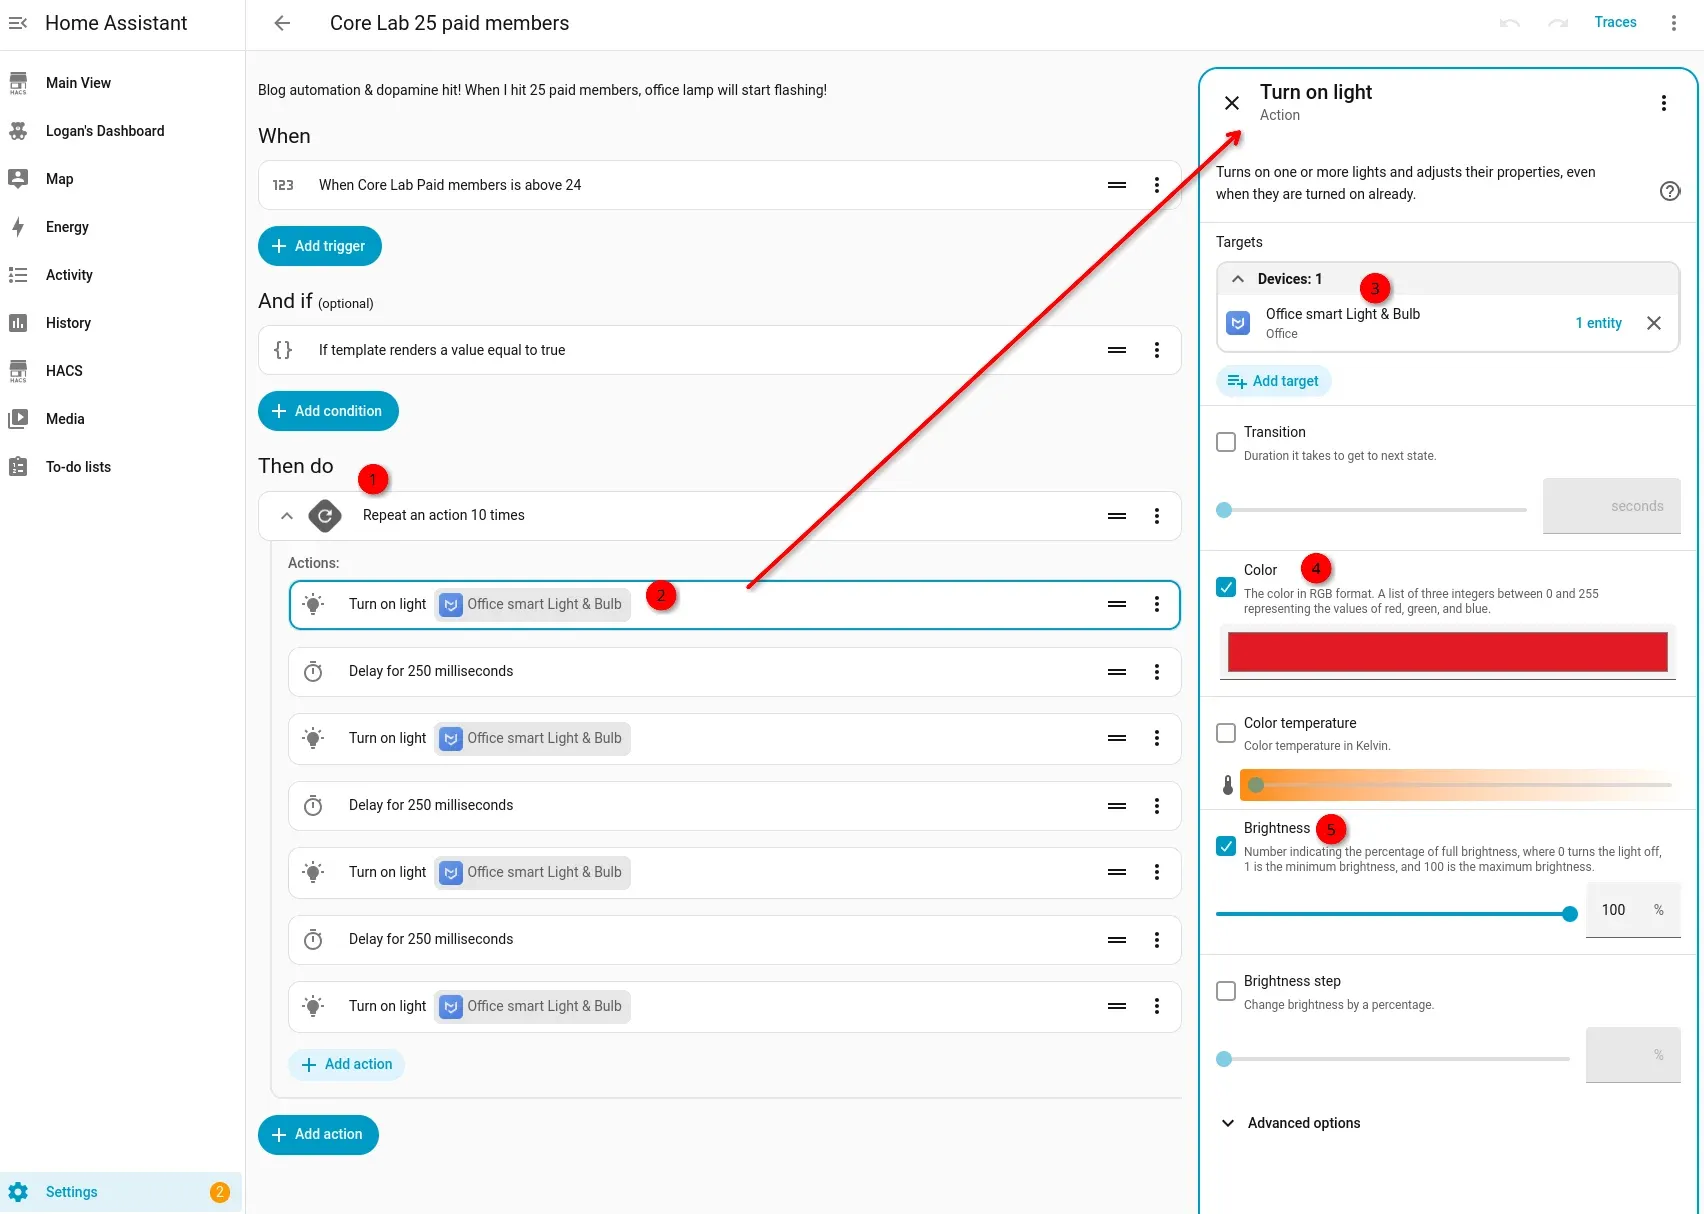
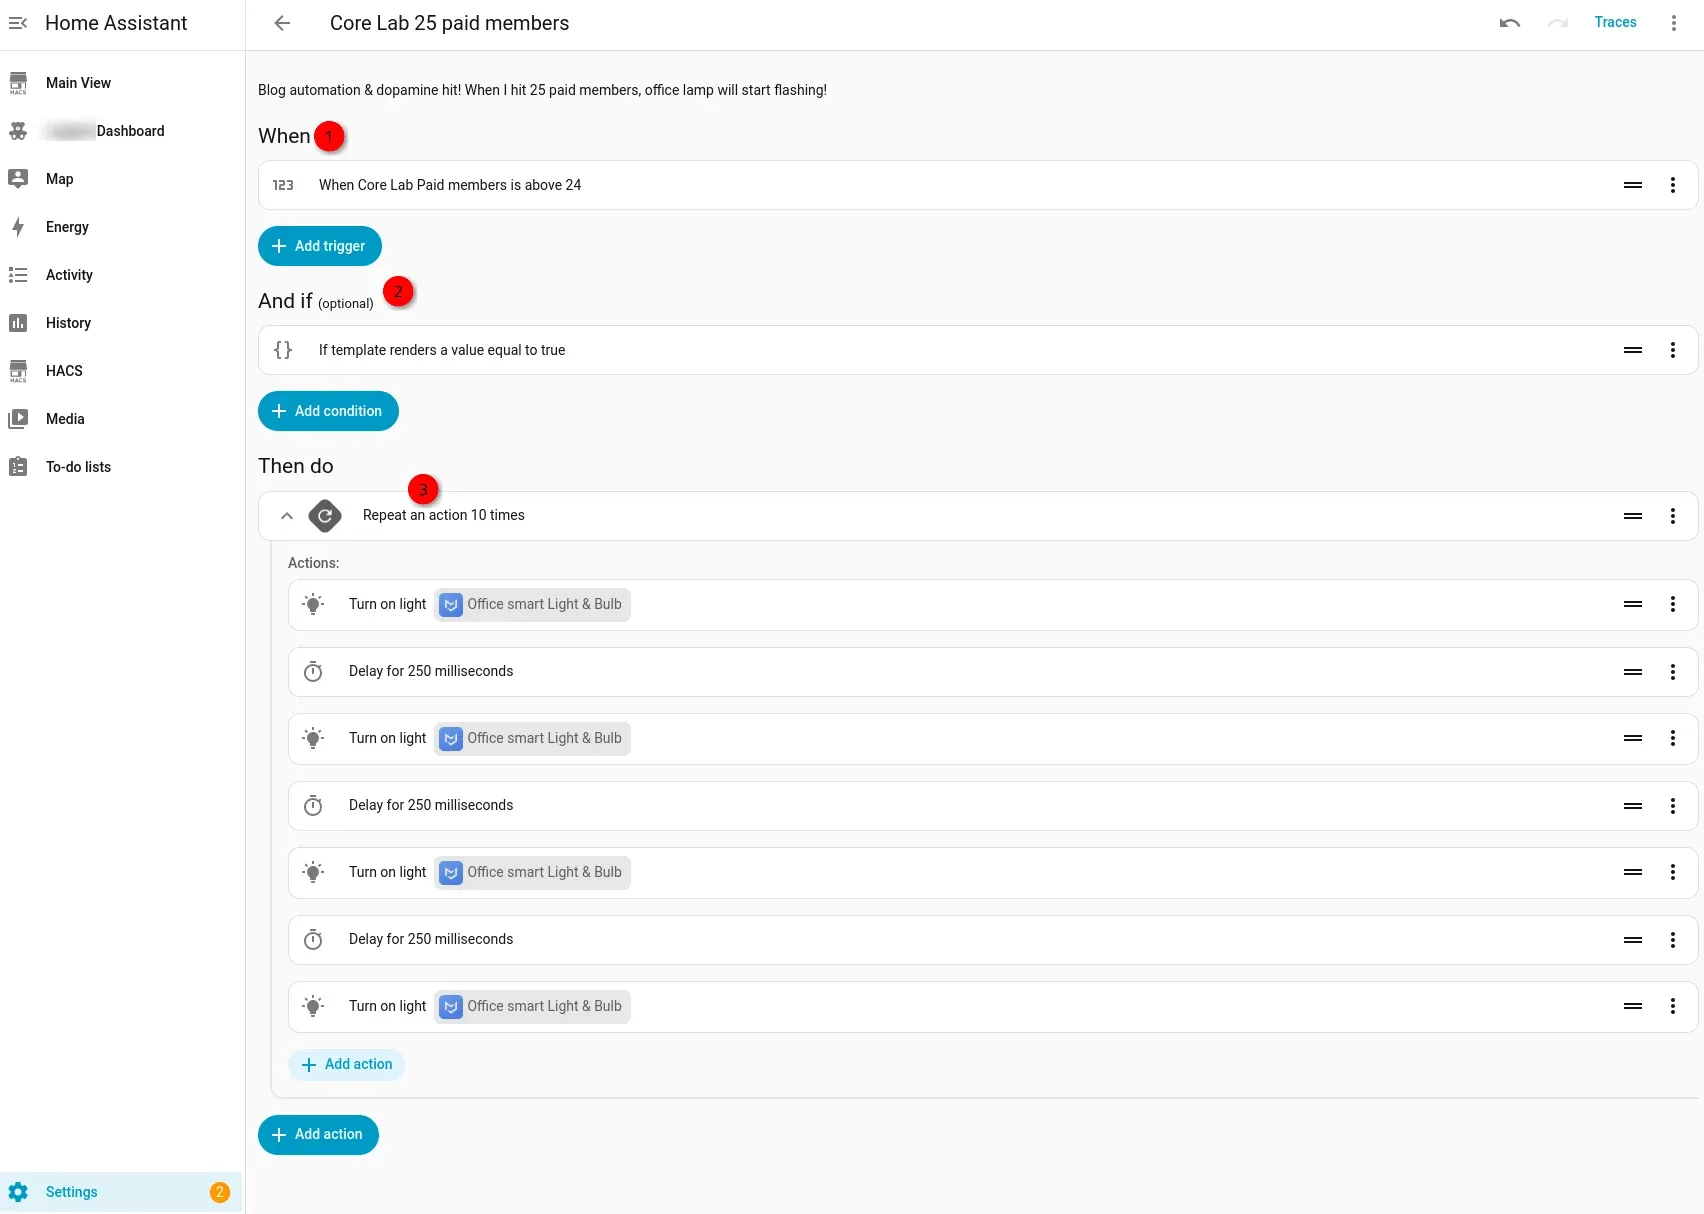
From top left to bottom right, step your way through and don't forget to click the little 3 dots and "duplicate" steps as needed!
Pretty simple to setup but a lot of fun whenever that happens😄 The automation on your lights might be a little different depending on the hardware & plugins you have.
Option A: The Visual Automation UI Setup
- Go to Settings → Automations & Scenes → Create Automation.
- Add Trigger: Choose Numeric State. Set the Entity to
sensor.ghost_paid_membersand set the Above parameter to24. - Add Condition: Choose Template. To ensure this only fires exactly when passing the boundary line, insert the following condition:
{{ trigger.from_state.state | int < 25 }} - Add Action: Choose Repeat. Set the repetition count loop value to
5or10. - Inside the repeat loop action sequence, add a service call to
light.turn_on, targeting your desk lamp or office smart bulb, and set your target color value blocks to alternate between red, green, and blue with a short millisecond delay macro placed between transitions.
💡 Hardware Callout: If you are deploying this loop on consumer-tier Wi-Fi hardware (like Meross smart bulbs), avoid embedding a transition: command inside rapid repeat loops. Doing so can choke the local hardware controller firmware and cause the light to drop offline. Stick to hard state changes with micro-delays instead.Option B: The Raw YAML Blueprint
If you prefer pasting your automations directly into your code editors, use this blueprint structure:
alias: "Creator Ops: 25 Paid Subscriber Celebration"
description: "Flashes office lighting infrastructure when hitting membership milestones"
trigger:
  - platform: numeric_state
    entity_id: sensor.ghost_paid_members
    above: 24
condition:
  - platform: template
    value_template: "{{ trigger.from_state.state | int < 25 }}"
action:
  - repeat:
      count: 5
      sequence:
        - service: light.turn_on
          target:
            entity_id: light.office_lamp
          data:
            rgb_color: [255, 0, 0]
            brightness_pct: 100
        - delay:
            milliseconds: 250
        - service: light.turn_on
          target:
            entity_id: light.office_lamp
          data:
            rgb_color: [0, 255, 0]
            brightness_pct: 100
        - delay:
            milliseconds: 250
  - service: light.turn_on
    target:
      entity_id: light.office_lamp
    data:
      color_temp_kelvin: 3000
      brightness_pct: 70
mode: single
As always - Test using:
Run Automation
📈 Next Steps: Active Tracking & Infrastructure Upgrades
Once you have your membership loops finalized, you can start building metrics trackers for your email campaign deliveries. For instance, you can construct a Newsletter Success Loop that watches your sensor.ghost_latest_newsletter_open_rate and drops an encrypted mobile notification alert directly to your phone when an article delivery crosses a 50% open threshold.
Ghost and Home Assistant are both dominant power-user frameworks in their respective spaces. One handles the distribution of your digital intellectual property; the other governs your physical space and computing environments.
Let me know if this interests you or there's another monitoring / analytics angle you're looking at?
Unifying them natively takes less than five minutes and opens up endless creative optimization avenues.
Final Thoughts \ What Next?
So there's an almost limitless set of automations you can make with HA, depending on the hardware & software you run, and I am sure those more creative than me will come up with some fantastic ones! Please share in the comments so we can all enjoy making cool stuff!
If you aren't running HA yet, absolutely jump to my guide and fire it up so you're not missing out - it's just another docker! 👇
Core Lab Joe
Check out all my Ghost posts so far, if you run a Ghost blog or are thinking about it:

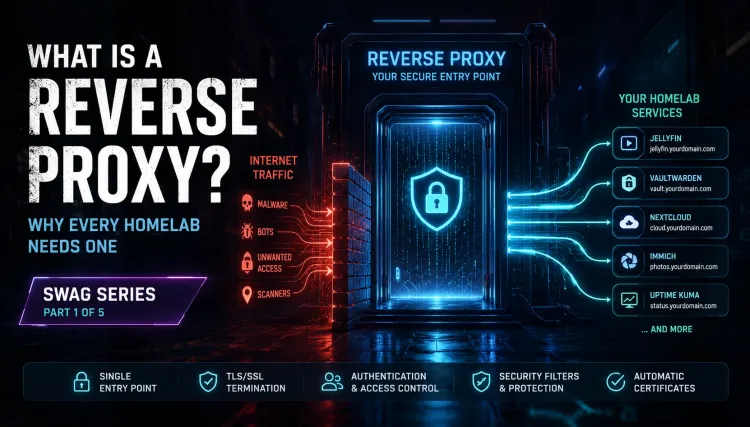
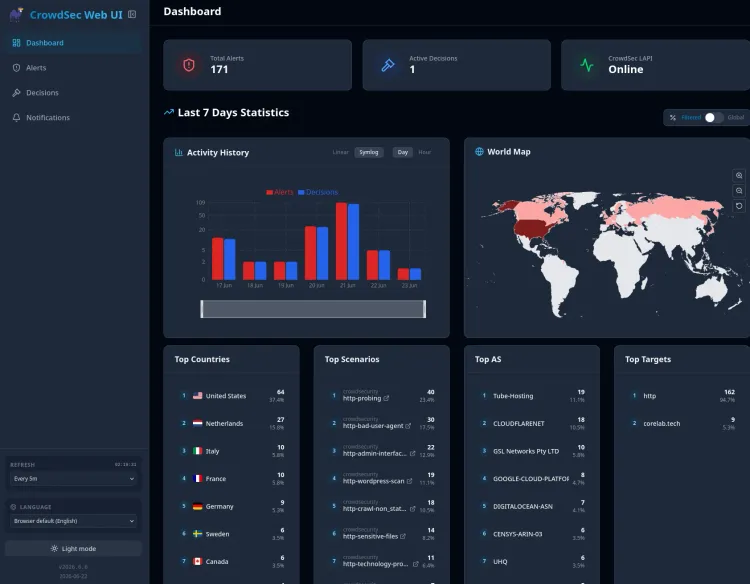
As always, you will need a reverse proxy for these fantastic tools. Go slam this guide out and get yours up or hardened today.
Core Lab Joe Core Lab Joe
Member discussion