
Hello Seerr: A Guide to Migrating from Overseerr & Jellyseerr
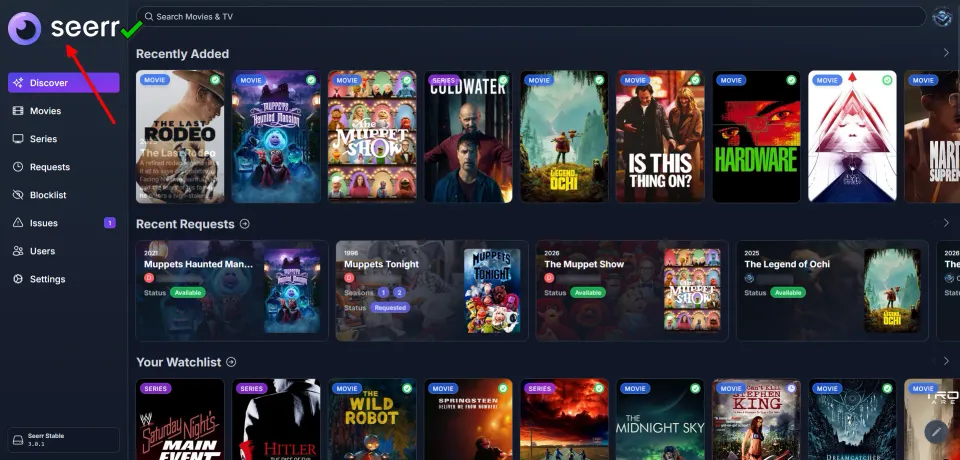
If you run a home media server, you likely rely on Overseerr or its Jellyfin-focused fork, Jellyseerr, to handle request management. They are the gold standard for discovering new content and automating downloads.
But the landscape is changing. Right now.
Enter Seerr: the new, unified successor designed to bring everyone under one roof. Whether you are Team Plex (Overseerr) or Team Jellyfin/Emby (Jellyseerr), Seerr is the new codebase you should be running.
The good news? The team has made the transition remarkably smooth.
The better news? I’ve broken down exactly how to move your setup over without losing your request history or user data.
Why Migrate?
Seerr represents the next step in development for these request managers. By consolidating efforts, the Seerr team provides a more secure, streamlined, and actively maintained image. The old forks are essentially merging into this new standard.
Step 0: The Golden Rule (Backups)
Before you touch a single YAML file or terminal command: Back up your data.
While the migration is designed to be automatic, things can happen. Have you even met or heard of Murphy?!
- Stop your current Overseerr/Jellyseerr container.
- Copy your entire configuration folder (the one mapped to
/app/config) to a safe location.
The Good News: Automatic Data Migration
You generally do not need to manually move database files or edit JSON configs. Seerr includes an automatic migration script that runs the first time you start the container.
- Jellyseerr users: Your database will just work.
- Overseerr users: An additional migration will run automatically to convert your configuration to the new format.
The Technical Changes (Docker)
Most of us run this stack on Docker. Here are the specific changes you need to make to your docker-compose.yml or run command.
To begin, stop your existing instance:
docker compose down overseerr (or jellyseerr)1. Update the Image
Swap your old image reference for the new official one:
- Old:
sct/overseerrorfallenbagel/jellyseerr - New:
ghcr.io/seerr-team/seerr:latest
For context, here is what a legacy Jellyseerr config usually looks like:
services:
  jellyseerr:
    container_name: jellyseerr
    image: fallenbagel/jellyseerr:latest
    restart: unless-stopped
    networks:
       - aarr_stack # Or whatever your network settings already are!
    ports:
      - "5055:5055"
    dns:
      - 10.0.0.1
    depends_on:
      - sonarr
      - radarr
    environment:
      - TZ=America/Toronto
    volumes:
      - /mypath/DOCKERS/jellyseerr/config:/app/config
A legacy jellyseerr docker compose file.
Notes on my config -
- I have a few customizations in mine specifically the
dns:anddepends_onwhich are NOT required.
2. Add the Init Process (Crucial!)
The new container does not provide an internal init process. You must enable this manually to prevent zombie processes and ensure signals are handled correctly.
- Docker Compose: Add
init: trueto your service. - Docker CLI: Add the
--initflag.
3. Handle User Permissions (The "Gotcha")
This is the most significant change. Seerr now runs strictly as a non-root user (specifically, the node user with UID 1000).
Seerr runs strictly as a non-root user (specifically, the node user with UID 1000).
- Remove User Directives: If you previously defined a
user:or PUID/PGID environment variables in your compose file, remove them. - Fix Folder Permissions: Because the container now runs as UID 1000, it needs ownership of your config folder. If your old folder was owned by root (UID 0), the new container will crash with "Permission Denied" errors.
Run this command to fix ownership before starting the new container:
docker run --rm -v /path/to/your/config:/data alpine chown -R 1000:1000 /data(Replace /path/to/your/config with your actual host path).
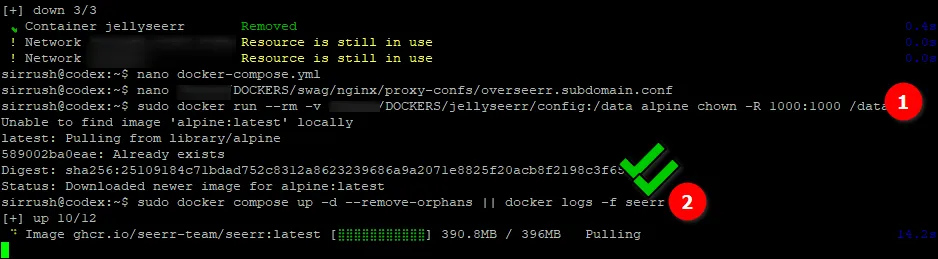
chown command to give the new non-root node user (UID 1000) ownership of your config folder.#1 above - the command run, showing my path and taking ownership of the old jellyseerr container. If you really wanted you could rename that folder as well.
Example: The New Docker Compose
Here is what a clean, migrated entry looks like:
services:
  seerr:
    image: ghcr.io/seerr-team/seerr:latest
    container_name: seerr
    init: true            # <--- New Requirement
    environment:
      - LOG_LEVEL=debug
      - TZ=America/Toronto
    ports:
      - 5055:5055
    volumes:
      - /path/to/appdata/config:/app/config
    restart: unless-stopped
The "Core Lab" Optimized Config
If you want to get fancy with healthchecks and dependencies, here is the optimized config I am currently running:
  seerr:
    container_name: seerr
    image: ghcr.io/seerr-team/seerr:latest
    init: true # New variable!
    networks:
       - aarr_stack # Or whatever your network settings already are!
    ports:
      - "5055:5055"
    dns:         # Optional
      - 10.0.0.1
    depends_on:  # Optional
      - sonarr
      - radarr
    environment:
      - TZ=America/Toronto
    volumes:
      - /mypath/DOCKERS/jellyseerr/config:/app/config
    healthcheck:
      test: wget --no-verbose --tries=1 --spider http://localhost:5055/api/v1/status || exit 1
      start_period: 20s
      timeout: 3s
      interval: 15s
      retries: 3
    restart: unless-stopped
A Note for Kubernetes & Other Platforms
- Kubernetes: You need to update your Security Context. Set
runAsUser: 1000,runAsGroup: 1000, andfsGroup: 1000. You should also explicitly drop all capabilities and setrunAsNonRoot: true. - Unraid & Snap: As of writing, the official Unraid app and Snap packages are not maintained. You should switch to the official Docker container method if you want the latest updates.
Deployment & Troubleshooting
Once you have your config set and permissions fixed, run:
docker compose up -d --remove-orphans && docker logs -f seerr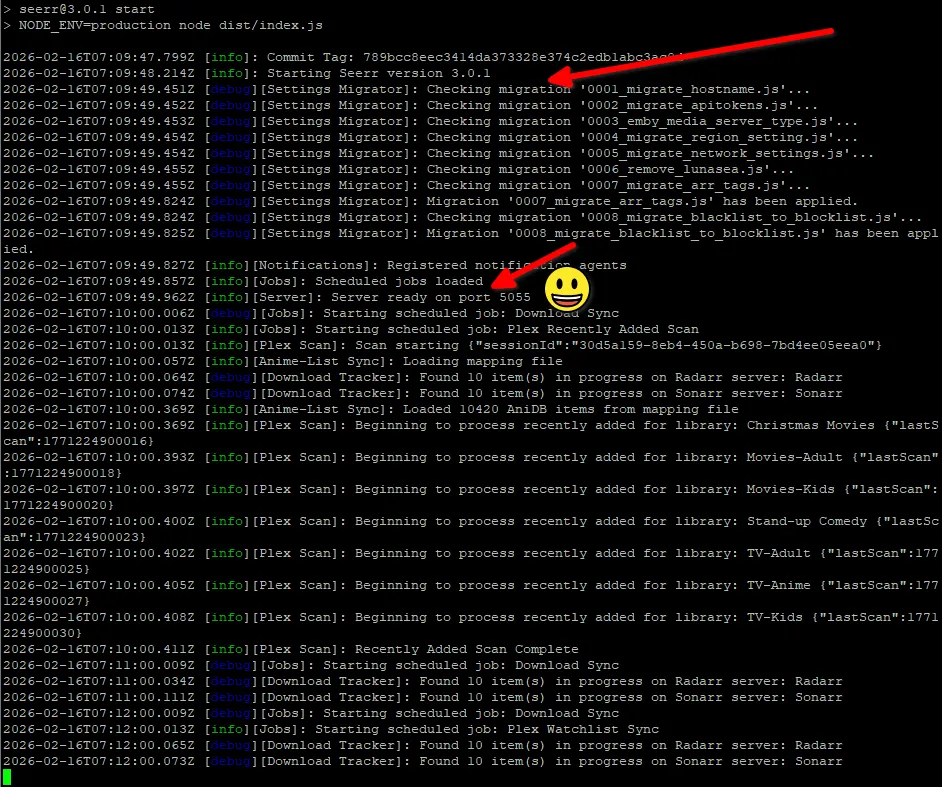
This combines the startup command with the log viewer. You should see the migration taking place in the logs. It’s usually quick!
- Why
--remove-orphans? Since we changed the service name (e.g., fromjellyseerrtoseerr), Docker sees the old container as an "orphan." This flag cleans it up automatically.
What about Your Reverse Proxy?
GOOD - you're using one!
I recommend using the same config you're already using.
- If you use IP: You don't need to change anything.
- If you use DNS (Container Names): If you changed your container name from
jellyseerrtoseerr, make sure to update your proxy config to point tohttp://seerr:5055.
For SWAG users, I simply used the existing Overseerr template (/swag/nginx/proxy-confs/overseerr.subdomain.conf) and customized it. Since I point to my services via IP, I didn't have to change a thing on my SWAG instance after the migration.
If you don't have a reverse proxy yet, take a look at my reverse proxy setup & comparison guide.
Welcome to the future of media requests!
For the full official documentation, check out the Seerr Migration Guide.


Member discussion