The Definitive PS5 Teardown & Deep Clean: Diagnosing Thermal Failure, Liquid Metal & Fan Problems
Does your PS5 shut off while playing games? Follow this hands-on teardown guide to deep clean the heatsink and safely replace the APU's liquid metal.
Is your PS5 shutting off while playing games? Here's how you fix it.
While Core Lab is traditionally dedicated to computers, servers, Docker containers, and networking infrastructure, occasionally a piece of consumer hardware crosses the bench that demands a technical tear-down.
The PlayStation 5 is essentially a highly customized, liquid-metal cooled PC squeezed into an aggressive form factor.
No, not that liquid metal, but the way it moved a bit reminded me of this...
At the request of my oldest kid and his friend, who were recently encountering severe thermal issues where the PS5 console would go into a hard thermal shutdown, just like a PC or CPU would, I decided to do a complete tear-down, deep clean, and liquid metal replacement. I do not game on consoles! #PCMasterRace 😉
If your PS5 sounds like a jet engine or is shutting down (powering itself off) randomly due to thermal limits, simply blowing compressed air into the side vents won't cut it. You need to pull it apart. Here is the comprehensive, step-by-step technical teardown.
There's a million of these on Youtube of course but not many written on on a static page, which I prefer so you can leave it at one place vs playing the pause 17 times and rewind game.
Pre-Requisites & Tools Required
Before you begin, ensure you have the key tools ready to, and your favourite beverage! It's likely to take a few hours... This is for an original 2020 Gen 1 PS5 with Disc.
Tools
- TR8 Security Torx Bit w/hole in the center
- Phillips #5 Bit
- Preferably a tech screwdriver that you can spin more freely
- Place to carefully put all the 5 types and sizes of screws, like a magnetic mat
- Spudger / Lifting / Edging Tools
- Flathead Screwdriver if nothing else, for pry-work (Careful!)
- Tweezers
- Various brushes to clean with
- Compressed air cans or the better choice:
- Powered Compressed Air Duster such as WOLFBOX MF200
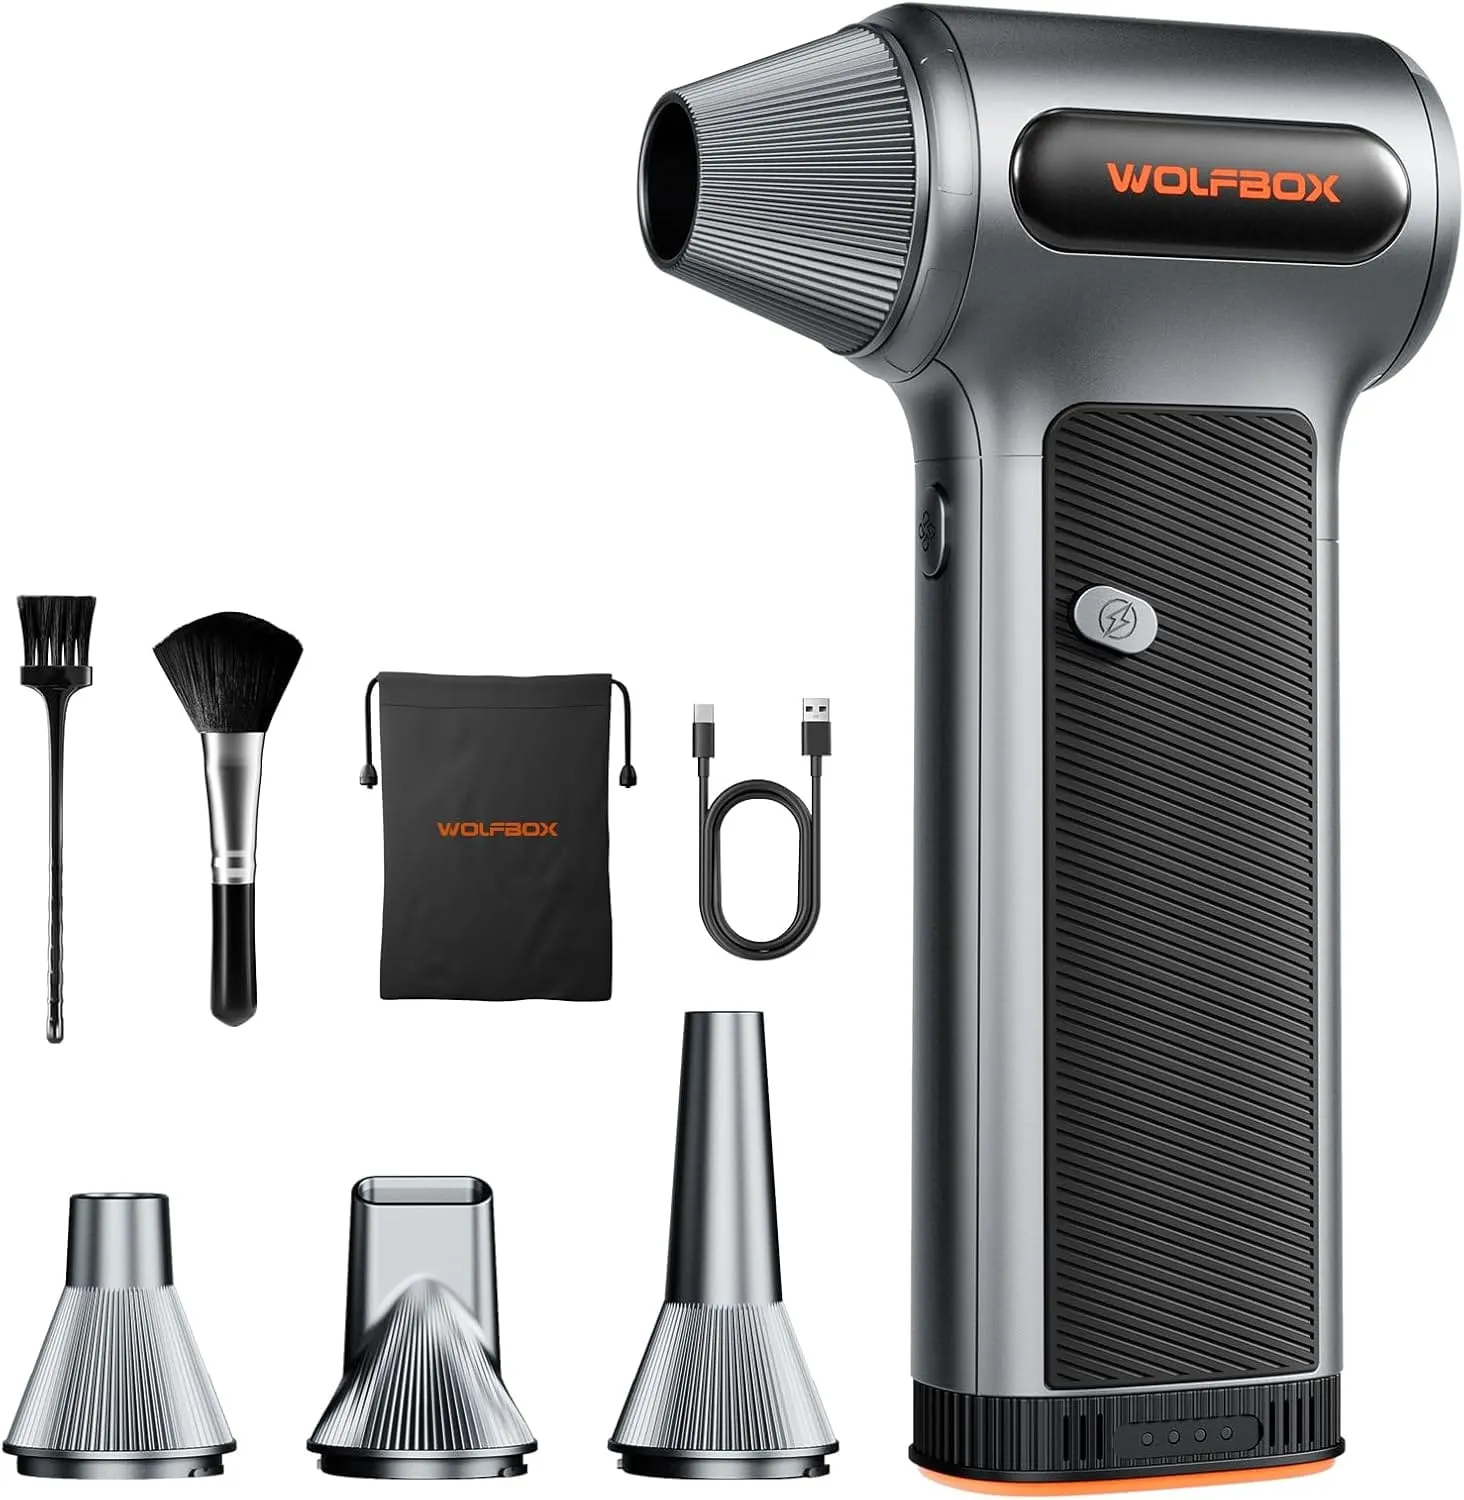
WOLFBOX MF200 Compressed Air Duster
Comes with Removable Battery & 4 Nozzles, Cordless 3-Speed Adjustable Mini Blower for Computer Keyboard, Car Cleaning, Home, and Outdoor Use. Rated 4.7 on Amazon!
Replacement Parts & Supplies for PS5
- Replacement PS5 OEM cooling fan
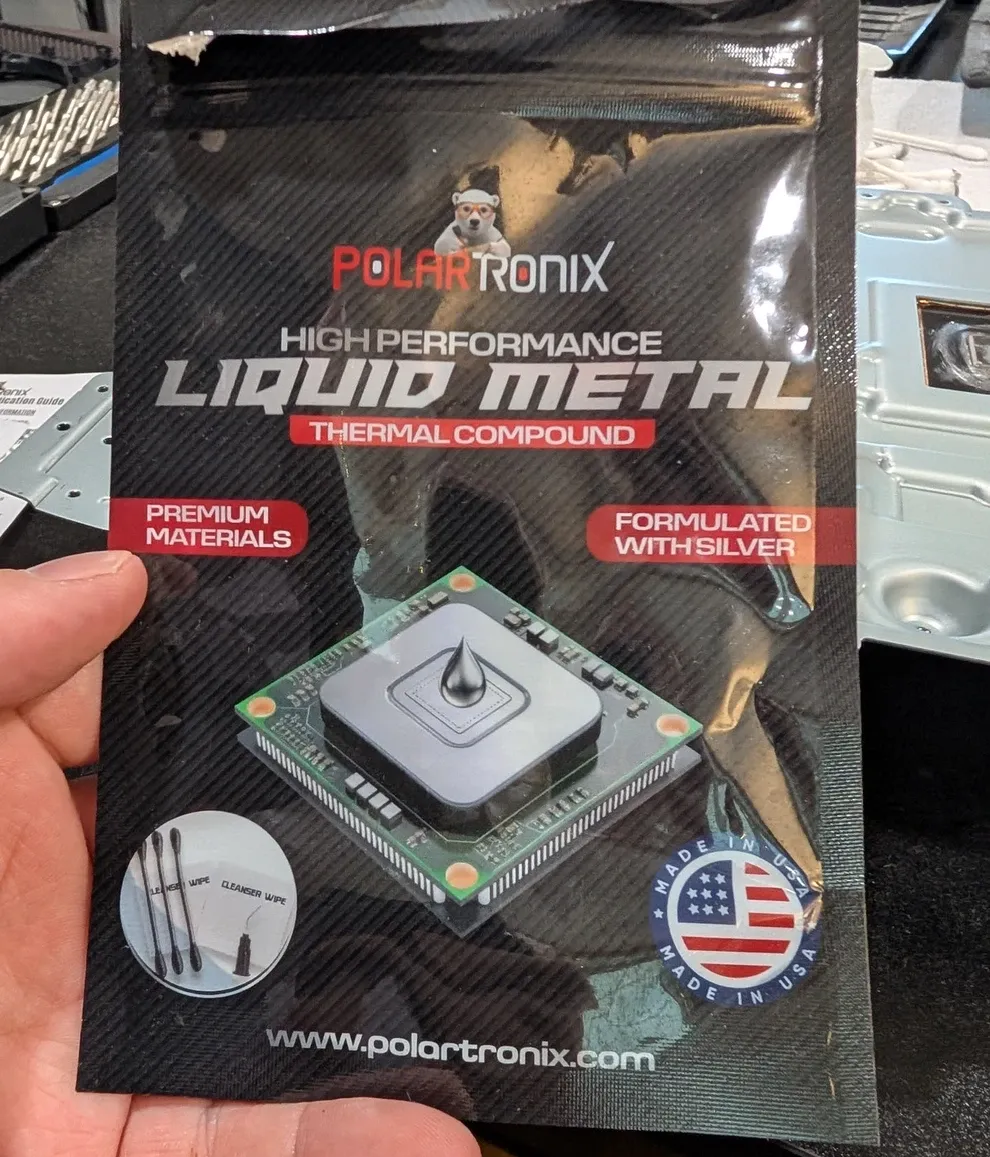
- Replacement high quality liquid metal
- I recommend what I used - Polartronix Liquid Metal, 130W/m'K performance!
Part 1 - PS5 Tear-Down
1. Removing the Side Plates
Sony actually designed the outer plates to be user-removable without tools. By grabbing the top corner (where the PlayStation logo is) and gently pulling up and sliding down towards the base, the panels pop right off. They kind of 'hang' there with little resistance to being pulled out, when pulled the correct direction.
I had this one orientated with the power, HDMI and ethernet ports facing me, on the left side as I was looking at it. It's kinda weird at first but if you still need help, checkout iFixit's guide, they did a fantastic job documenting the removal.
2. Remove Layers of Screws (58 I think?)
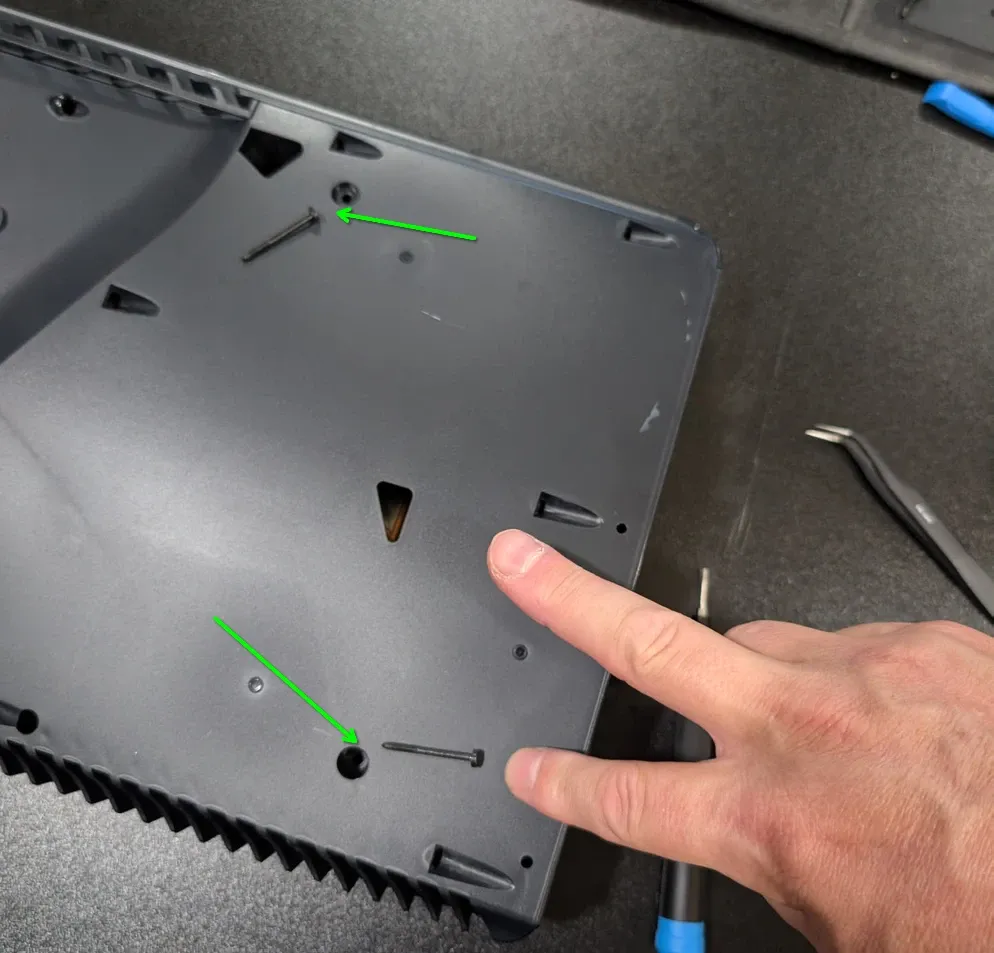
Work in the same pattern as you go through each layer, remove each screw from top left, to right bottom, around the PS5 as you, placing them so you can re-assemble later in reverse order!
With the plates off, you immediately see the massive 120mm blower fan & shroud. To remove it:
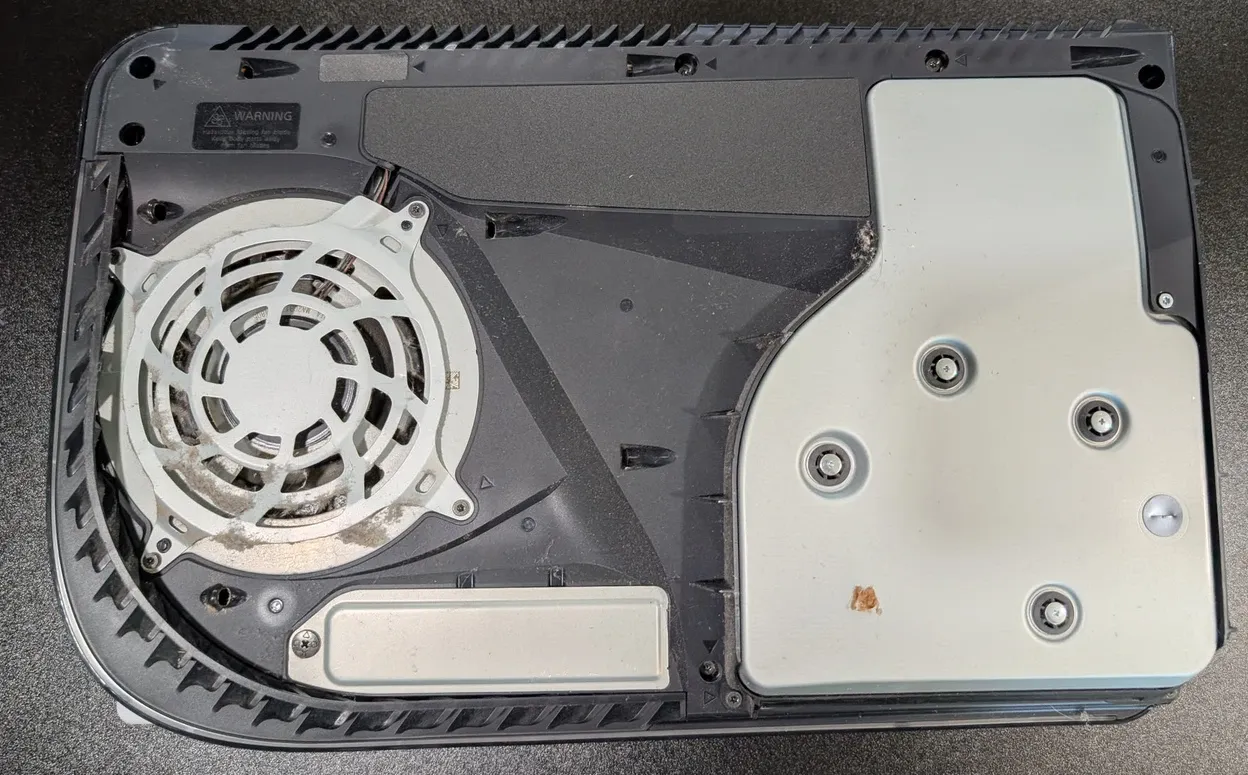
- Remove the side grill (Bottom left of picture, wrapping around the edge of the fan) by using a spudger to pry the grill away from the case, or just pop it off with your hand a section at a time.
- Peel back the black plastic warranty/routing tape covering the fan wire. (Top of picture above, you can see where the fan power cable goes into a recess under it)
- Unscrew the four Torx Security (T8/T9) screws holding the fan shroud. (Note: Keep track of these, they are different lengths!)
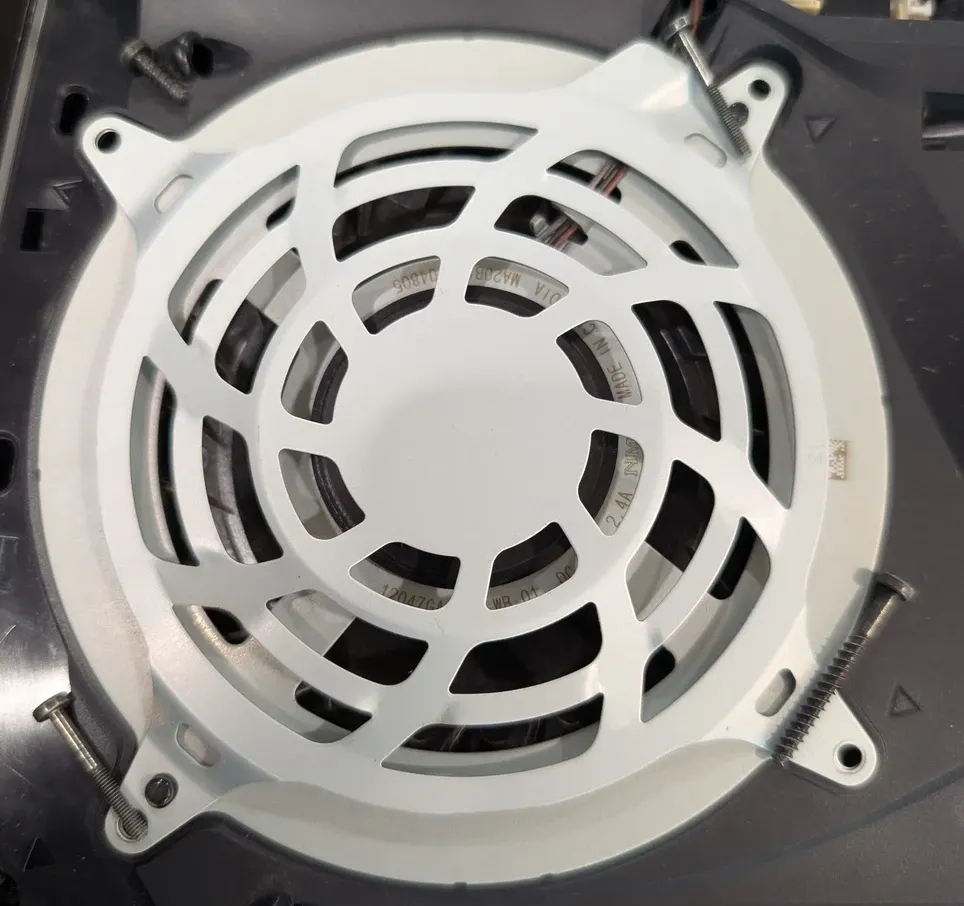
- Using tweezers, carefully detach the fan connector from the motherboard. Do not pull by the wires; pull by the plastic (blue) header.
In my case, the stock fan was too far gone. I opted to completely replace the fan with a fresh, balanced OEM equivalent replacement to ensure absolute silence and optimal airflow. The fan wasn't that dirty, overall, but the way it spun I could tell that the bearings weren't smooth anymore. All you have to do to check, is compare it against a new fan and you'll see immediately. If it doesn't spin when you give it a fling with your finger, for quite some time with what feels like no resistance, it needs replacement.
The fan was only $37.99 CAD from Amazon, so it's a VERY low cost and huge return (on cooling performance) replacement.
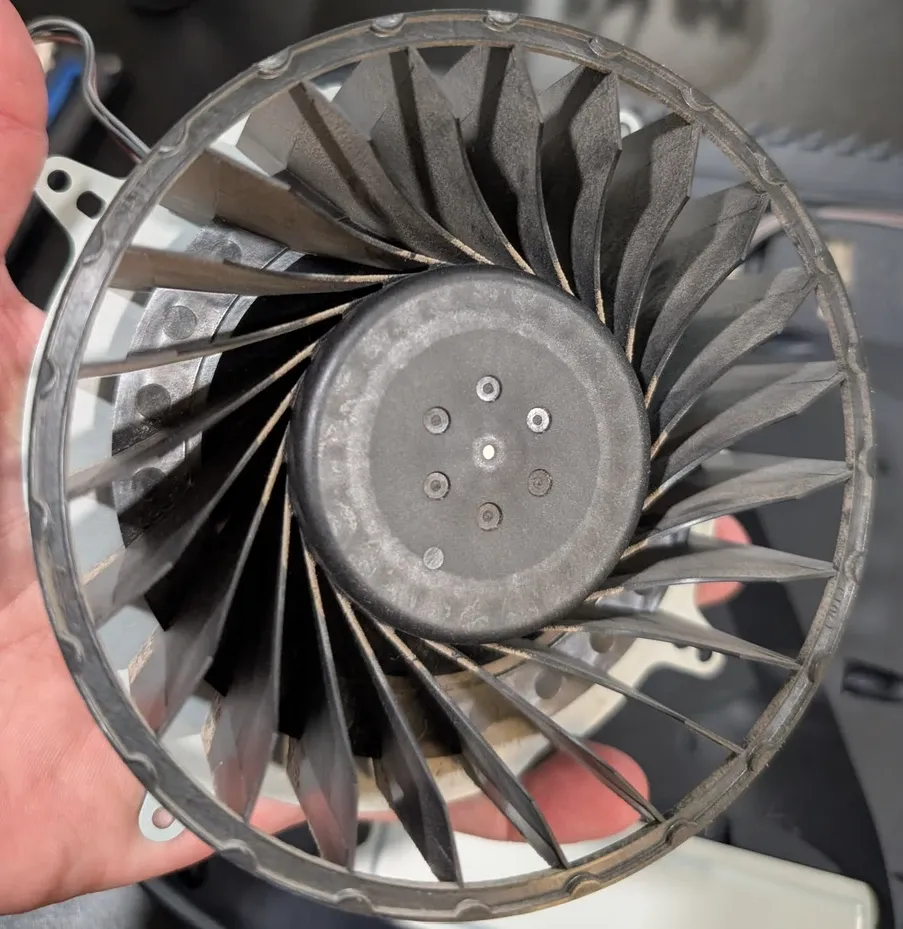
Replacement was a YWLRONG brand OEM compatible drop-in replacement!
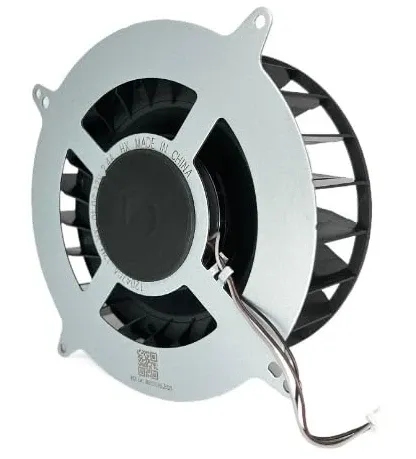
YWLRONG Internal Cooling PS5 Fan
- Replacement for Sony PlayStation 5 Series - 23 Blades General Fan
- Compatibility: Internal cooling fan for Sony Playstation 5 PS5 replacement, with 60MM/2.36 inch Flex cable!!! Please make sure your game model and cable length before purchase.
- Two models available - 23 blade and 17 blade, both 2.4A 120mm.
- Compatible for Sony Playstation 5 PS5 23 Blades Fan 12047GA-12M-WB-01 12V 2.4A and;
- 17 Blades Fan G12L12MS1AH-56J14.
3. The Optical Drive and Wi-Fi Antennas
If you have the disc edition, the optical drive is the next barrier. It is secured by a few screws and connected via another fragile ribbon cable. You do not remove or unscrew the 'bolts`. Once you remove the screw AROUND the drive tray, it'll just 'fall' off more or less.
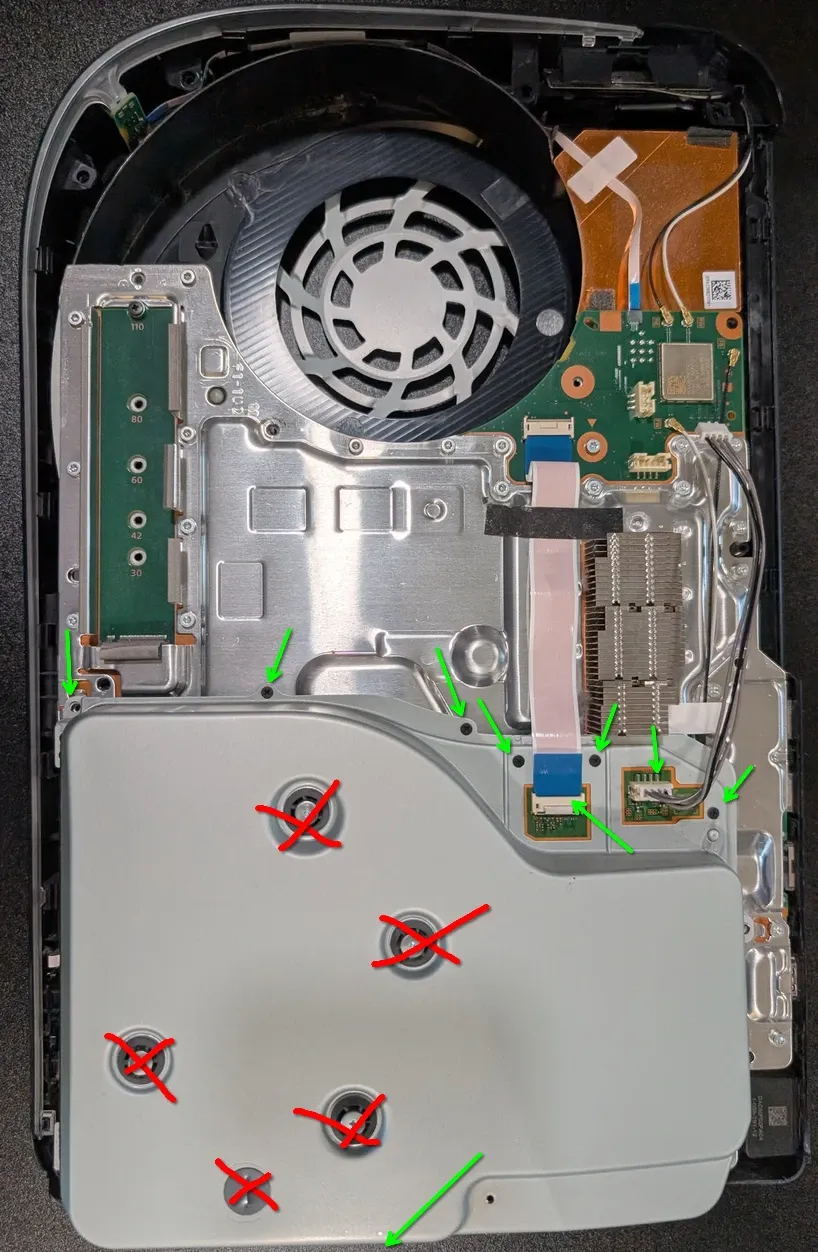
Bottom of picture, there's another screw around that side if memory serves... Next:
- Disconnect the ribbon cable by flipping up the black locking latch on the motherboard connector, then slide the cable out with tweezers as per previous ribbon cables.
- It's just below the WiFi connectors in the top left quadrant of the picture above. It was attatched to the disc drive.
motherboard. If you rip or damage that specific ribbon cable or its connector, your PS5 disc drive is permanently bricked and cannot be replaced by a third-party part. Extreme caution is required there!
- Next, detach the two Wi-Fi antenna wires (black and white) from the wireless module. They pop off like standard laptop Wi-Fi antennas. Route them out of their plastic channels so they don't snag later.
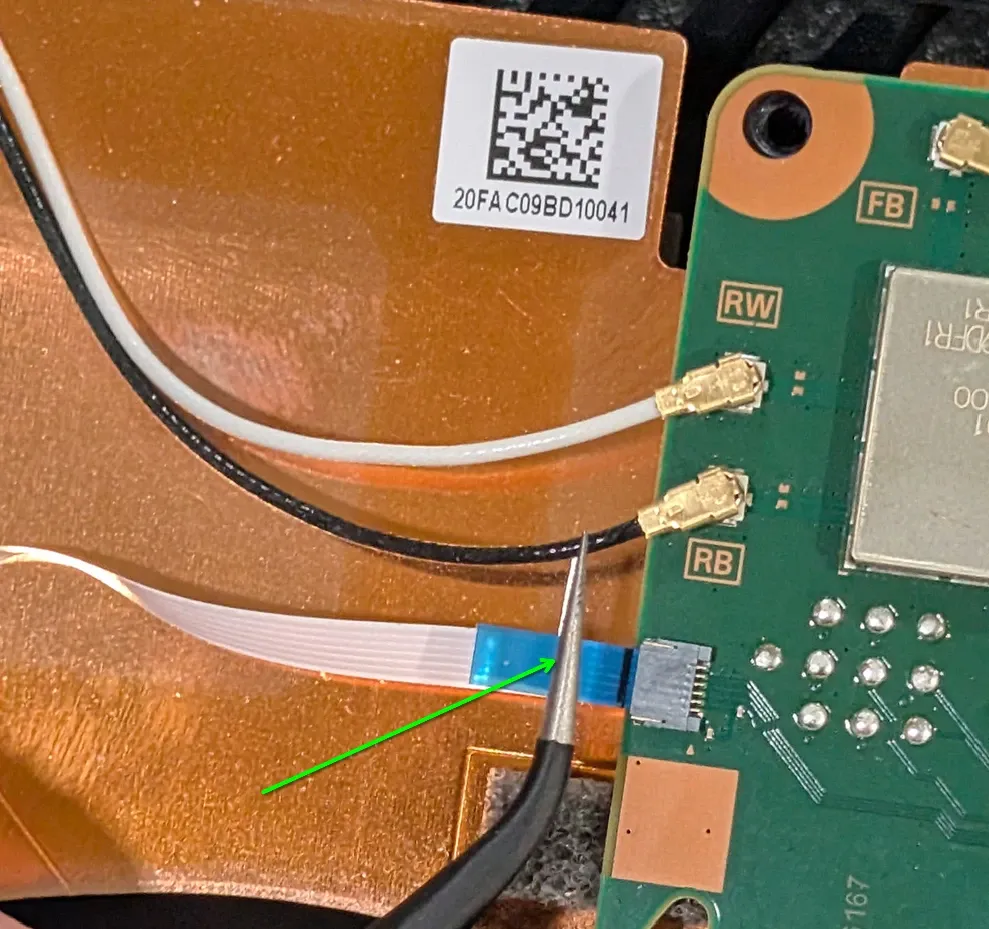
Note: You're putting the tweezers around the little blue plastic pull-tab, not the actual ribbon cable itself.
5. EMI Shield Removal & Exposing the Motherboard
To get to the heart of the machine, we have to remove the massive metal EMI shield. This involves removing dozens of silver TR8 Torx screws (41X 7.3mm long, 1X 43.2mm long!) around the perimeter of the chassis... Take your time, and don't forget to take a break if you need to.
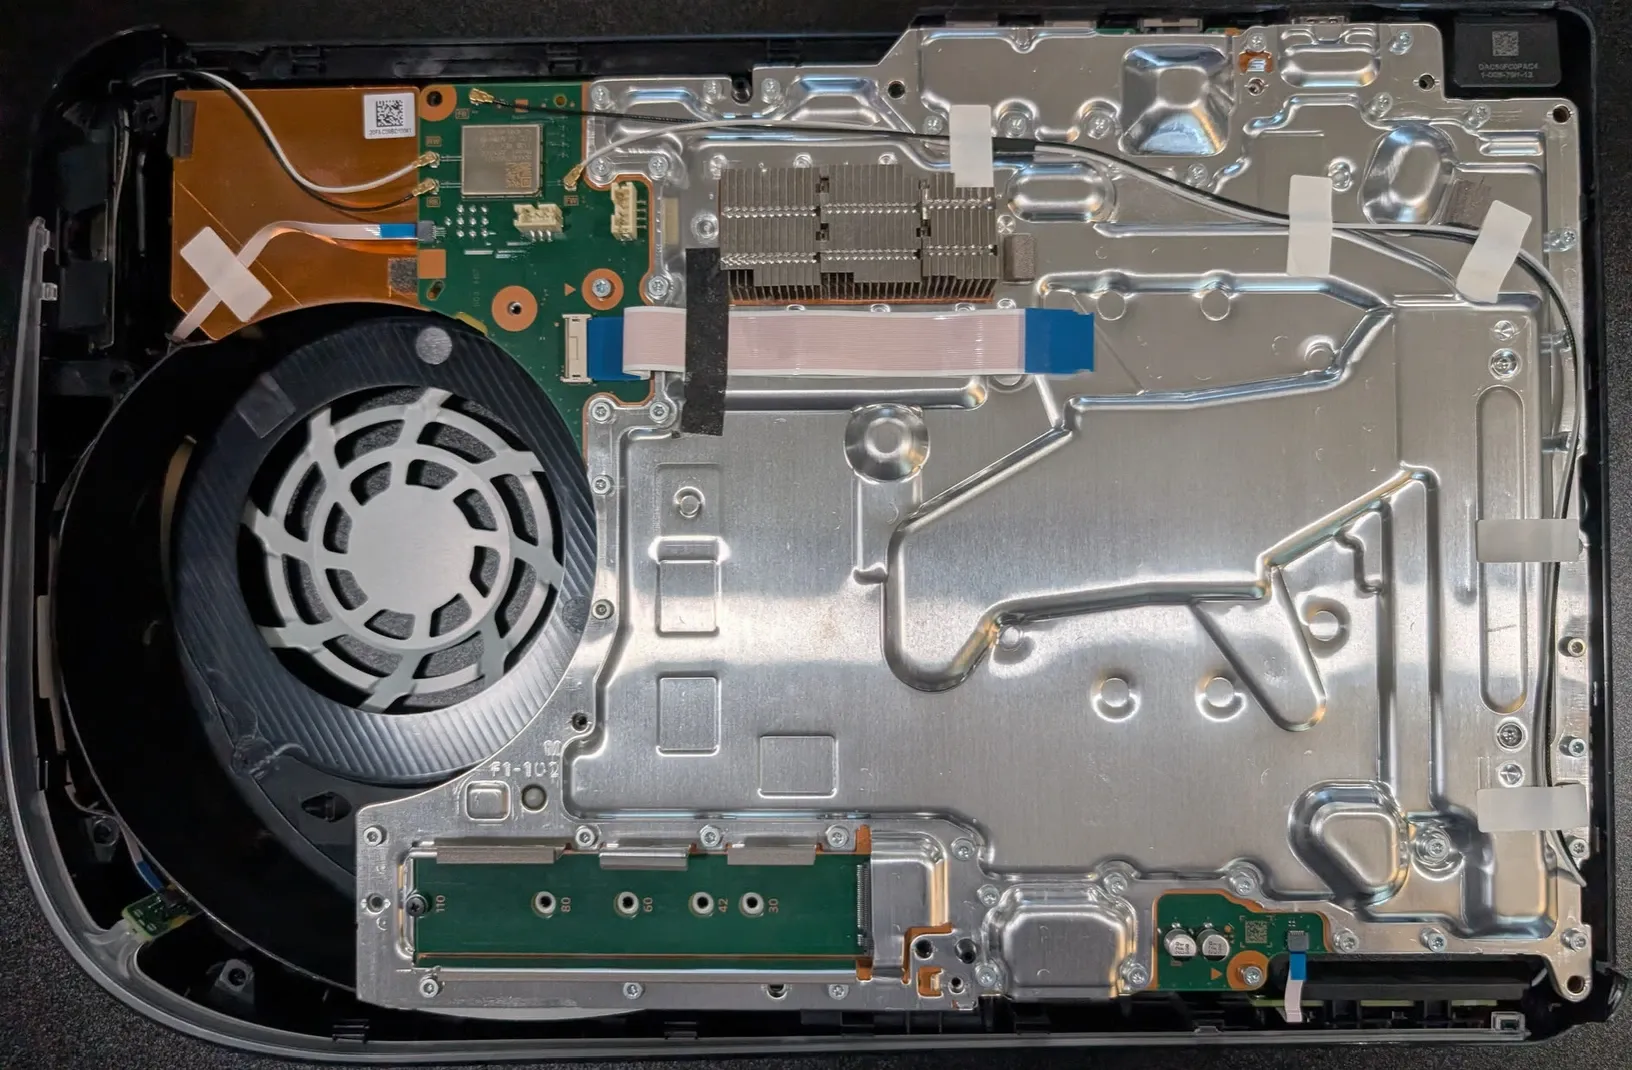
- Remove all screws you can find (there's lots!)
- Disconnect any further visible connectors or ribbon cables
- There's one more once the EMI shield is removed, beside the NVME drive slot.
Once you've removed all the perimeter ones, you can pop off the big EMI shield itself and you'll see the actual motherboard in all it's glory! A quick walkthrough here:
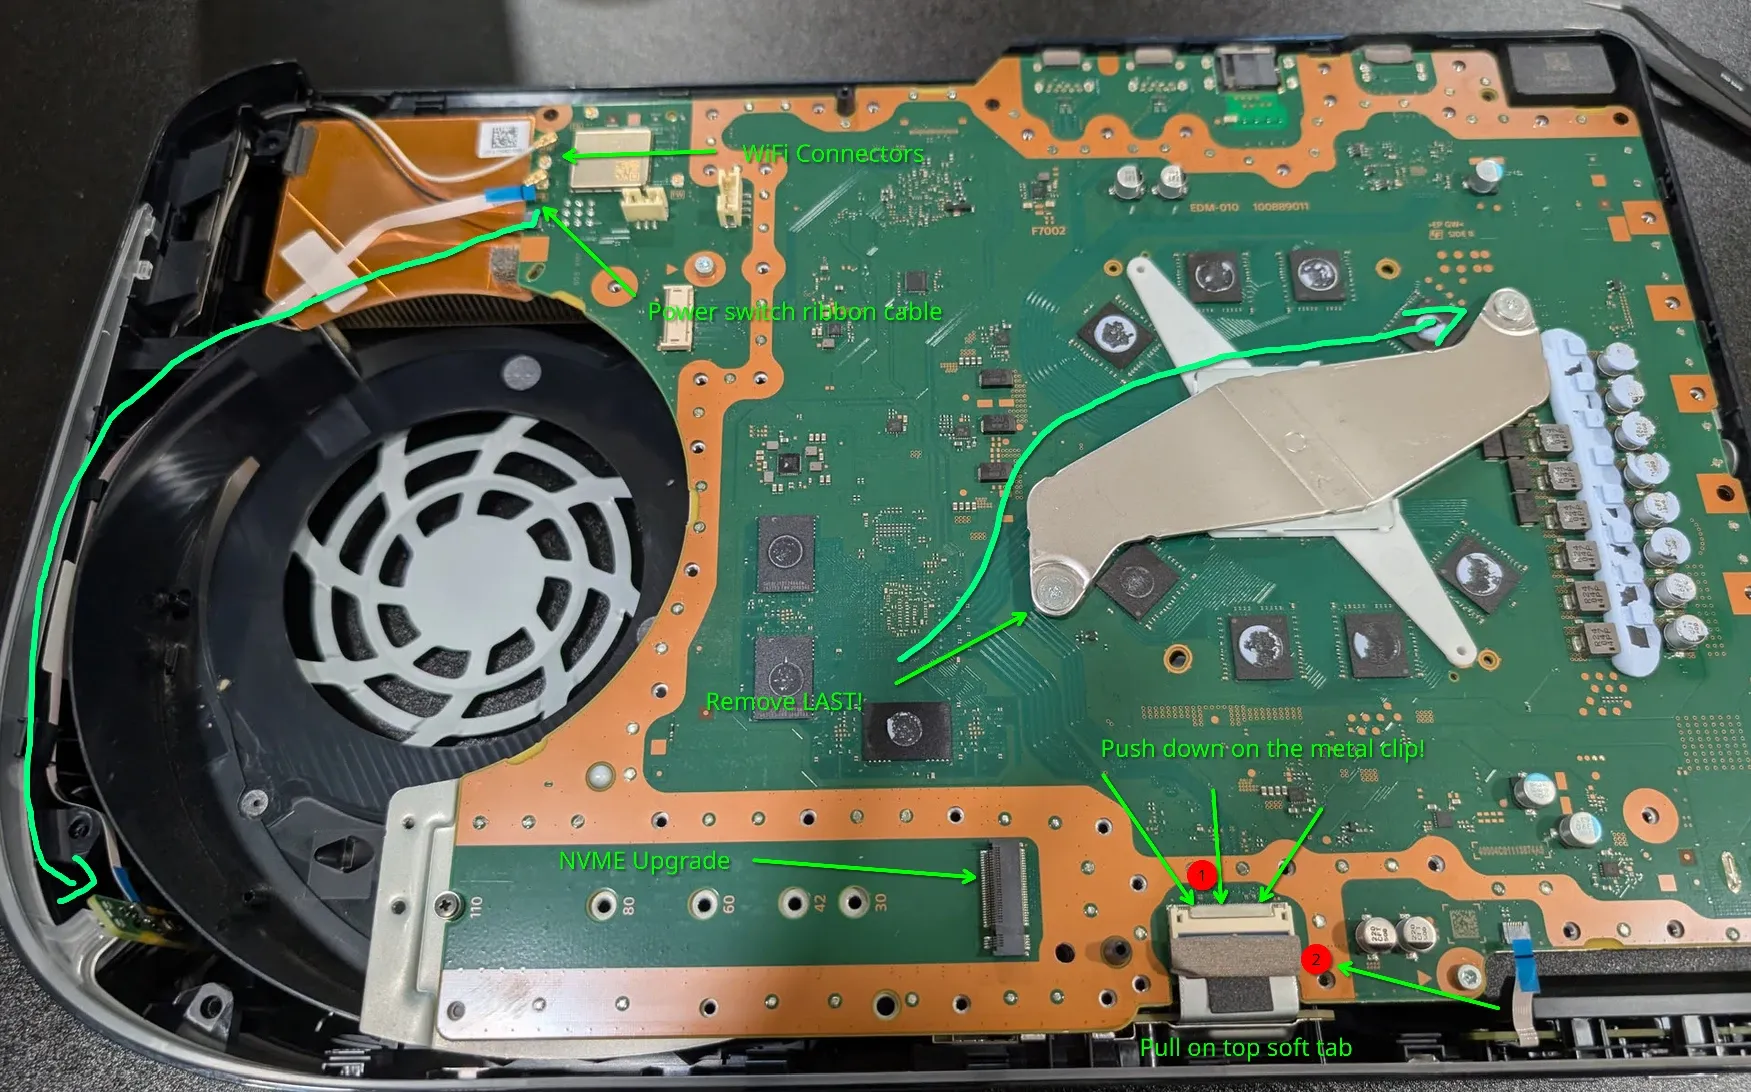
- Remove the 2 remaining screws holding & sealing the liquid metal APU cooling chamber, as pictured above stating "Remove LAST!". This is done with a Phillips screwdriver, not the TR8.
Once you've unscrewed that bracket, it will look like this, sitting there waiting for you to pop it off:
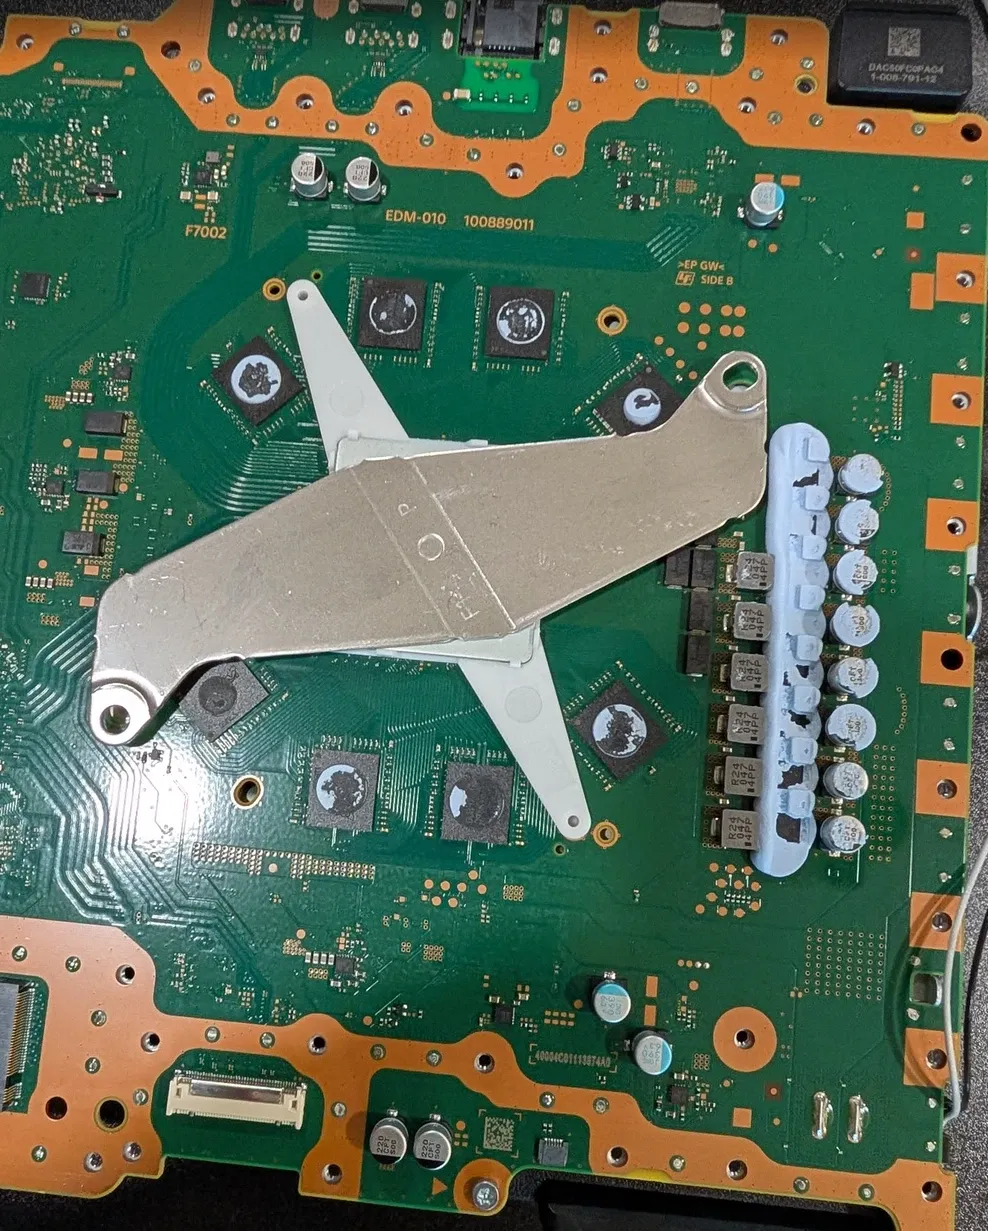
Place the bracket aside after you carefully peel it off. It comes apart in 2 pieces. Be very careful with the circuitry under here, do not drop a screwdriver onto these parts!!!
6. Remove Motherboard & Flip it Over
At this stage you have to gently pry the bottom right corner of the motherboard / mainboard up, and disconnect it from the power supply system. It's a two prong metal post setup which plugs directly into the mainboard with no play, it should come off with a spudger. If it's never been removed it may take a bit of steady force but it will then 'pop' out of it's wall-like socket on the PSU.
Once this is done, carefully work each edge of the motherboard so you know it's lose and ready to be lifted, then:
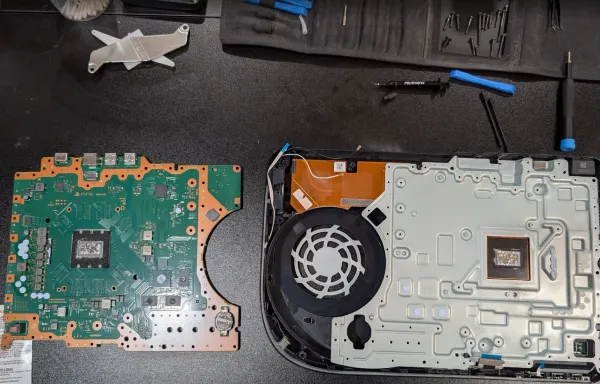
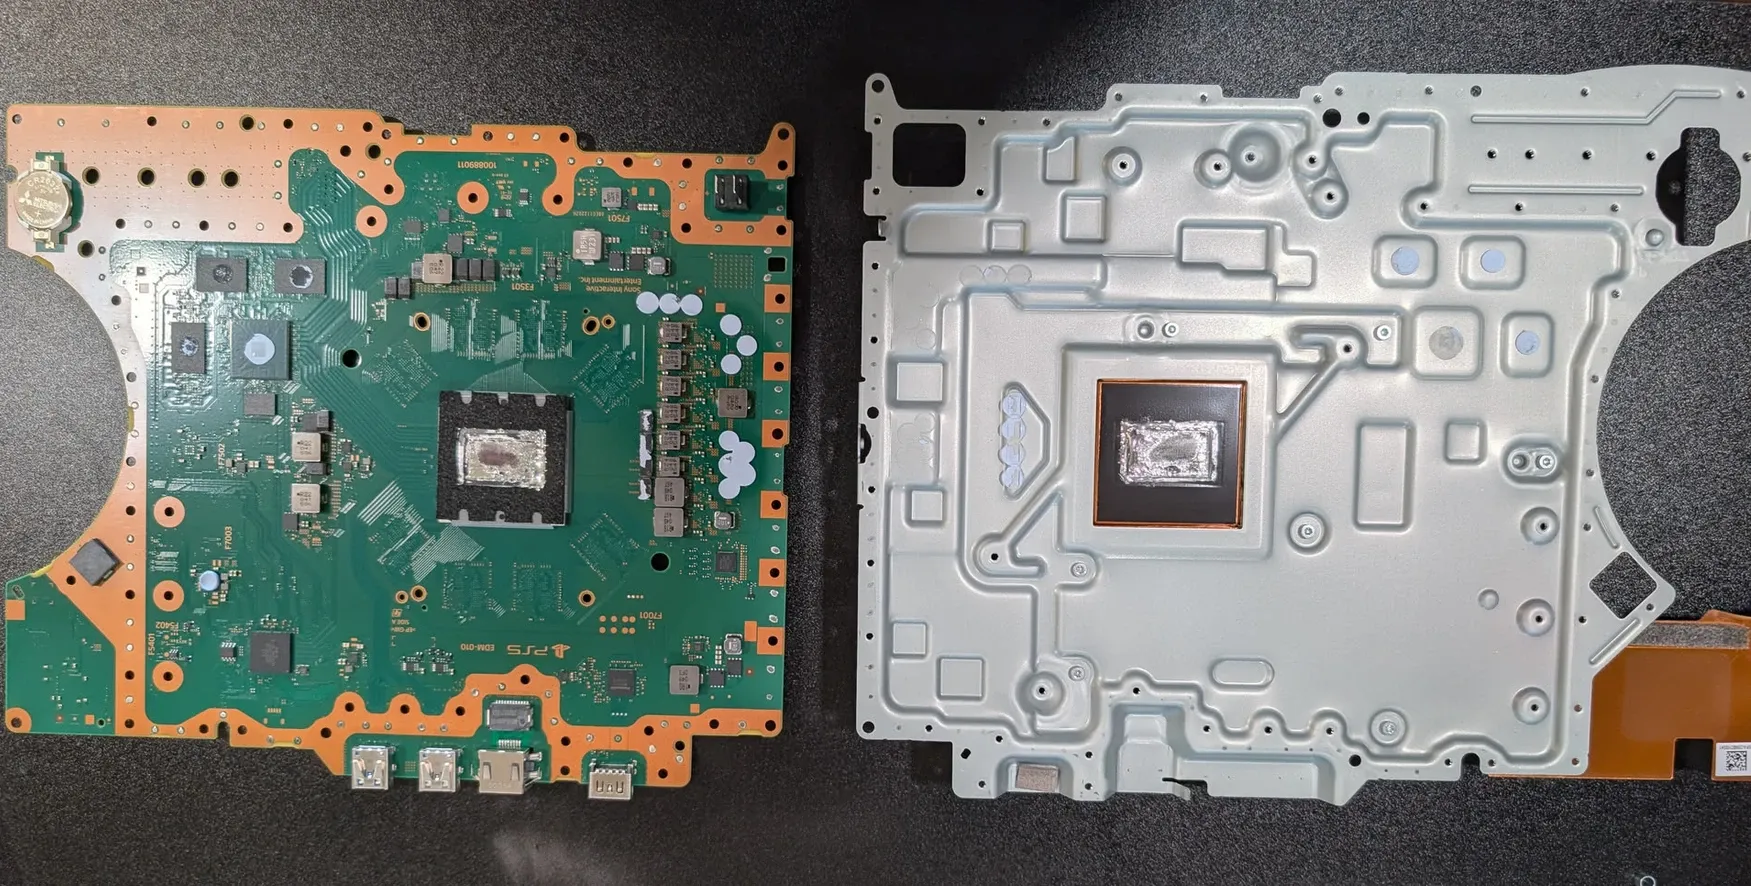
- Lift the motherboard straight up and flip it over (SLOWLY) in as graceful a motion as you can and place it onto a CLEAN workspace facing UP!
- It should look like this, side by side:
Part 2 - Diagnosis & Deep Cleaning
1. Inspect the Liquid Metal and APU
In this PS5's case, it was pretty obvious why this was suffering from thermal shutdowns, as the liquid metal had sort of slophed to one side, and was no longer covering the entire API, and there was sort of a 'hot spot' where the APU was completely dry, and looked almost slightly burnt. I was a little nervous seeing that!
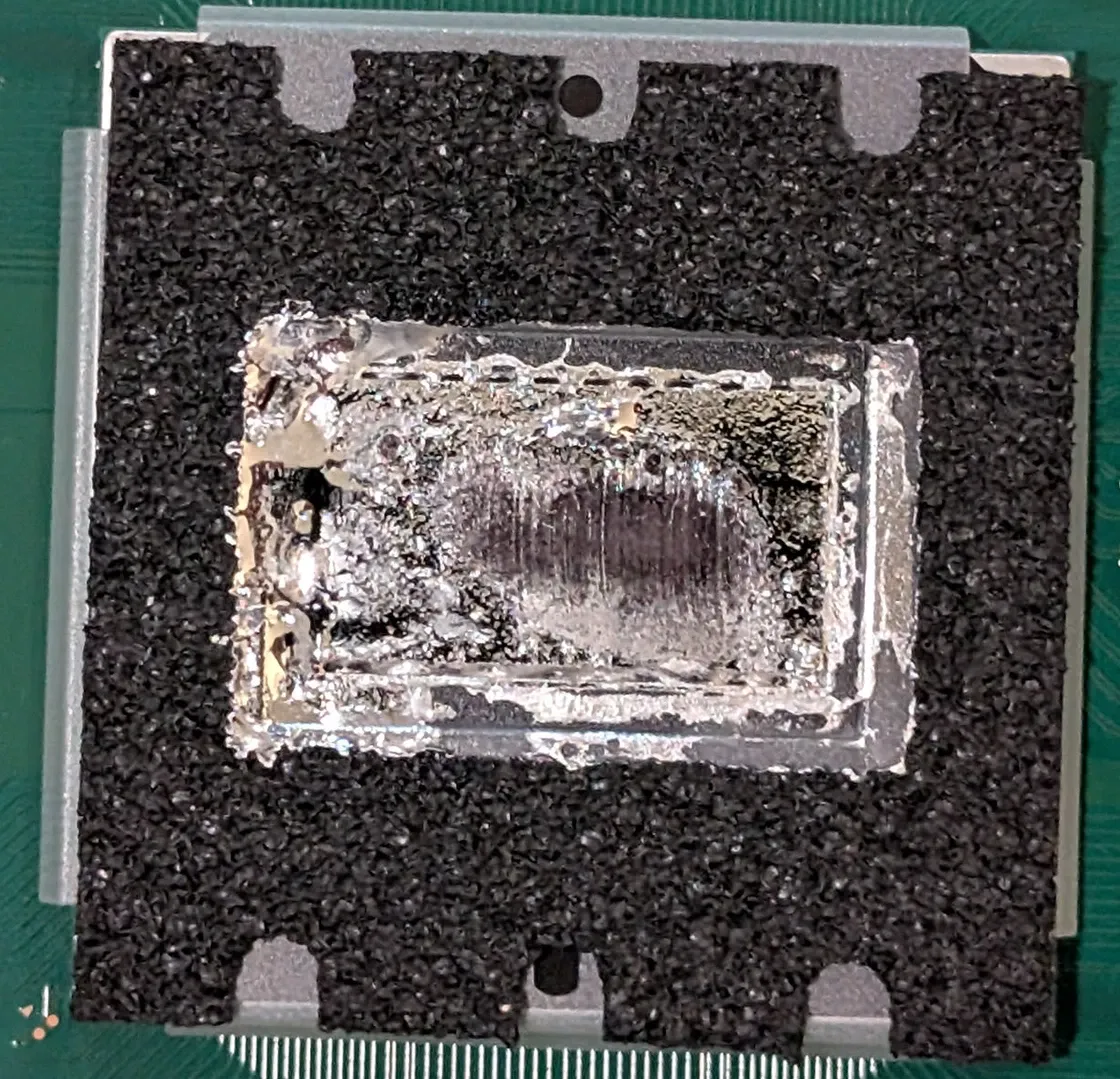
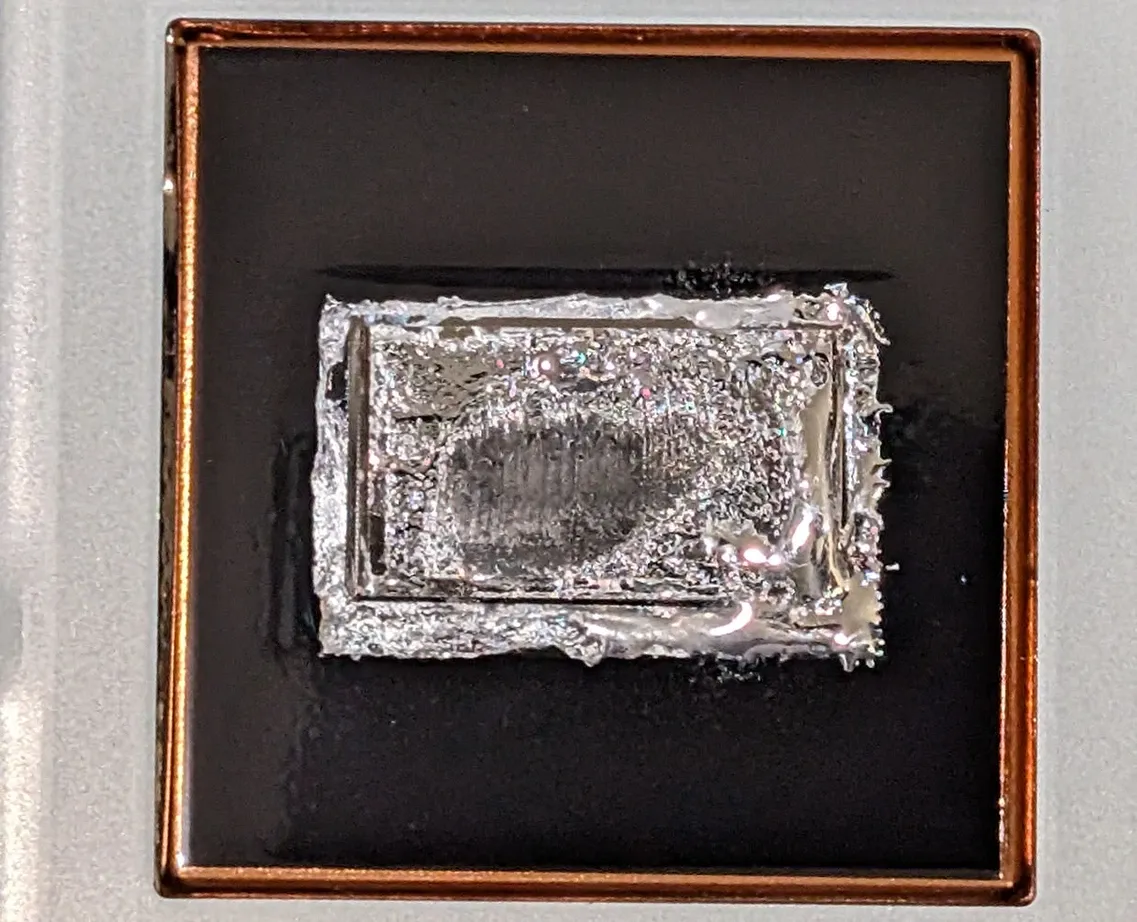
APU & old liquid metal, showing it all slophed to the sides and a 'blank' spot with no coverage on the APU itself.
You can see the matching spot where somehow, the liquid metal had all fallen off. There was technically still enough liquid metal here to re-absorb it and re-apply it, but I did not have a spare empty tube with a syringe/needle end to "suck" it back up. Also I'd rather put brand new liquid metal on, as I already went this deep into the system, may as well give it the best shot at longevity.
QTips & isopropyl alcohol (99% is best, 70% minimum!) and take your time.
Leave liquid metal replacement aside for a moment.
2. The Deep Clean Heatsink & Chassis
With the console fully disassembled, you now have access to the massive copper and aluminum heatsink assembly as well.
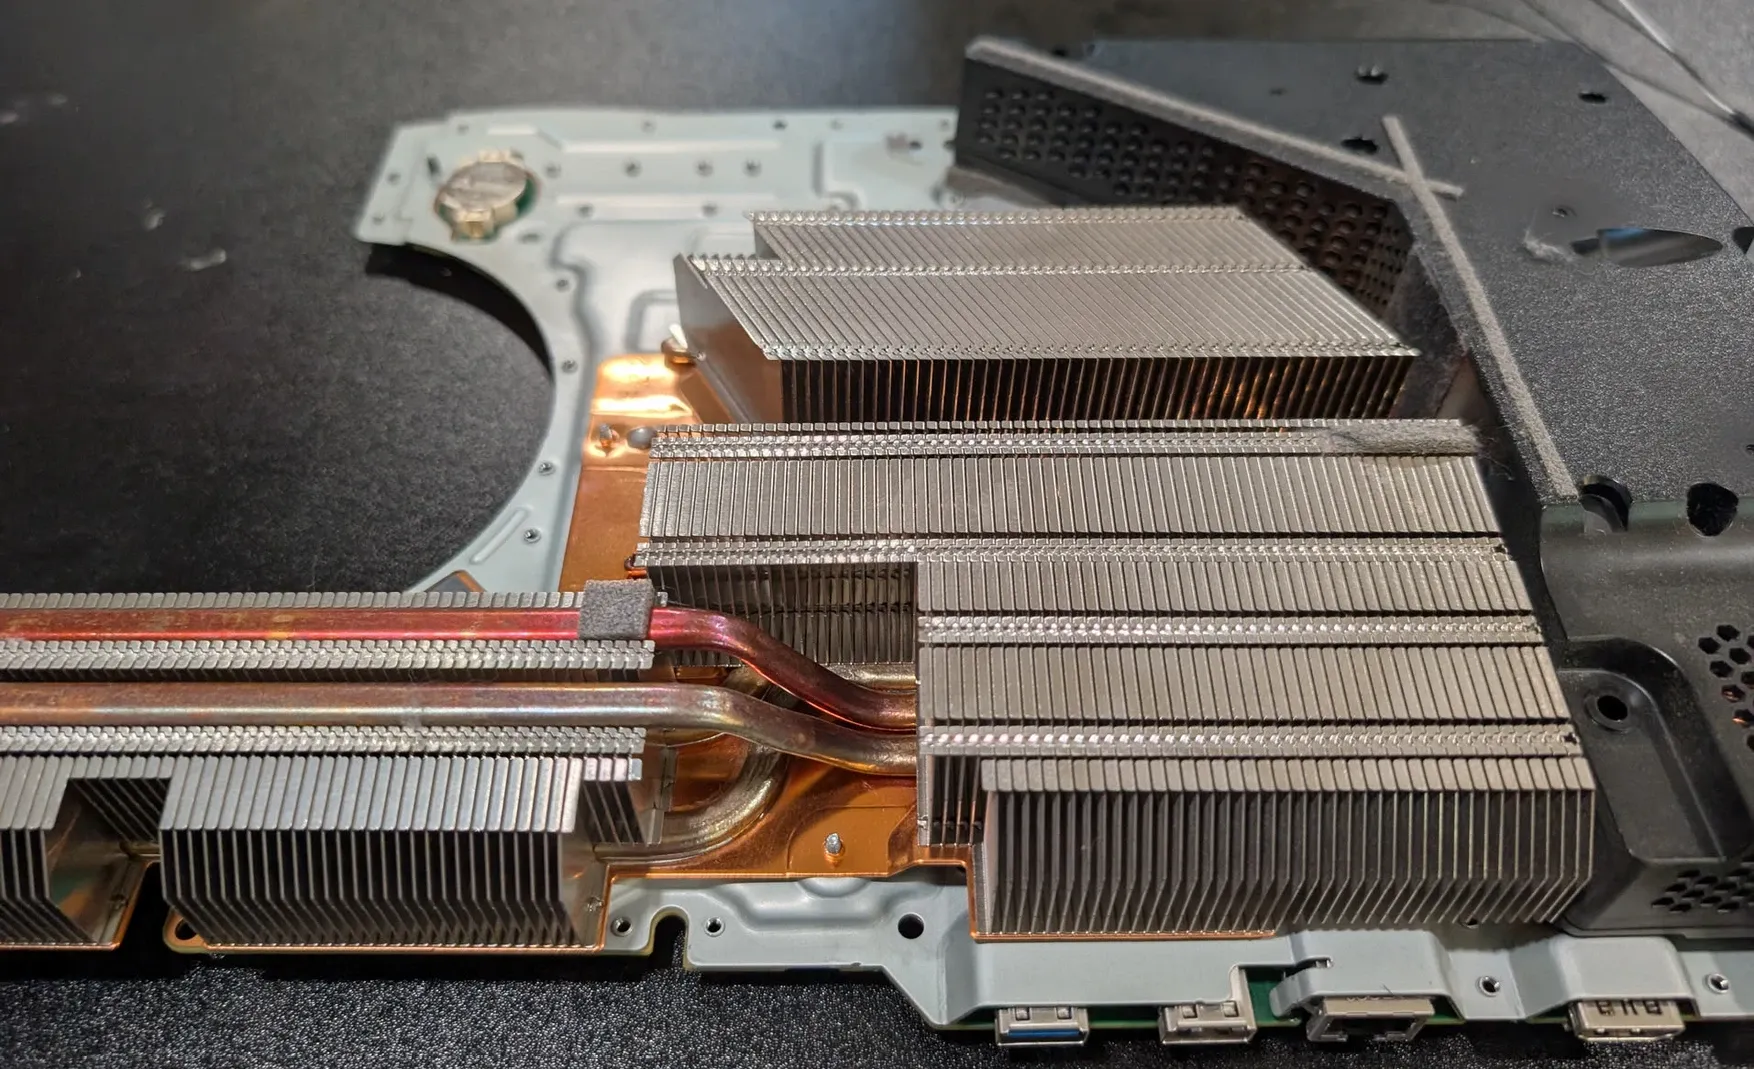
- The Heatsink: This is where the thermal throttling happens first; airflow issues. Use an air duster and a soft-bristled brush to completely clear the fins of dust bunnies, pet hair, food, bugs, whatever else may have worked it's way in there. I used my electronic air duster at MAX power and blasted this entire stack, plus some brushing.
- Take the time to clean out the entire case, all components and pieces, the exterior and interior; you want NO dust or cobwebs remaining!
3. Liquid Metal Replacement
Prepping the APU: Over time, the factory liquid metal can pool to one side due to gravity (especially if the PS5 is mounted vertically) or begin to oxidize, leaving dry spots on the APU die that cause localized overheating. I used Q-tips and high-percentage isopropyl alcohol to meticulously scrub all the old, degraded liquid metal off both the APU die and the heatsink cold plate until both were perfectly clean and reflective, and no Q-tip fuzz remained. Be thorough here, and don't use any of the alcohol at first, try to 'gather' the liquid metal into one spot to clean it up with qtips or, if you have a empty syringe it would be faster to suck it up off the APU. If you use the alcohol to much or to early, you'll just smear the liquid metal round like I did in this pic right below and it'll take longer to clean.
This took awhile as it was the first time I touched liquid metal and was not familiar with it's high tensile properties. It was weird to clean off and did not behave quite like liquid, and does not 'absorb' easily!
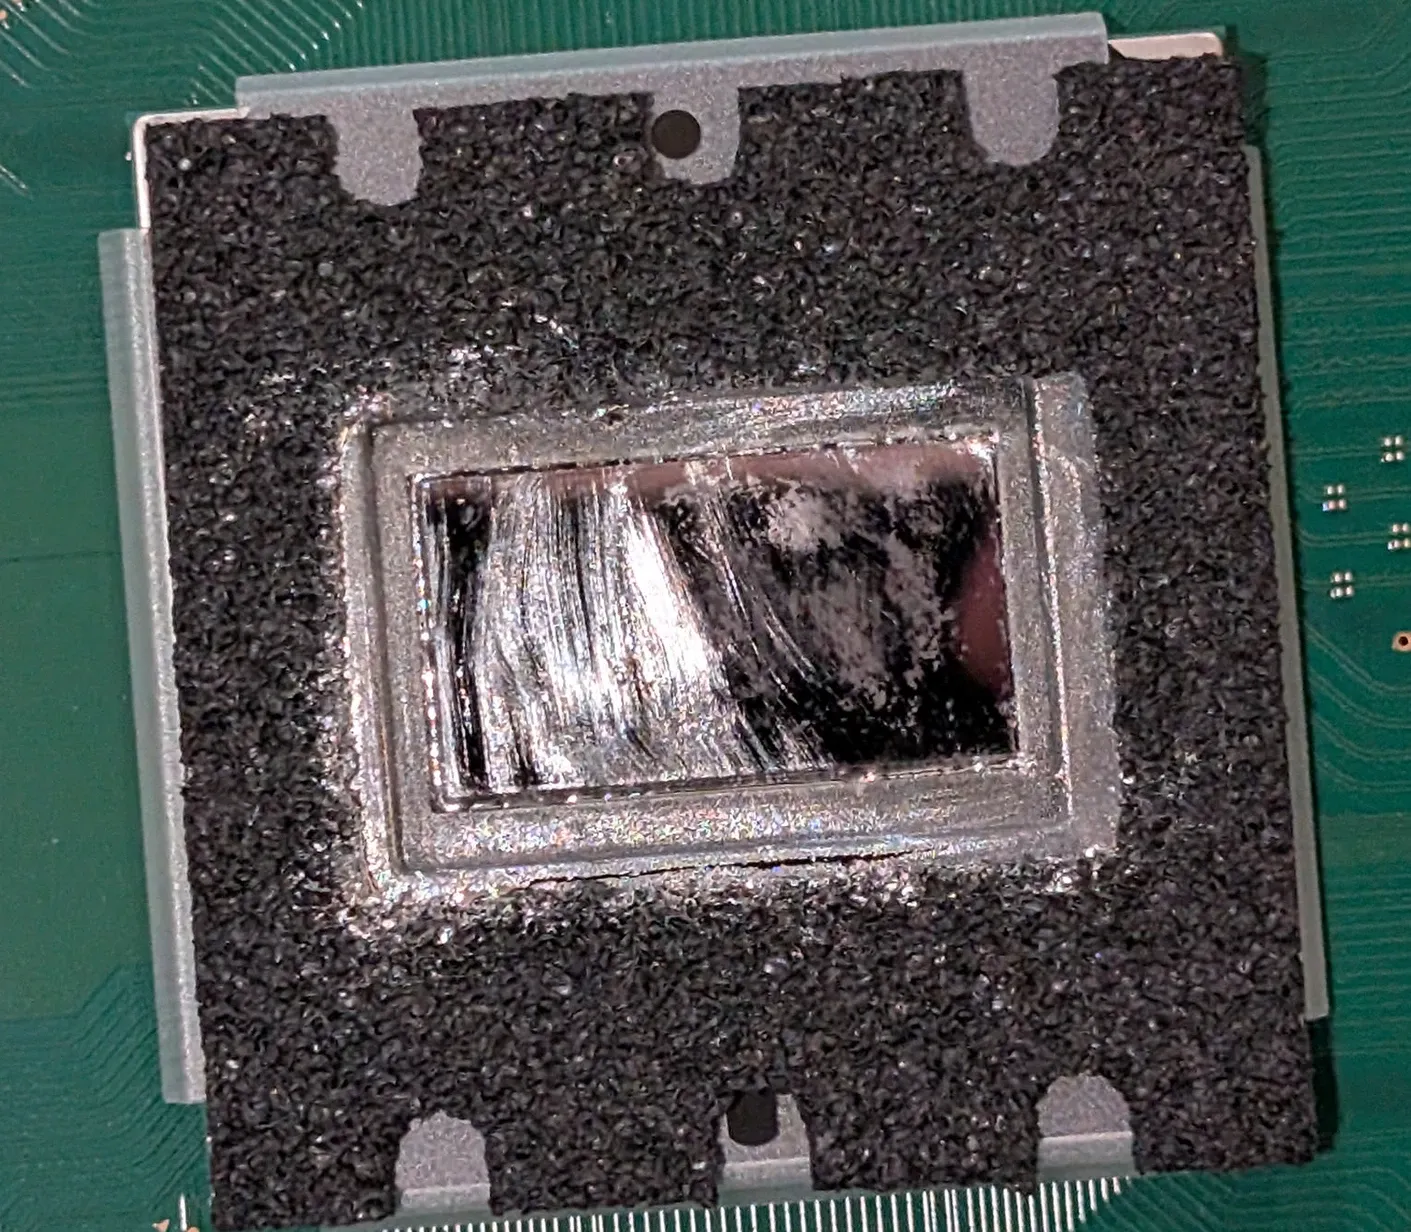
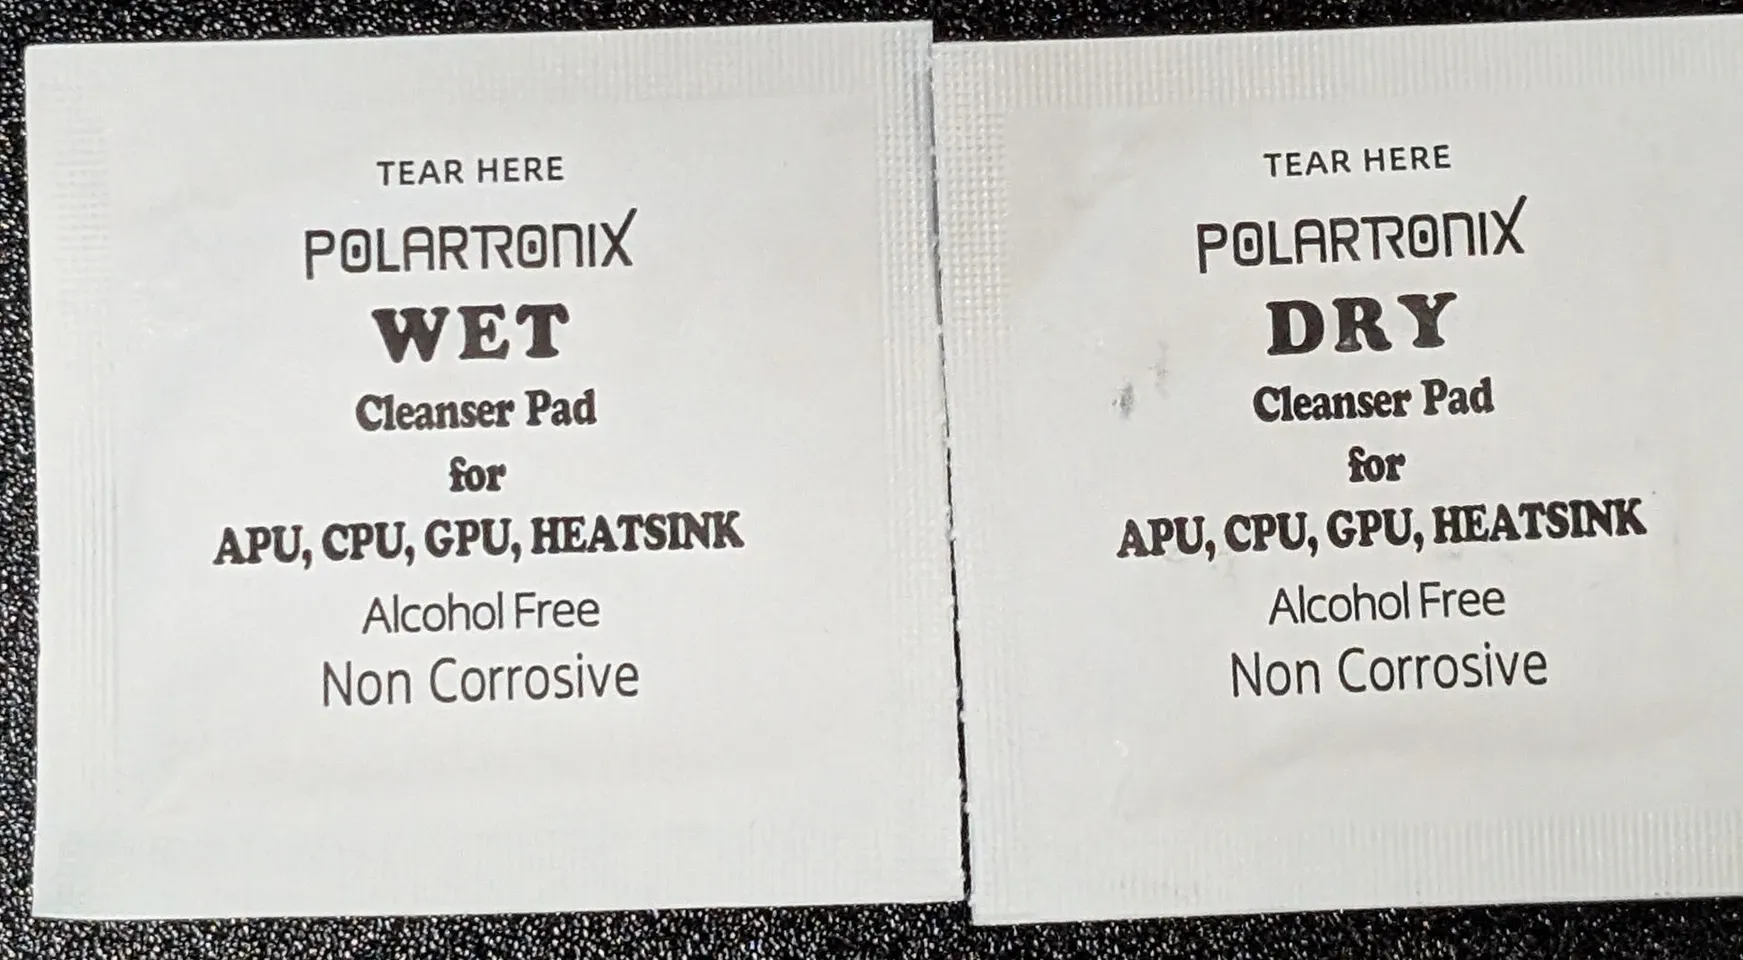
This is how it looked after my first attempt, trying to clear the bulk of the old liquid off. I wasn't entirely happy with this; not clean enough. So I ripped open the included cleaning wipes that came with the Polartronix Liquid Metal replacement kit.
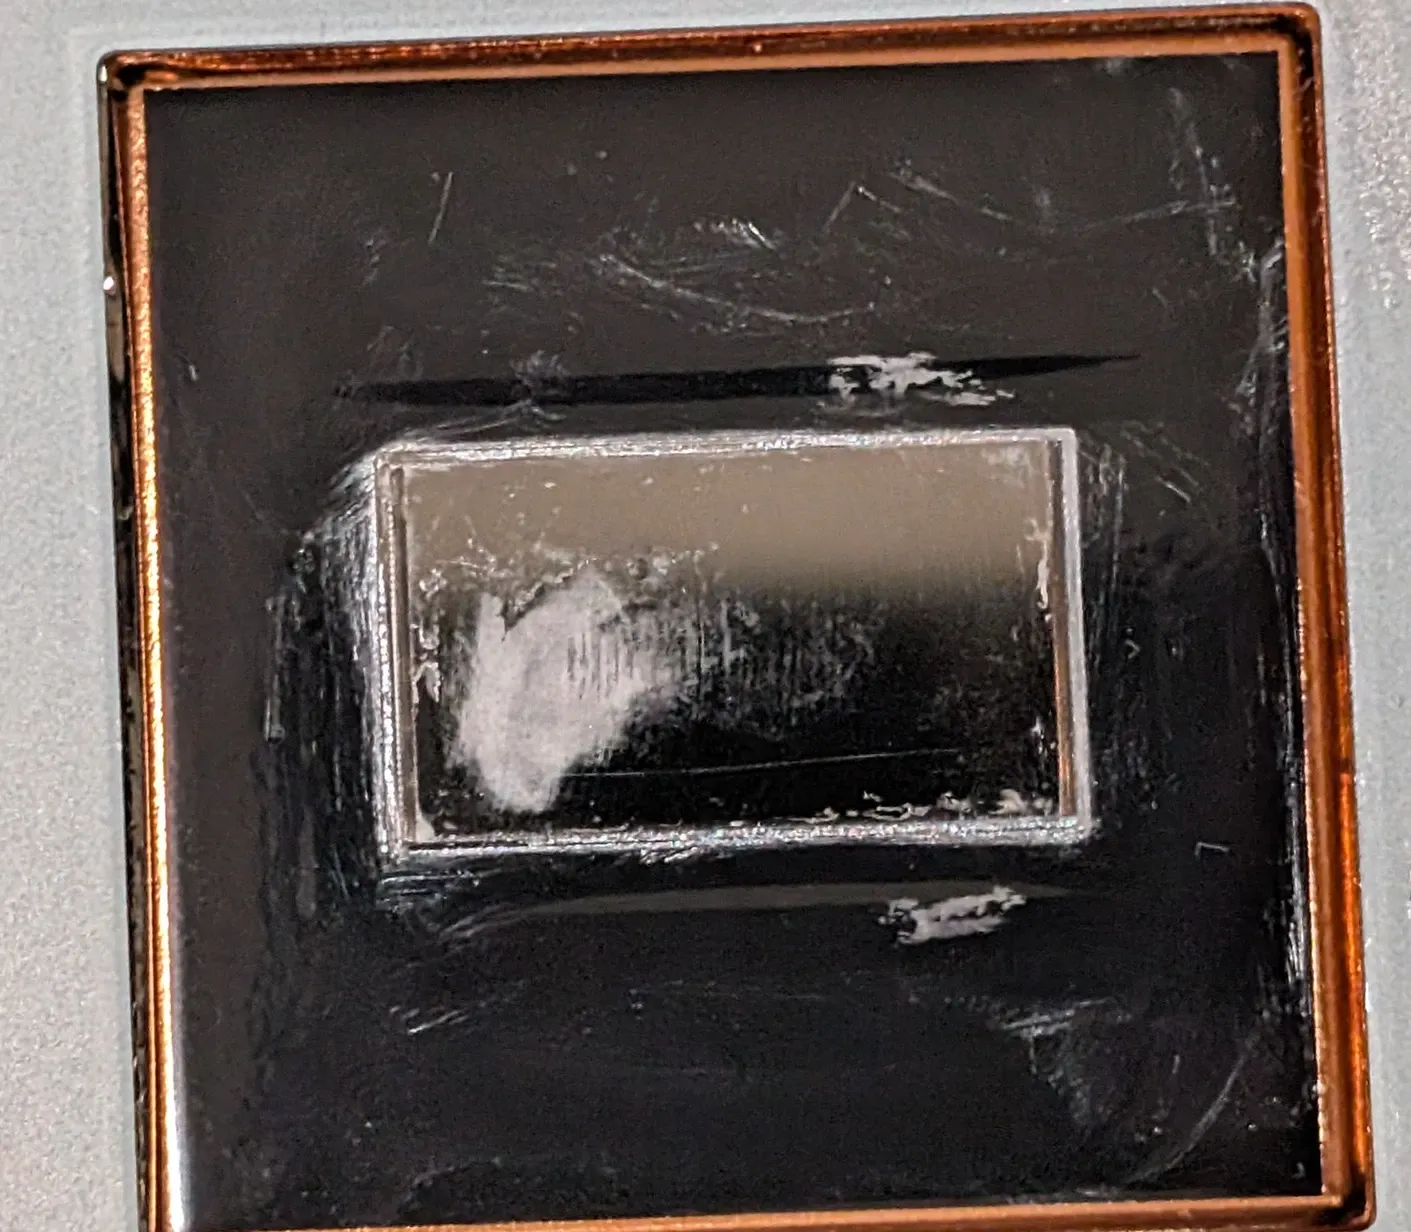
After carefully using these, and giving things time to dry off completely, much better result! However that hotspot / scratched spot on the APU remains, regardless. Nothing I can do about that except ensure it's covered lovingly by new liquid metal.
- Applying New Liquid Metal: Carefully apply a small drop of fresh liquid metal (like the PolarTronix or Thermal Grizzly etc ) to the center of the APU die. Using the specialized black Q-tip provided with the syringe, gently "paint" the liquid metal until it forms a perfect, ultra-thin, mirror-like layer across the entire silicon die. Repeat this process for the cold plate on the heatsink. You do not need very much liquid metal for this. Far less than I originally thought!
Here's the 'drop' I put on the APU and this was almost too much! Notice how the liquid metal stays as a 'bead' on the die? It reminds me of mercury from thermostats and such.
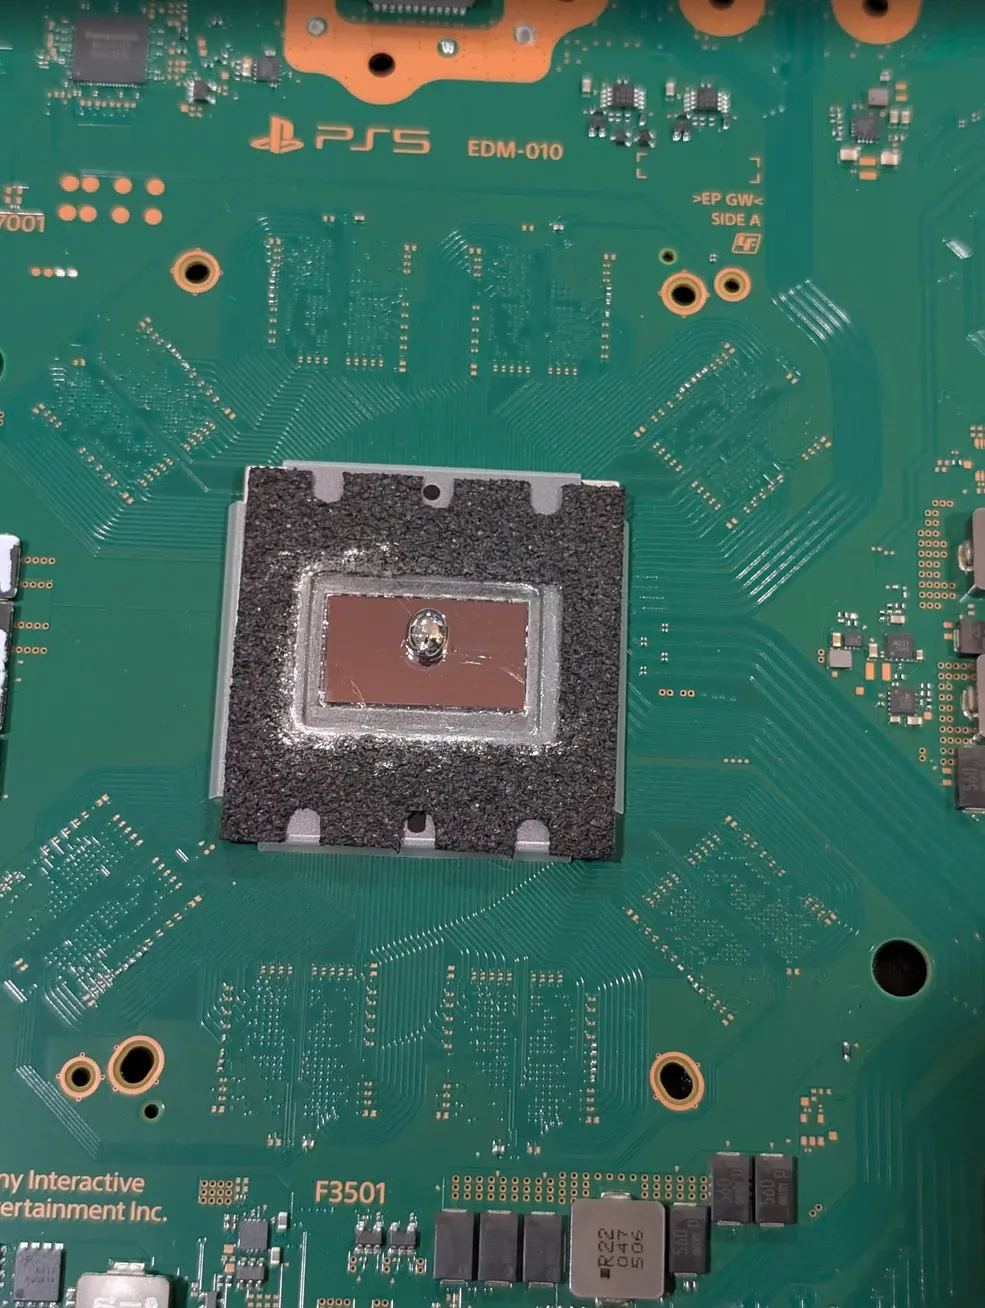
Once I painted it on, here's how this looked. Probably could have been a bit better in after-thought, but it seems to have worked out wonderfully.
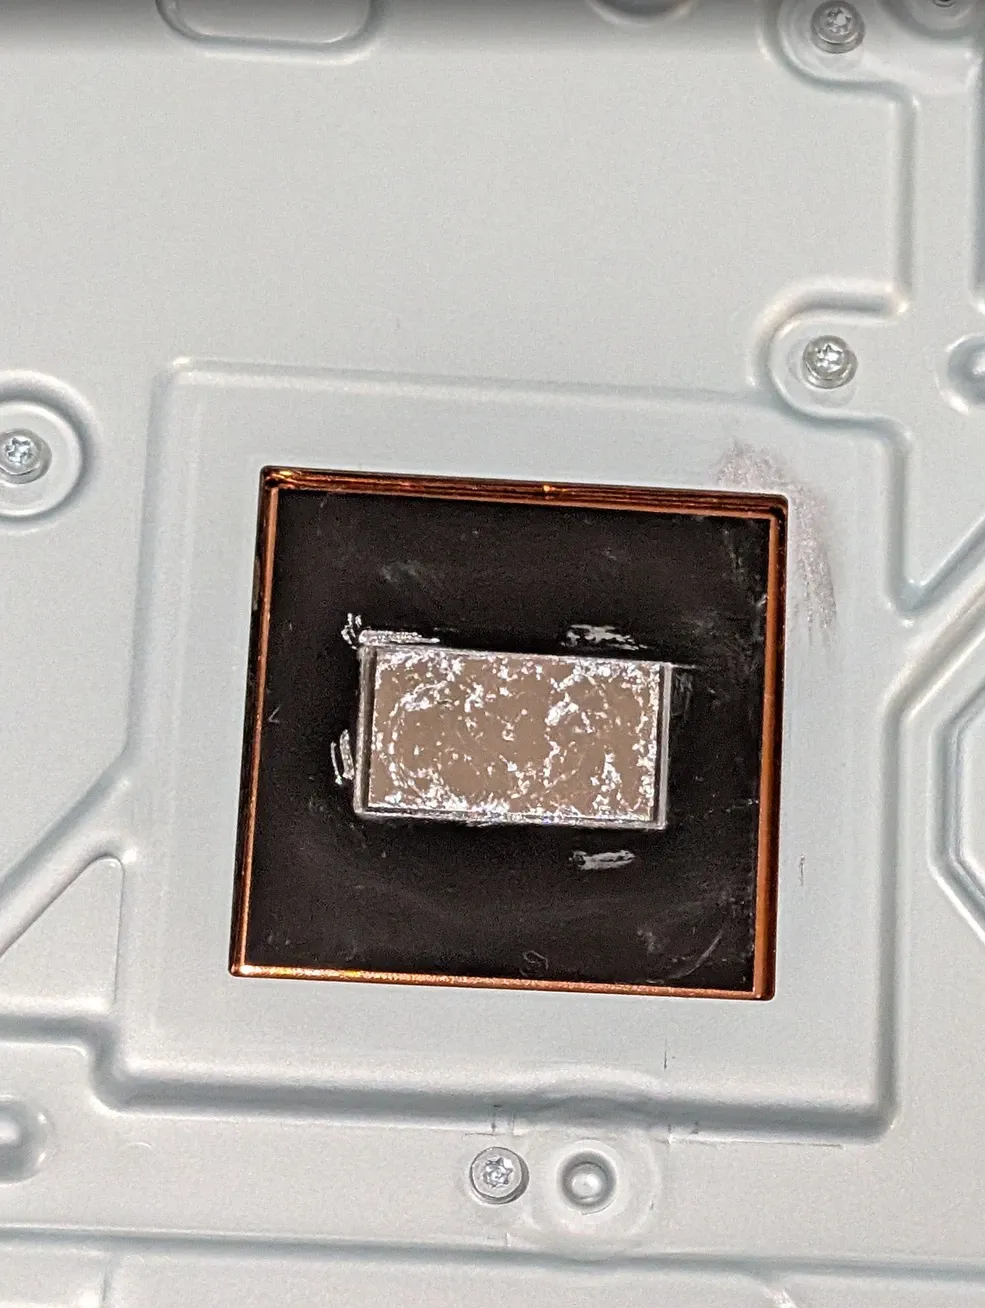
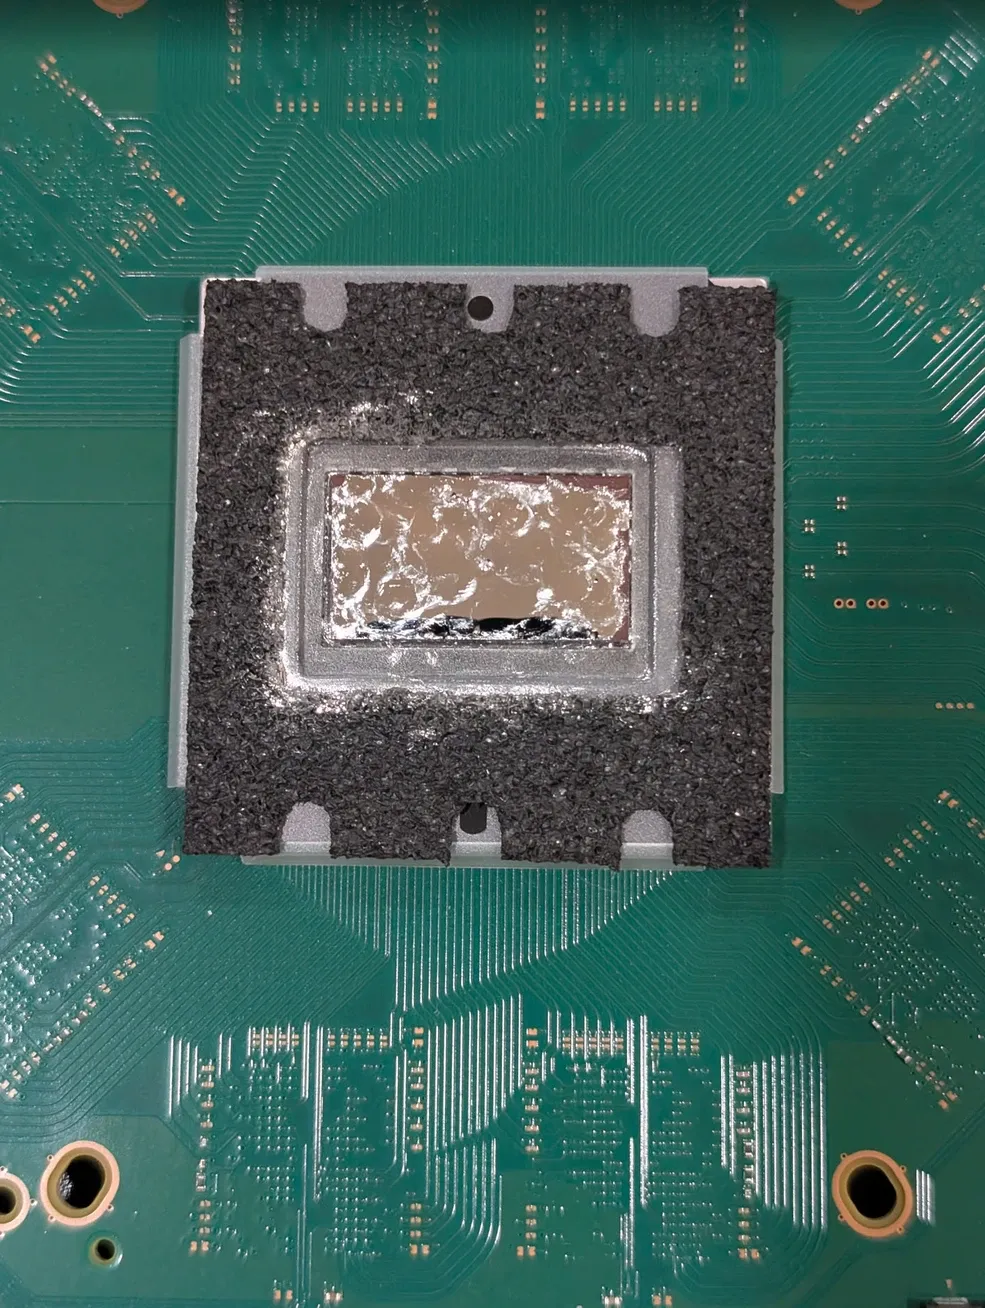
PS5 APU (both sides) with liquid metal having been 'painted' on and spread around.
Part 3 - Reassembly and the 4K Stress Test
Reassembly is exactly the reverse. The key friction points to watch out for:
- Ensure the liquid metal foam barrier is properly seated before laying the motherboard back onto the heatsink. This foam prevents the conductive liquid metal from bridging electrical components.
- Do not over-tighten the APU clamping bracket; it requires even, firm pressure.
- Remember to lock the optical drive ribbon cable back down and route the Wi-Fi antennas exactly as they were.
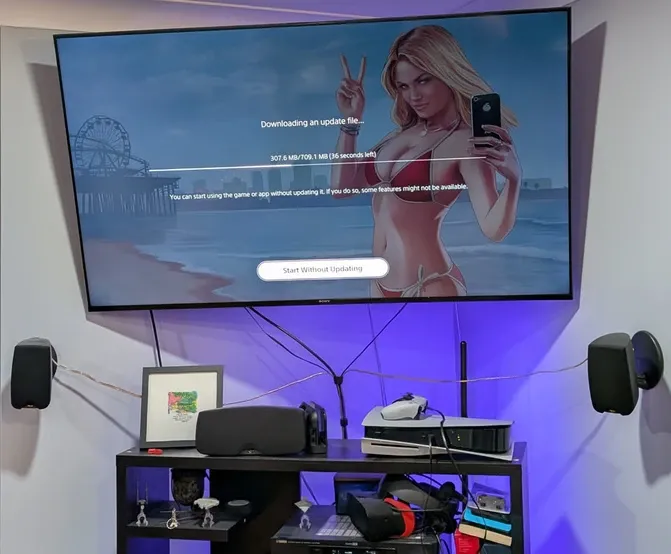
The results speak for themselves. Before this deep clean and liquid metal replacement, the console was repeatedly suffering from hard thermal shutdowns, within minutes. Now, even when pushing 4K graphics at high framerates on demanding titles, the PS5 purrs like a kitten. The new fan and fresh thermal interface material have completely restored the thermal engineering Sony originally designed.
PS5 Teardown & Repair FAQ
If you run into any issues that my guide isn't clear enough on or can't solve, jump on over to iFixIt's PS5 teardown. It is labratorily detailed and should cover the gaps ;)
Do I need to replace the liquid metal when I open my PS5?
Not necessarily, but if your console is overheating and the heatsink is clear of dust, the factory liquid metal has likely oxidized or pooled due to gravity. This leaves dry, uncooled spots on the APU. Scrubbing the old material off and applying a fresh, even coat ensures optimal thermal transfer.
Can I use regular thermal paste instead of liquid metal on a PS5?
Absolutely not! Sony specifically engineered the PS5's thermal profile around the extremely high thermal conductivity of liquid metal. Traditional thermal paste cannot transfer heat fast enough for the dense PS5 APU, and applying it will cause the console to overheat and trigger a thermal shutdown almost instantly.
Is liquid metal electrically conductive?
Yes, highly. You must be incredibly careful when applying it (like Thermal Grizzly Conductonaut). If a stray drop touches any surface-mounted components on the motherboard, it will instantly short-circuit and kill your console. Always ensure the protective foam barrier is seated correctly around the APU before reassembly.
Written by
On this page
What's Next?


News from Core Lab: Theme Upgrades & PC Builds & Overhauls
Happy Friday! If things look a little different around here, it's because Core Lab just underwent a massive infrastructure upgrade on the front end. I've migrated the site to a new premium theme designed specifically to fix some of the UX friction you've experienced, when reading massive 3,000-5,000-word guides on small screens. A staggering 84% of Core Lab visitors are hitting the site on laptops or mobile devices, so it made sense to switch to something even more modest-screen friendly. As al