
Self-Hosting Vaultwarden Securely (Complete 2026 Guide)

If you don't own your passwords, you don't own your digital life.
Self-hosting your password manager sounds like the ultimate privacy win, until you realize one mistake can expose your entire digital life.
Vaultwarden is lightweight, fast, and incredibly popular in the homelab world. But most guides stop at “it works” and completely ignore the part that actually matters: security!
In this guide, you’re not just spinning up Vaultwarden - you’re building a hardened, production-grade password vault using SWAG, Fail2Ban, CrowdSec WAF, encryption in transit, backups and proper network design. Welcome to Core Lab, where we don't half ass something as serious as your password vault!
Because if you're going to self-host your secrets… it better be done right. This is one of those services you want as protected as you can make it.
LastPass had a breach. 1Password is great but expensive. The only way to ensure your keys to the kingdom are truly safe is to hold them yourself.
I've been running Vaultwarden since LastPass 2018-2019 breech. When the catastrophic breach of 2022 happened, I shook my head and advised some fellow nerd friends who hadn't made the jump yet, to do just that. I publicly exposed it in 2021 via my SWAG reverse proxy.
It places the encrypted database on your storage.
Is It Safe to Self-Host Vaultwarden❓ (Read this First)
Yes, if setup & secured properly behind a firewall, served with a reverse proxy and https, and MFA, it's plenty safe.
I've been self-hosting my instance of Vaultwarden since 2021 and have not had a single issue. If you simply port-forward it directly to the internet with no reverse proxy in front, for all the bots to poke at, you will likely run into an issue!
As a Core Lab tweak, we also lock down the admin page to our LAN only, via our reverse proxy which really solidifies the setup.
🏗️ Architecture: How a Secure Vaultwarden Setup Should Look
We are deploying a "Sidecar" stack:
- Vaultwarden: The server itself.
- Vaultwarden-Backup: A specialized container that encrypts the database and sends it to the cloud (Rclone) or local NAS automatically.
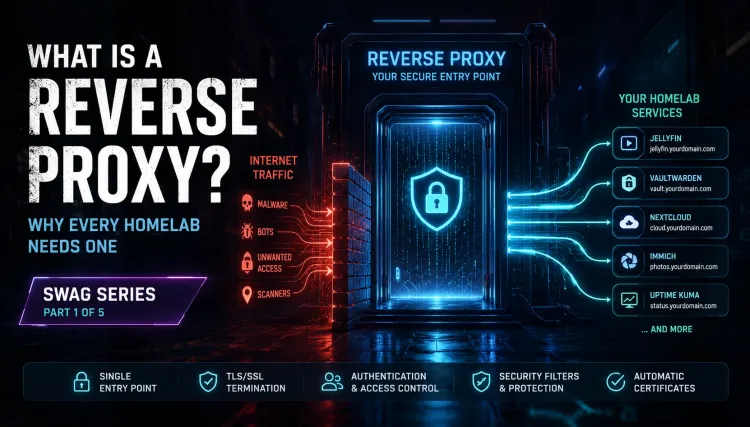
- SWAG (Reverse Proxy): The gatekeeper that provides Fail2Ban and CrowdSec & optionally, geoblocking protection. I prefer to handle the geoblocking upstream however with CloudFlare.
🔐 Vaultwarden Hardened Architecture
flowchart TD

%% Internet Layer
User["🌍 User / Client
Browser • Mobile App"]

CF["☁️ Cloudflare
DNS • WAF • DDoS"]

%% Network Edge
OPN["🔥 OPNsense Firewall
NAT • VLANs • Rules"]

%% Reverse Proxy Layer
SWAG["🌐 SWAG (Nginx)
Reverse Proxy"]

F2B["🚫 Fail2Ban
IP Banning"]
CS["🛡️ CrowdSec
Threat Intelligence"]
AUTH["🔐 Authelia
SSO / 2FA"]

%% Application Layer
VW["🔑 Vaultwarden
Password Vault"]

%% Flow
User --> CF
CF --> OPN
OPN --> SWAG

SWAG --> VW

%% Security integrations
SWAG --> F2B
SWAG --> CS
SWAG --> AUTH

AUTH --> VW

%% Optional internal access
LAN["🏠 Internal Access
LAN / VPN"]
LAN --> SWAG

%% Clickable nodes (replace or keep)
click CF "https://corelab.tech/cloudflare-protection-free/"
click OPN "https://corelab.tech/opnsensept1/"
click SWAG "https://corelab.tech/swag-reverse-proxy-guide/"
click VW "https://corelab.tech/digital-vault-self-hosting-vaultwarden/"
click AUTH "https://corelab.tech/digital-castle-swag-crowdsec-authelia/#3-authelia-centralized-multi-factor-authentication-authorization"
click CS "https://corelab.tech/digital-castle-swag-crowdsec-authelia/#%F0%9F%9B%A1%EF%B8%8F-explainer-crowdsec-the-watchmen"
click F2B "https://corelab.tech/swag-nginx-security-hardening-guide/"
Vaultwarden is never exposed directly to the internet - every request is filtered, inspected, and authenticated before it ever reaches your vault.
How This Setup Aligns with Real-World Security Standards (SOC 2, NIST, CCCS)
Self-hosting Vaultwarden isn’t just about convenience or control - when properly secured, it can align closely with recognized cybersecurity frameworks like SOC 2, NIST, and guidance from the Canadian Centre for Cyber Security (CCCS).
While a homelab setup won’t make you “compliant” on its own, the architecture you’ve built here follows many of the same core security principles used in enterprise environments.
Access Control (SOC 2 CC6 / NIST AC Controls)
By placing Vaultwarden behind Authelia with enforced 2FA, you’re implementing strong identity and access management:
- Multi-factor authentication (2FA)
- Centralized authentication (SSO)
- Session control before app access
This directly maps to:
- SOC 2 CC6 (Logical Access Controls)
- NIST 800-53 AC (Access Control family)
👉 If you're looking to align password policies with compliance requirements, that linked guide (the highlighted text, or link below) is your go-to:
https://www.secureleap.tech/blog/soc-2-password-requirements
Network Security & Boundary Protection (SOC 2 CC5 / NIST SC-7)
Your layered approach:
- Cloudflare (edge filtering + WAF)
- OPNsense (firewall + VLAN segmentation)
- SWAG (reverse proxy isolation)
…ensures Vaultwarden is never directly exposed.
This aligns with:
- SOC 2 CC5 (System Operations & Protection)
- NIST SC-7 (Boundary Protection)
Threat Detection & Response (SOC 2 CC7 / NIST SI-4)
With CrowdSec and Fail2Ban in place:
- Brute-force attacks are blocked automatically
- Known malicious IPs are denied preemptively
- Logs can be monitored and acted upon
This reflects:
- SOC 2 CC7 (Monitoring & Detection)
- NIST SI-4 (System Monitoring)
Encryption & Secure Transport (SOC 2 CC6.7 / NIST SC-12)
Using SWAG with enforced HTTPS ensures:
- All traffic is encrypted in transit
- Certificates are properly managed (e.g., Let’s Encrypt)
This supports:
- SOC 2 CC6.7 (Encryption Controls)
- NIST SC-12 (Cryptographic Protection)
Least Privilege & Attack Surface Reduction
By design:
- Vaultwarden is not publicly exposed
- Only SWAG handles inbound traffic
- Admin access can be restricted or disabled
This follows a core principle across all frameworks:
- Minimize exposure
- Reduce attack surface
- Enforce least privilege
What This Doesn’t Cover (Important Reality Check)
This setup gets you technically aligned, but not fully compliant.
You still need:
- Audit logging & retention policies
- Formal access reviews
- Backup and disaster recovery procedures
- Documented security policies
Compliance frameworks are as much about process and documentation as they are about technology.
Should You Expose Vaultwarden to the Internet?
For ultimate utility (ease of use) and functionality, a say resoundingly, YES. Again the nuance here is that you must secure it properly, that's what this guide, and this site moreso is specifically setup to help you with.
I said something similar above, but again, I have been self-hosting this service for years and have never been 'breached' or my passwords stolen. When you utilize a firewall like OPNsense, a reverse proxy and lock down the admin page, there's simply far easier targets to go for.
What are the benefits?
- Automatic sync of all your devices (phone, laptop, tablet etc) to your instance!
- Access to save new passwords / credentials from anywhere.
- No reliance on paid Corpo password managers. You save some money, and gain privacy!
- Fully encrypted in transit communications (HTTPS, TLS 1.2/1.3 w/HSTS!)
Common Mistakes That Will Get You Compromised
- Exposing the container directly to the internet (raw port forwarding)
- Having a very weak admin token and/or password
- No rate limiting (brute force protection)
- No logs / monitoring of any kind!
This is basically all mitigated by setting up SWAG reverse proxy properly from the start, which you can then utilize for multiple other services as your self-hosted lab grows.
 Core Lab Joe
Step 1 - Step-by-Step Deployment of Vaultwarden with Docker 🐳
Create a new folder vaultwarden and a file docker-compose.yml.
Here is the comparison and the two specific versions of the config (below).
🥊 The Showdown: Bind vs. Volume
| Feature | Bind Mounts (./data:/data) | Docker Volumes (my_vol:/data) |
| Location | You decide (e.g., ./vaultwarden/data) | Hidden in /var/lib/docker/volumes/... |
| Visibility | You can see files with ls or FileZilla. | You need root access or specific docker commands. |
| Backups | Easy: Just copy the folder. | Harder: Requires docker run commands to export. |
| Permissions | Can be tricky (User ID mapping). | Managed automatically by Docker. |
| Verdict | Winner for Homelabs. | Winner for Enterprise Clusters. |
📂 Option A: The "Bind Mount" Version (Recommended)
This is what I use in all my guides & my own tech stack. It creates a folder vw-data right next to your docker-compose.yml file.
services:
  vaultwarden:
    image: vaultwarden/server:latest
    container_name: vaultwarden
    volumes:
      # BIND MOUNT SYNTAX:
      # ./host_path:container_path
      - ./vw-data:/data  # <--- This is the Bind Mount
Why this wins: If your server catches fire, you just grab the vw-data folder, move it to a new server, and run docker compose up. You are back online in 10 seconds.
📦 Option B: The "Docker Volume" Version (Abstracted)
Use this if you don't care where the data lives and want Docker to manage permissions perfectly.
services:
  vaultwarden:
    image: vaultwarden/server:latest
    container_name: vaultwarden
    volumes:
      # VOLUME MOUNT SYNTAX:
      # volume_name:container_path
      - vw_vol:/data  # <--- This references the volume below

# You must define the volume at the bottom
volumes:
  vw_vol:
The Catch: To back this up, you can't just copy a folder. You have to use a tool (like the vaultwarden-backup container we will use) or run a command like: docker run --rm -v vw_vol:/volume -v $(pwd):/backup alpine tar cvf /backup/backup.tar /volume
🏆 Core Lab Recommendation
Stick to Bind Mounts (Option A). For a "Digital Fortress/FOB," you want to be able to pull your USB drive, plug it into any laptop, and see your db.sqlite3 file immediately without needing to install Docker just to inspect the data structure.
Option A - Bind Mount Compose:
  vaultwarden:
    image: vaultwarden/server:latest
    container_name: vaultwarden
    networks:
      your_docker_net:
        ipv4_address: IP_Youpicked
    #   depends_on: # Next two lines optional!
#          - swag
    environment:
      - DOMAIN=https://vaultwarden.your_domain.com
      - WEBSOCKET_ENABLED=true
      - EMAIL_EXPIRATION_TIME=600
      - ADMIN_TOKEN=${VAULTWARDEN_ADMIN_TOKEN}
      - ENCRYPTION_PASSWORD=MyStrongBackupPassword123! # TURNS ON ENCRYPTION, optional
      - INVITATIONS_ALLOWED=false
      - LOGIN_RATELIMIT_MAX_BURST=10
      - LOGIN_RATELIMIT_SECONDS=60
      - ADMIN_RATELIMIT_MAX_BURST=10
      - ADMIN_RATELIMIT_SECONDS=60
      - SENDS_ALLOWED=true
      - EMERGENCY_ACCESS_ALLOWED=false
      - WEB_VAULT_ENABLED=true
      - SIGNUPS_ALLOWED=false
      - SIGNUPS_VERIFY=true
      - SIGNUPS_VERIFY_RESEND_TIME=3600
      - SIGNUPS_VERIFY_RESEND_LIMIT=5
      - SIGNUPS_DOMAINS_WHITELIST=your_domain.com
    volumes:
      - /opt/DOCKERS/vaultwarden/vw_data:/data
    ports:
      - 8080:80 # Comment this out when using SWAG/reverse proxy
      - 80:80
    restart: unless-stopped

  # Backups for our new vault!
  vw_backup:
    image: bruceforce/vaultwarden-backup
    container_name: vw-backup
    restart: unless-stopped
    init: true
    volumes:
      - /opt/DOCKERS/vaultwarden/vw_data:/data/
      - /opt/DOCKERS/vaultwarden/vw_data:/backups/
      - /opt/DOCKERS/vaultwarden/vw_data:/logs/
    environment:
      - BACKUP_DIR=/home/yourusername/docker_backups/vw_backups
      #- BACKUP_DIR=/mnt/NAS/vw_backups # ⚠️ Can be to a network loction etc
      - LOG_DIR=/logs/
      - CRON_TIME=0 5 * * *
      - DELETE_AFTER=30
      - TIMESTAMP=true
      - UID=0 # enter user that has docker permission
      - GID=0 # enter group ID for docker
      - BACKUP_ADD_DATABASE=true    # Optional but I use this
      - BACKUP_ADD_ATTACHMENTS=true # Optional but I use this
      - BACKUP_ADD_CONFIG_JSON=true # Optional but I use this
      - BACKUP_ADD_ICON_CACHE=true  # Optional but I use this
      - BACKUP_ADD_RSA_KEY=true     # Optional but I use this
      - LOG_LEVEL=INFO
      - TZ=America/Toronto
Key Explanations
ENCRYPTION_PASSWORD: Defining this variable is what "turns on" the encryption. The backup script detects this variable and uses it to encrypt the resulting archive (usually.tar.xz.gpgor similar). Do not lose this password; without it, your backups are unrecoverable.- Volumes:
./vw-data:/data/: Both containers must (critical❗) map to the exact same host directory for the data volume. The backup container needs direct file access to the Vaultwarden database to back it up safely../backup:/backup/: This is where your encrypted backup files will appear on your host machine.
init: true: This is recommended for the backup container to ensure proper signal handling (like stopping the process gracefully).
If you want to try a different container for vaultwarden backups, here's another viable choice which includes usage of rclone:
  # The Safety Net: Encrypted Backups
  vaultwarden-backup:
    image: ttionya/vaultwarden-backup:latest
    container_name: vaultwarden-backup
    restart: unless-stopped
    depends_on:
      - vaultwarden
    environment:
      - CRON=0 5 * * * # Runs every day at 5:00 AM
      - ZIP_ENABLE=TRUE       # Zips the backup
      - ZIP_PASSWORD=CHANGE_THIS_PASSWORD # ⚠️ Encrypts the zip file
      - BACKUP_KEEP_DAYS=30
      # Optional: Rclone settings for Cloud Uploads
      # - RCLONE_REMOTE_NAME=BitwardenBackup
    volumes:
      # SOURCE: Must match the Vaultwarden data folder exactly
      - ./vw-data:/bitwarden/data
      # DESTINATION: Where the .zip backups will land on your Host
      - ./backup:/bitwarden/backup
📂 What happens when you run this?
Unlike Docker Volumes (which hide your data), this config creates visible folders on your server:
/home/user/vaultwarden/
├── docker-compose.yml
├── vw-data/              <-- Your LIVE Database lives here (Don't touch while running!)
│   ├── db.sqlite3
│   ├── attachments/
│   └── sends/
└── backup/               <-- Your ZIP Backups appear here
    ├── backup-2026-01-06.zip
    └── backup-2026-01-07.zip
Option B - Volume Mount Compose:
Note: Replace ADMIN_TOKEN with a long generated string (use openssl rand -base64 48).
services:
  vaultwarden:
    image: vaultwarden/server:latest
    container_name: vaultwarden
    restart: unless-stopped
    environment:
      - WEBSOCKET_ENABLED=true  # Crucial for instant sync across devices
      - SIGNUPS_ALLOWED=true    # Change to FALSE after creating your account
      - ADMIN_TOKEN=YOUR_LONG_RANDOM_TOKEN_HERE
      - INVITATIONS_ALLOWED=false
      - SHOW_PASSWORD_HINT=false
    volumes:
      - ./vw-data:/data
    ports:
      # We only expose this to the internal docker network usually,
      # but if testing locally map it. Better to leave closed and use SWAG.
      - 8080:80

  # The Safety Net: Encrypted Backups w/volume mount
  vaultwarden-backup:
    image: ttionya/vaultwarden-backup:latest
    container_name: vaultwarden-backup
    restart: unless-stopped
    environment:
      - CRON=0 5 * * * # Runs every day at 5:00 AM
      - ZIP_ENABLE=TRUE          # Zips the backup
      - ZIP_PASSWORD=YOUR_BACKUP_PASSWORD # Encrypts the zip file
      - BACKUP_KEEP_DAYS=30
      # Optional: Rclone settings if you want to push to cloud
      # - RCLONE_REMOTE_NAME=BitwardenBackup
    volumes:
      - ./vw-data:/bitwarden/data  # Must match the volume above
      - ./backup:/bitwarden/backup # Local backup location
    depends_on:
      - vaultwarden
🚀 Deploy It
Run docker compose up -d. Go to http://YOUR-SERVER-IP:8080 immediately and create your account. Once created, go back to the Compose file, set SIGNUPS_ALLOWED=false, and redeploy with docker compose up -d --force-recreate vaultwarden.
🔒 Step 2: Secure It Properly (Critical Hardening Steps)
Exposing your password manager to the internet sounds scary. That is why we use SWAG.
🛡️ Enforce HTTPS with SWAG / Why This Rocks
By placing this behind SWAG, you automatically gain the benefits of our [Fortress Guide]:
- Fail2Ban: Bans IPs that spam login attempts.
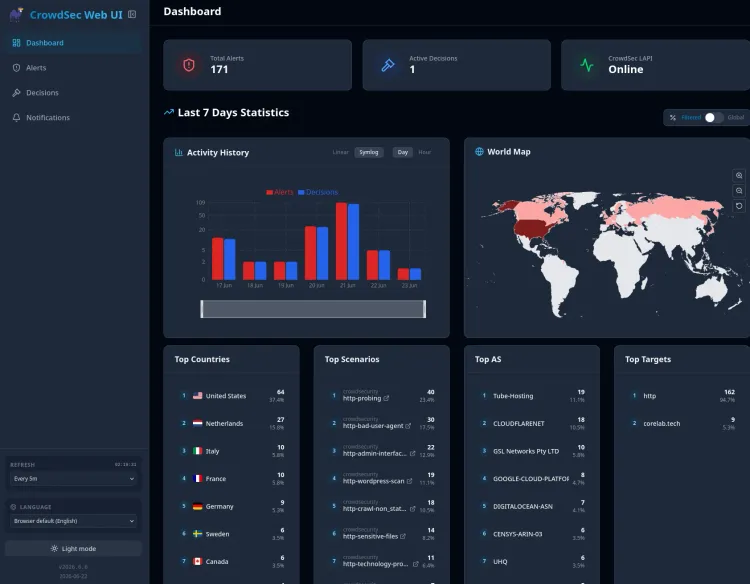
- CrowdSec: Pre-emptively blocks known bad malicious actors.
- Geoblocking: If you only travel in the Canada/US or wherever, you can block the rest of the world. Basically you can lock it down to JUST your home country. I use Cloudflare for Geoblocking however.
We are going to configure Nginx to:
- Serve the site publicly (so your phone works on LTE).
- BLOCK the
/adminportal for everyone except your home network!
First, if you don't have SWAG itself running yet, head over to the setup guide for that and then pop back over here.👇
Core Lab Joe
Don't skip out on setting your reverse proxy up right! This is likely one of the most important / critical services you will self-host, you want it locked down!
File: /swag/nginx/proxy-confs/vaultwarden.subdomain.conf this is directly from their (SWAG) Github.
## Version 2025/07/18
# make sure that your vaultwarden container is named vaultwarden
# make sure that your dns has a cname set for vaultwarden
# if you are using bitwarden (the official image), use the bitwarden conf
# if you are using vaultwarden (an unofficial implementation), use the vaultwarden conf
#
# vaultwarden defaults to port 80 and can be changed using the environment variable ROCKET_PORT on the vaultwarden container

server {
    listen 443 ssl;
#    listen 443 quic;
    listen [::]:443 ssl;
#    listen [::]:443 quic;

    server_name vaultwarden.*;

    include /config/nginx/ssl.conf;

    client_max_body_size 128M;

    # enable for ldap auth (requires ldap-location.conf in the location block)
    #include /config/nginx/ldap-server.conf;

    # enable for Authelia (requires authelia-location.conf in the location block)
    #include /config/nginx/authelia-server.conf;

    # enable for Authentik (requires authentik-location.conf in the location block)
    #include /config/nginx/authentik-server.conf;

    # enable for Tinyauth (requires tinyauth-location.conf in the location block)
    #include /config/nginx/tinyauth-server.conf;

    location / {
        # enable the next two lines for http auth
        #auth_basic "Restricted";
        #auth_basic_user_file /config/nginx/.htpasswd;

        # enable for ldap auth (requires ldap-server.conf in the server block)
        #include /config/nginx/ldap-location.conf;

        # enable for Authelia (requires authelia-server.conf in the server block)
        #include /config/nginx/authelia-location.conf;

        # enable for Authentik (requires authentik-server.conf in the server block)
        #include /config/nginx/authentik-location.conf;

        # enable for Tinyauth (requires tinyauth-server.conf in the server block)
        #include /config/nginx/tinyauth-location.conf;

        include /config/nginx/proxy.conf;
        include /config/nginx/resolver.conf;
        set $upstream_app vaultwarden;
        set $upstream_port 80;
        set $upstream_proto http;
        proxy_pass $upstream_proto://$upstream_app:$upstream_port;

    }

    location ~ ^(/vaultwarden)?/admin {
        # enable the next two lines for http auth
        #auth_basic "Restricted";
        #auth_basic_user_file /config/nginx/.htpasswd;

        # enable for ldap auth (requires ldap-server.conf in the server block)
        #include /config/nginx/ldap-location.conf;

        # enable for Authelia (requires authelia-server.conf in the server block)
        #include /config/nginx/authelia-location.conf;

        # enable for Authentik (requires authentik-server.conf in the server block)
        #include /config/nginx/authentik-location.conf;

        # enable for Tinyauth (requires tinyauth-server.conf in the server block)
        #include /config/nginx/tinyauth-location.conf;

        # if you enable admin page via ADMIN_TOKEN env variable
        # consider restricting access to LAN only via uncommenting the following lines
        #allow 10.0.0.0/8;
        #allow 172.16.0.0/12;
        #allow 192.168.0.0/16;
        #deny all;

        include /config/nginx/proxy.conf;
        include /config/nginx/resolver.conf;
        set $upstream_app vaultwarden;
        set $upstream_port 80;
        set $upstream_proto http;
        proxy_pass $upstream_proto://$upstream_app:$upstream_port;

    }

    location ~ (/vaultwarden)?/api {
        include /config/nginx/proxy.conf;
        include /config/nginx/resolver.conf;
        set $upstream_app vaultwarden;
        set $upstream_port 80;
        set $upstream_proto http;
        proxy_pass $upstream_proto://$upstream_app:$upstream_port;

    }

    location ~ (/vaultwarden)?/notifications/hub {
        include /config/nginx/proxy.conf;
        include /config/nginx/resolver.conf;
        set $upstream_app vaultwarden;
        set $upstream_port 80;
        set $upstream_proto http;
        proxy_pass $upstream_proto://$upstream_app:$upstream_port;

    }
}📱 Step 3: Connecting Your Devices
You do not need a special "Vaultwarden" app. You use the official Bitwarden apps.
On iPhone / Android
- Download Bitwarden from the App Store.
- On the Login screen, look for a small Settings (Gear) icon or "Self-Hosted" button.
- Server URL: Enter
https://vaultwarden.yourdomain.com. - Click Save.
- Log in with your email and Master Password.
On BrowserExtensions (Chrome/Firefox)
- Open the Extension.
- Click the Settings (Gear) icon in the top left.
- Under Self-hosted Environment, enter your
https://vaultwarden.yourdomain.com. - Log in with your credentials that you made your first account with.

💾 Step 4: The "Doomsday" Backup
Passwords are critical data. If your server SSD/OS drive dies, you cannot lose this database.
The vaultwarden-backup container we added in Step 1 is your insurance policy.
- How it works: Every night at 5 AM, it gracefully shuts down the database write-mode (briefly), dumps the SQLite file, zips it with a password, and saves it.
- The Pro Move: Map the
./backupvolume to a secondary drive, a NAS mount, or use theRCLONEvariables to send it straight to Google Drive/Dropbox encrypted.
🏁 Final Thoughts: Convenience vs Security Trade-Off
You now have a password manager that is more secure than the commercial alternatives.
- It's Self-Hosted (Data Sovereignty).
- The Admin Portal is invisible to the internet.
- The Database is encrypted and backed up automatically.
This is the cornerstone of your Digital Identity. Treat it with respect and probably save another copy of it somewhere else even!
Next Steps:
- Secure your other apps using the techniques in my [Fortress: SWAG & CrowdSec Guide].👇
 Core Lab Joe
- Learn how to access your Vaultwarden Admin portal remotely using [WireGuard / VPN].👇
 Core Lab Joe
All part of my Cybersecurity Selfhosting roadmap.👇
 Core Lab Joe
Frequently Asked Questions
Is Vaultwarden safe to expose to the internet?
Yes - but only if it’s properly secured behind a reverse proxy, uses HTTPS, and includes protections like rate limiting, intrusion detection (CrowdSec or Fail2ban), and strong authentication. Exposing it directly without these layers is risky.
Is Vaultwarden as secure as Bitwarden?
Vaultwarden uses the official Bitwarden clients and encryption model, but it’s an unofficial server implementation. Security depends heavily on how well you configure and maintain your server.
Do I need a reverse proxy for Vaultwarden?
Yes. A reverse proxy like SWAG adds HTTPS, access control, and protection layers that should never be skipped in a public-facing deployment.
Can I run Vaultwarden without exposing it publicly?
Absolutely. You can keep it internal and access it via VPN (like WireGuard or Tailscale), which is the safest approach.
What’s the biggest risk when self-hosting Vaultwarden?
Misconfiguration. Weak admin access, lack of brute-force protection, or exposing the service directly are the most common causes of compromise.
Member discussion