Installing & Gaming on Pop!_OS (Steam, Lutris & Heroic, ProtonGE)

Level Up Your OS: The Technical Switch from Windows 10/11 to Pop!_OS for Gaming
Enter Pop!_OS. Developed by System76, it's not just another Linux distro; it’s an Ubuntu-based, performance-focused operating system that understands gamers. I'm publishing this in rapid succession right after my post the day before, about the state of gaming on Linux in 2025.
This isn't a "why to switch" article - you already know why. This is a technical, step-by-step guide to prepare your system, install the OS, and immediately get the triumvirate of Linux gaming - Steam, Lutris, and ProtonGE - working flawlessly, complete with critical power and performance optimizations.
Pop!_OS is a derivative of Ubuntu, which itself is derived from Debian, the Linux OS "God" of stability. This post focuses on Pop!_OS V22.04 LTS. A new guide will be made at some point for Cosmic which is V24.04 and currently still in Beta.
📡 Core Lab has since moved on to daily-driving & gaming on CachyOS!
Check out my CachyOS Linux Gaming Guide to see how to plug your API key into Hydra Launcher to download your PC game archives at unrestricted speeds!
Phase 1: Pre-Flight Checklist & Installation
The jump is easy, but preparation is key.
1. Backup Your Data (Non-Negotiable)
Before touching a partition, back-up your critical files! Linux is not Windows, and there is no automatic migration of installed Windows applications. If you chose to install and forgot to back something up, you very well might be really sorry!
This is where it's very very handy to have something to backup to. Depending on how much data you have, maybe all you need is a USB stick? Or you need an external hard drive connected via USB? If you've read anything on this blog yet, you'll know I suggest your own home server and/or NAS of course. If you don't want to roll your own, you have plenty of great options, here's two:

4-Bay NAS! Intel Pentium Gold 8505 5-Core CPU, 8GB DDR5 RAM, 128G SSD, 1 * 10GbE, 1 * 2.5GbE, 2 * M.2 NVMe Slots, 4K HDMI
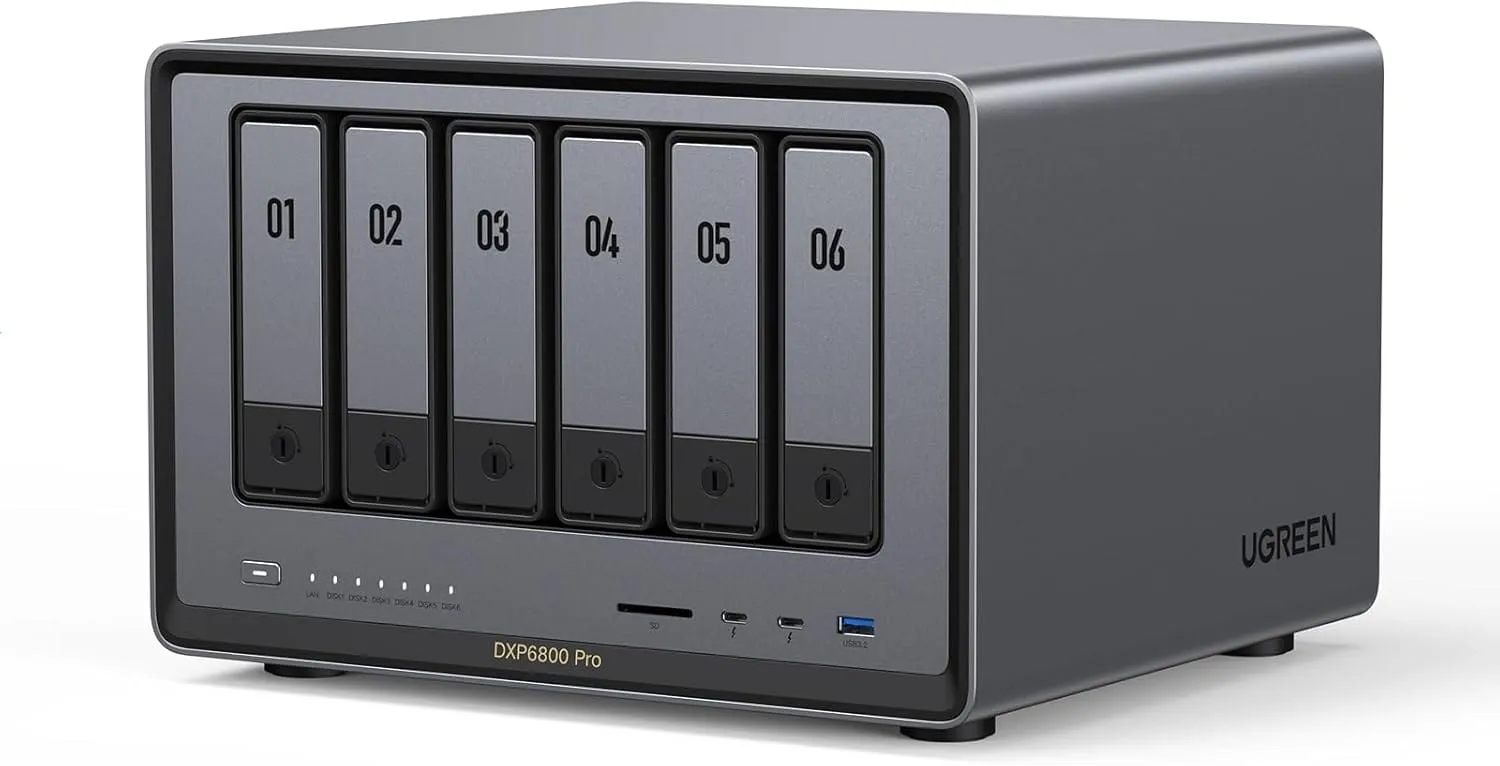
6-Bay Desktop NAS, Intel i5 1235u 10-Core CPU, 8GB DDR5 RAM, 128G SSD, 2 * 10GbE, 2 * M.2 NVMe Slots, 8K HDMI, 2 * TBT4, Network Attached Storage
2. Prepare the Installation Media
- Download the Pop!_OS ISO: Crucially, download the version that matches your GPU:
- NVIDIA: Use the version with the proprietary drivers pre-packaged.
- AMD/Intel: Use the standard version, as drivers are built into the Linux kernel.
- Create Bootable USB: Use a tool like Balena Etcher or Ventoy to flash the ISO to a USB drive (8GB+ and USB3 recommended).

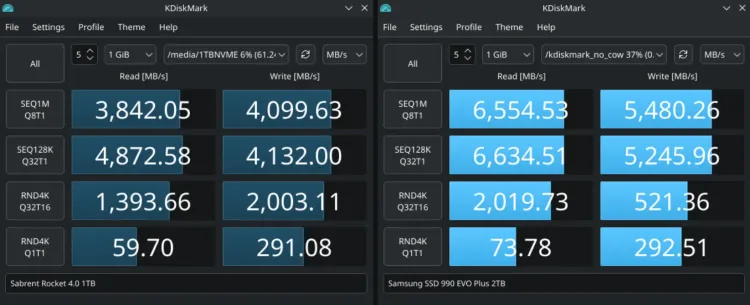
Samsung 990 EVO Plus - 2TB
TB PCIe Gen4. X4 / Gen5. X2 NVMe 2.0 - M.2 Internal SSD, Speed Up to 7,250MB/s, Upgrade Storage for PC/Laptops, HMB Technology and Intelligent Turbowrite (MZ-V9S2T0B/AM)
3. Installation & Partitioning (Dual-Boot or Full Switch)
- For a Full Switch: The installer can wipe your entire drive and install Pop!_OS. Simple, quick and efficient. This is the method I chose.
- For Dual-Boot (Recommended for Testing): You must shrink your Windows partition from within Windows (using Disk Management) to create unallocated space.
- Boot from the USB drive.
- Select the Custom (Advanced) install option.
- Required Partitions in the Unallocated Space (GPT/UEFI):
- /boot/efi: ∼500 MB, FAT32 (If one doesn't already exist from Windows).
- / (Root): 100GB+, Ext4 (This is the main OS install).
- /home: Remainder of space, Ext4 (Your user data, games, and personal files).
- Swap (Optional but Recommended): Equal to your RAM (e.g., 16GB if you have 16GB of RAM), Linux Swap.
Pop!_OS handles the rest. Once installed and rebooted, you'll be running the OS.
🕹️ Tired of Self-Hosting Local Game Servers?
Running games like Palworld, Valheim, or Minecraft locally while you play can tank your system's frame times - even with a tuned GPU. If you want a dedicated, 24/7 world for your crew without hurting your local FPS, check out my Ultimate Linux Gaming Server Setup Guide where we break down the best high-performance VPS providers for lag-free multiplayer.
Phase 2: Core Gaming Configuration
So you've installed it, you have things running, now it's time to see what this OS can do... This is where we turn Pop!_OS into a gaming beast!
1. Update & Drivers (If needed)
Pop!_OS generally handles this for you, but a quick check ensures everything is current.
sudo apt update
sudo apt full-upgrade
2. Install Steam (The Easiest Step)
The Pop!_Shop (the app store) is the easiest way. Open it, search for Steam, and install the native .deb package (not the Flatpak version, as it can complicate Proton compatibility).
Step 1: Type Steam in the Pop!_Shop search bar.

Step 2: Install the .deb package as shown here.

3. Enabling Steam Play (Proton)
- Open Steam.
- Go to Steam > Settings > Compatibility.
- Check "Default compatibility tool" and "Proton Experimental" from the dropdown menu. This is Valve's bleeding-edge version and contains the up to date code to run even brand new games.

4. Installing ProtonGE (The Performance Edge)
For games that struggle with the official Steam Proton, Proton-GE (GloriousEggroll) is the community gold standard for stability and performance. We use ProtonUp-Qt for this.
- Install ProtonUp-Qt: Find it in the Pop!_Shop and install it (it's a GUI app).
- Add ProtonGE: Open ProtonUp-Qt, click "Add Version," and install the latest GE-Proton version.
- Use it in Steam: Restart Steam. Now, for any game, right-click in your Library > Properties > Compatibility, and you can select the newly installed GE-Proton version. ProtonDB.com is your resource for which games need which version.

5. Setting up Lutris & Heroic (Beyond Steam)
Lutris & Heroic Launcher are essential for non-Steam games, Epic Games, GOG, and other launchers. Between Heroic and Lutris, you should be able to run any of those AHEM... Games you're "testing" or have trail versions for... 😏
- Install Lutris: Open the Pop!_Shop, search for Lutris, and install it.
- Installing Runners: Open Lutris. Go to Lutris > Preferences > Runners. You will see entries for Wine and Proton.
- Install Wine-GE: This is the equivalent of ProtonGE for Lutris. In Lutris, click the "Manage Versions" button (usually next to the Wine runner) and install the latest
lutris-GE-x.xversion. - Install Games: Click the '+' icon in Lutris to add a game. For Epic Games, GOG, etc., search the Lutris website for community-maintained installers that handle the setup for you.
- Process is basically the same for Heroic, more or less.

Installing Bottles (For running Windows apps in Linux!)
Install Bottles: Open the Pop!_Shop, search for Bottles, install it.
Setup Bottles: The first time you launch Bottles, it will run a quick setup wizard.
- Launch Bottles from your application menu.
- The wizard will begin automatically. Click Next.
- The wizard will check for and download essential components (like the Wine runtime). Let this process complete.
- The wizard will also ask you to install "Runners." This is important. Runners are the different versions of Wine (the compatibility layer) that Bottles will use.
- Make sure you install:
- Caffe: The recommended runner developed by the Bottles team.
- Soda: A high-performance runner optimized for gaming.
- (Optional) Proton-GE: If you want to use the popular custom version of Proton.
- Click Finish when the wizard is done.
Optimize Bottles: Creating and Configuring Your First Bottle
"Setting up" in Bottles means creating a "bottle" (a self-contained Windows environment) and configuring it for your specific program or game.
- From the main Bottles screen, click the plus icon (+) in the top-left corner to create a new bottle.
- A "Create new Bottle" window will appear.
- Name: Give your bottle a descriptive name (e.g., "GOG Games", "Photoshop", "Battle.net").
- Environment: This is the most important setting.
- Choose Gaming if you are installing a game. This automatically enables optimal settings like DXVK, VKD3D, and Esync.
- Choose Application for regular software.
- Click the Create button. Bottles will now build the environment, which may take a minute.
- Once created, click on the bottle's name to open its settings.
- Inside the bottle's settings, you have several key options:
- Run Executable...: Use this to run your game's
setup.exeor the main.exefile to launch it. - Dependencies: This is where you install common Windows components. If your game or app needs
.NET,DirectX, orVC Runtimes(e.g.,vcredist2019), you can install them from this list. The Gaming environment already installs the most common ones. - Preferences: Here you can change the Runner for this specific bottle (e.g., switch from Caffe to Soda) or toggle advanced options like FSR (FidelityFX Super Resolution).
- Run Executable...: Use this to run your game's
Phase 3: System & Power Optimizations
Pop!_OS is already great, but a few tweaks seal the deal.
1. Power and Performance Profile
Unlike Windows, Pop!_OS gives you direct, easy control.
- Open Settings > Power.
- Look for the Performance Mode toggle (usually a subtle icon in the top right system tray as well).
- For high-intensity gaming, set this to Performance. This forces the CPU governor to prioritize speed over power efficiency.
- For daily desktop use, Balanced is perfect.
2. Improving Sleep/Wake Cycles (Laptop Users)
This is the most common "gotcha" for new Linux users, especially on modern laptops that default to the lower-power S2 Idle state. We want to force the deeper S3 (Deep) sleep state, which holds a charge better.
- Check Current State:
cat /sys/power/mem_sleep- (Look for
s2idleordeepin square brackets). - Force S3 (Deep) Sleep: If you see
s2idleis active, make the following permanent change:
sudo kernelstub -a "mem_sleep_default=deep"
sudo reboot
Note: This usually fixes battery drain issues during sleep, but test your system's wake time.
3. Disable Mouse Acceleration
For most PC gamers, mouse acceleration is a performance killer.
- Open Settings > Mouse & Touchpad.
- Toggle Mouse Acceleration OFF.
- Also spend some time in the settings menu and really click through every option. I changed some settings to make my "super" button (windows key) open apps vs the workspaces view. The beauty of this is you can change it to do almost anything you prefer!!!
4. Setup OpenRGB
- Open the Pop!_Shop > Search for OpenRGB
- Install > Open, you'll get a popup about it complaining you don't have udev rules installed.

- Browse to their site and download their script: https://openrgb.org/udev
- Run the script:
- Launch your CLI interface of choice, then run
sudo bash openrgb-udev-install.sh
- Launch your CLI interface of choice, then run
- This sets your user up to be able to scan the devices in your system, carefully, without running the entire app as ROOT which is bad!
- Re-open OpenRGB, you will now see it's populated with your devices on the left side!

Tweak your lights to your heart's delight.
🎮 Now, go enjoy that newfound frame rate stability and freedom! Happy gaming!
Generic Tweaks: N00b-Friendly Apps & Commands You'll Love!
You've made a fantastic choice for a Linux distribution that balances power with user-friendliness. While the terminal might seem intimidating at first, it's your secret weapon for quickly managing your system. Here are some incredibly useful apps and commands that are easy to learn and will instantly make you feel more at home.
Getting Started with the Terminal (Don't Be Scared!)
The terminal (you can find it by searching for "Terminal" in your applications) is where you'll run most of these commands. Just type the command and press Enter!
1. System Monitoring & Information (Know Your Machine!)
These tools help you understand what's happening under the hood.
df -h(Disk Free - Human Readable)- What it does: Shows you how much free space you have on your hard drives and partitions, in an easy-to-read format (e.g., GB, MB).
- Why it's handy: Quickly check if you're running low on storage before downloading that massive game or movie.
Example output:
Filesystem      Size  Used Avail Use% Mounted on
/dev/nvme0n1p3  230G   25G  193G  12% /
tmpfs           7.8G  2.0G  5.8G  26% /tmp
/dev/nvme0n1p1 511M 6.1M 505M 2% /boot/efiglances(A "htop" for Everyone)- What it does: A comprehensive, real-time system monitor that shows CPU usage, memory, disk I/O, network activity, running processes, and more, all in one colorful, easy-to-read screen in your terminal.
- Why it's handy: When your computer feels slow,
glancescan help you identify if a specific program is hogging resources, if your CPU is maxed out, or if your network is busy. - How to install:
sudo apt install glances - How to run: Just type
glancesand press Enter.
Example output:

fastfetch(Show Off Your System!)- What it does: Displays your system's information (OS, kernel, CPU, GPU, memory, theme, etc.) in a sleek, visually appealing ASCII art format, often featuring your distro's logo.
- Why it's handy: Great for quickly getting an overview of your hardware, or for sharing your system specs with others (e.g., when asking for help online).
- How to install: Add the PPA first by typing
sudo add-apt-repository ppa:zhangsongcui3371/fastfetch - Then
sudo apt updateand finally; sudo apt install fastfetch- How to run: Type
fastfetchand press Enter.
Thanks to u/daevad for letting me know about fastfetch and swapping neofetch out!
2. File & Directory Management (Navigate Like a Pro!)
Basic file operations are much faster once you know these commands.
ls -ltra(List Files - Long, Time, Reverse, All)- What it does: Lists files and directories in the current folder, showing detailed information (
-l), sorted by modification time (-t), in reverse order (newest last,-r), including hidden files (-a). - Why it's handy: This is my go-to
lscommand for seeing the most recently changed files, including config files that often start with a.(making them hidden by default).
- What it does: Lists files and directories in the current folder, showing detailed information (
cd(Change Directory)- What it does: Changes your current working directory in the terminal.
- Why it's handy: Essential for navigating your file system.
cd Documents: Go into the Documents folder.cd ..: Go up one directory.cd ~: Go to your home directory (e.g.,/home/yourusername/).cd -: Go back to the previous directory you were in.
pwd(Print Working Directory)- What it does: Tells you the full path of the directory you are currently in.
- Why it's handy: Never get lost! If you're deep in nested folders,
pwdreminds you exactly where you are.
Example Output:
total 16
drwxr-xr-x  3 user user 4096 May 15 10:30 .
drwxr-xr-x 26 user user 4096 May 15 09:00 ..
-rw-r--r--  1 user user  123 May 15 10:25 important_document.txt
drwxr-xr-x  2 user user 4096 May 14 18:00 my_project/
3. Software & Updates (Keep Your System Fresh!)
These are the commands you'll use regularly to keep your Pop!_OS installation healthy and up-to-date.
sudo apt update- What it does: Downloads the latest package information from the Pop!_OS (and Ubuntu) software repositories. It doesn't install anything, just updates the list of available software and their versions.
- Why it's handy: Always run this before
sudo apt upgradeorsudo apt installto ensure you're getting the latest information.
sudo apt upgrade- What it does: Installs all available updates for the software you currently have installed on your system.
- Why it's handy: Keeps your system secure, stable, and ensures you have the latest features for your applications. Do this regularly!
sudo apt install <package-name>- What it does: Installs a new software package from the repositories.
- Why it's handy: This is how you'll add most command-line tools or even some graphical applications that aren't in the Pop!_OS Shop. (e.g.,
sudo apt install neofetch).
sudo apt remove <package-name>- What it does: Uninstalls a software package.
- Why it's handy: Clean up unwanted software.
4. Everyday Productivity & Convenience (Small Things, Big Impact!)
These are little gems that make life easier.
Audio Settings & Config
Easy Effects(Detailed Audio Settings & Mastery!)- What it does: Enables complete control & tweaking of your sound settings right in the desktop environment.
- Why it's handy: Allows fine-tuned control of your audio system, simply and easily. This used to be a lot harder on Linux!
- There are a lot of tips on how to reduce audio latency too.
- How to install: Available as a flatpak right from Pop!_OS Shop or from Flathub via cli. https://github.com/wwmm/easyeffects
xclip(Copy/Paste from Terminal)- What it does: Allows you to copy text from the terminal directly to your system's clipboard, and paste from the clipboard into the terminal.
- Why it's handy: Invaluable for copying output from a command (e.g., an error message or a file path) to paste into a browser or another application, or vice-versa.
- How to install:
sudo apt install xclip - How to use:
- To copy terminal output:
echo "This text will be copied" | xclip -selection clipboard - To paste into terminal:
xclip -selection clipboard -o
- To copy terminal output:
tldr(Too Long; Didn't Read - Simplified Man Pages)- What it does: Provides simplified, community-contributed examples for common commands, acting as a much friendlier alternative to the often verbose
man(manual) pages. - Why it's handy: Forget trying to decipher dense documentation. Just need to quickly remember how to use
tarorgrep?tldrgives you practical examples. - How to install:
sudo apt install tldr - How to use:
tldr <command-name>(e.g.,tldr ls,tldr tar)
- What it does: Provides simplified, community-contributed examples for common commands, acting as a much friendlier alternative to the often verbose
locate <filename>(Find Files Fast!)- What it does: Quickly searches for files by name across your entire file system using a pre-built database. It's much faster than
findfor general searches. - Why it's handy: Lost a config file? Can't remember where you saved that download?
locateis your friend. - How to install (if not already there):
sudo apt install mlocate(and thensudo updatedbonce to build the database). - How to use:
locate my_important_report.odt
- What it does: Quickly searches for files by name across your entire file system using a pre-built database. It's much faster than
5. Pop!_OS Specific Goodies (Get the Most Out of Your Distro!)
These are built-in features that make Pop!_OS great.
- Pop!_OS Shop (Graphical App Store)
- What it does: Your one-stop shop for installing and managing graphical applications, including both traditional
.debpackages and Flatpaks. - Why it's handy: A super easy way for new users to discover and install new software without touching the terminal. Just search, click "Install," and you're good to go!
- What it does: Your one-stop shop for installing and managing graphical applications, including both traditional
- Pop!_OS Tiling Assistant (Super + Y)
- What it does: A built-in window manager that allows you to automatically tile your open windows for maximum screen real estate and productivity.
- Why it's handy: Especially useful on larger monitors. Press
Super + Yto toggle it on/off, and useSuper + arrow keysto move windows around. It's a game-changer for workflow!
Some of my favourite Apps
- Alacritty - SSH w/GPU acceleration, replaced Putty for me.
- Files - Not the default builtin files & folders, but "Files" from PopOS!
- Notepad Next - Notepad++ replacement!
- KSNIP for screenshots
Please share & comment below on apps, trips & tricks you find useful while transferring your digital life to a FREE, incredibly performant new gaming OS!
Resources & Links:
 monolalia



Member discussion