
The Self-Hosting Roadmap: From Localhost to Public URL (Safely)
The "Traffic Cop" Philosophy
You have the hardware (maybe a "Dirty Snow" type workstation or a custom server). You have the firewall (OPNsense). Now, what do you actually do with it?
Many homelabbers get stuck in "Tutorial Hell." They spin up a container, it breaks, they fix it, and end up with a messy web of IP addresses and open ports that would make a sysadmin cry.
This guide is your Architecture Blueprint. We are going to build a production-grade stack from scratch, moving from a fresh server to a fully secured environment where:
- Public services (like a Blog) are accessible to the world.
- Private services (like Obsidian) are accessible only to you.
- Authentication is handled centrally, not by every individual app.
Here is the "Core Lab" standard for 2026.
Let's get your lab 'online' for real - exposed to the internet!
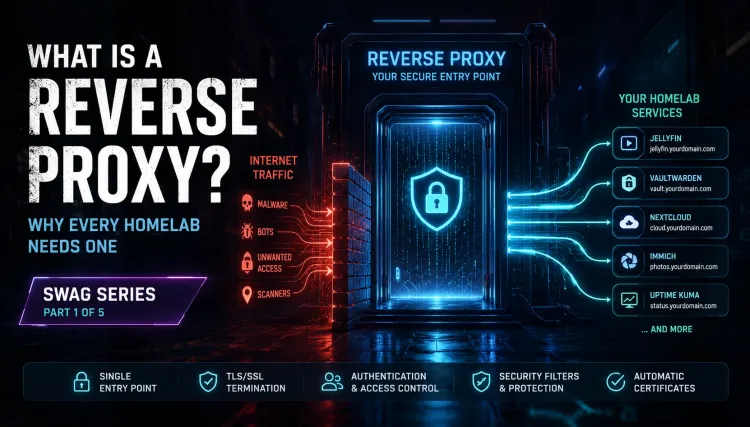
Mastering Reverse Proxies with SWAG
Learn the concepts, deploy SWAG, secure your services, understand the request flow, and confidently migrate from other reverse proxy solutions.
The Architecture Overview
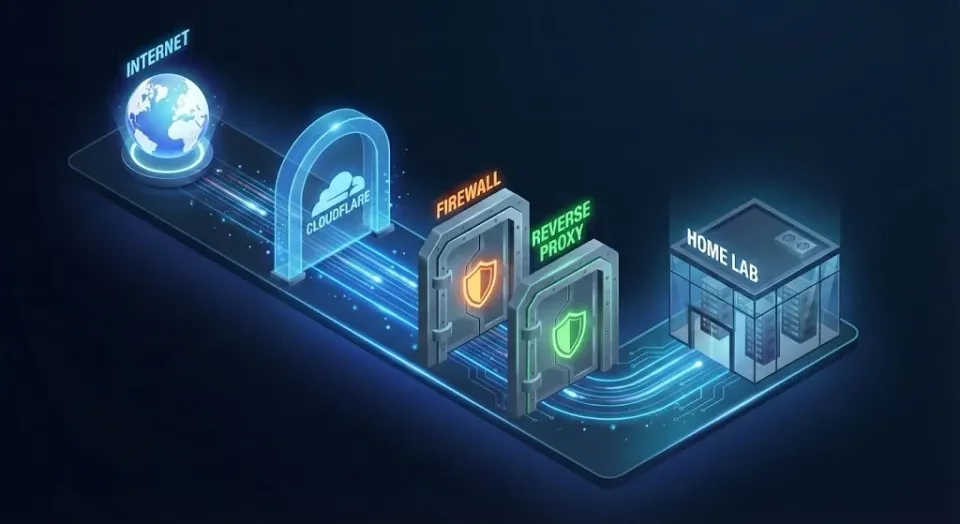
Before we type a single command, visualize the flow. We are NOT opening 50 different ports on your router. We open one set of ports (80/443) and let a "Reverse Proxy" sort the mail and the firewall be the guard dog!
The Flow:
Internet (User)
      ⬇
[ Cloudflare DNS ]  <-- "Where does corelab.tech live?"
      ⬇
[ OPNsense Firewall ] <-- "Port 443 is Open"
      ⬇
[ Nginx Proxy Manager ] <-- "The Traffic Cop"
      ⬇    ⬂ (Is this Private?)
      ⬇       [ Authelia ] <-- "Halt! ID Please."
      ⬇           ⬇
[ Docker Container ] (Ghost / Obsidian / Uptime Kuma)
NGINX Backgrounder
Level 1: The Foundation (DNS & The Domain)
You cannot build a house without an address.
1. Buy the Domain
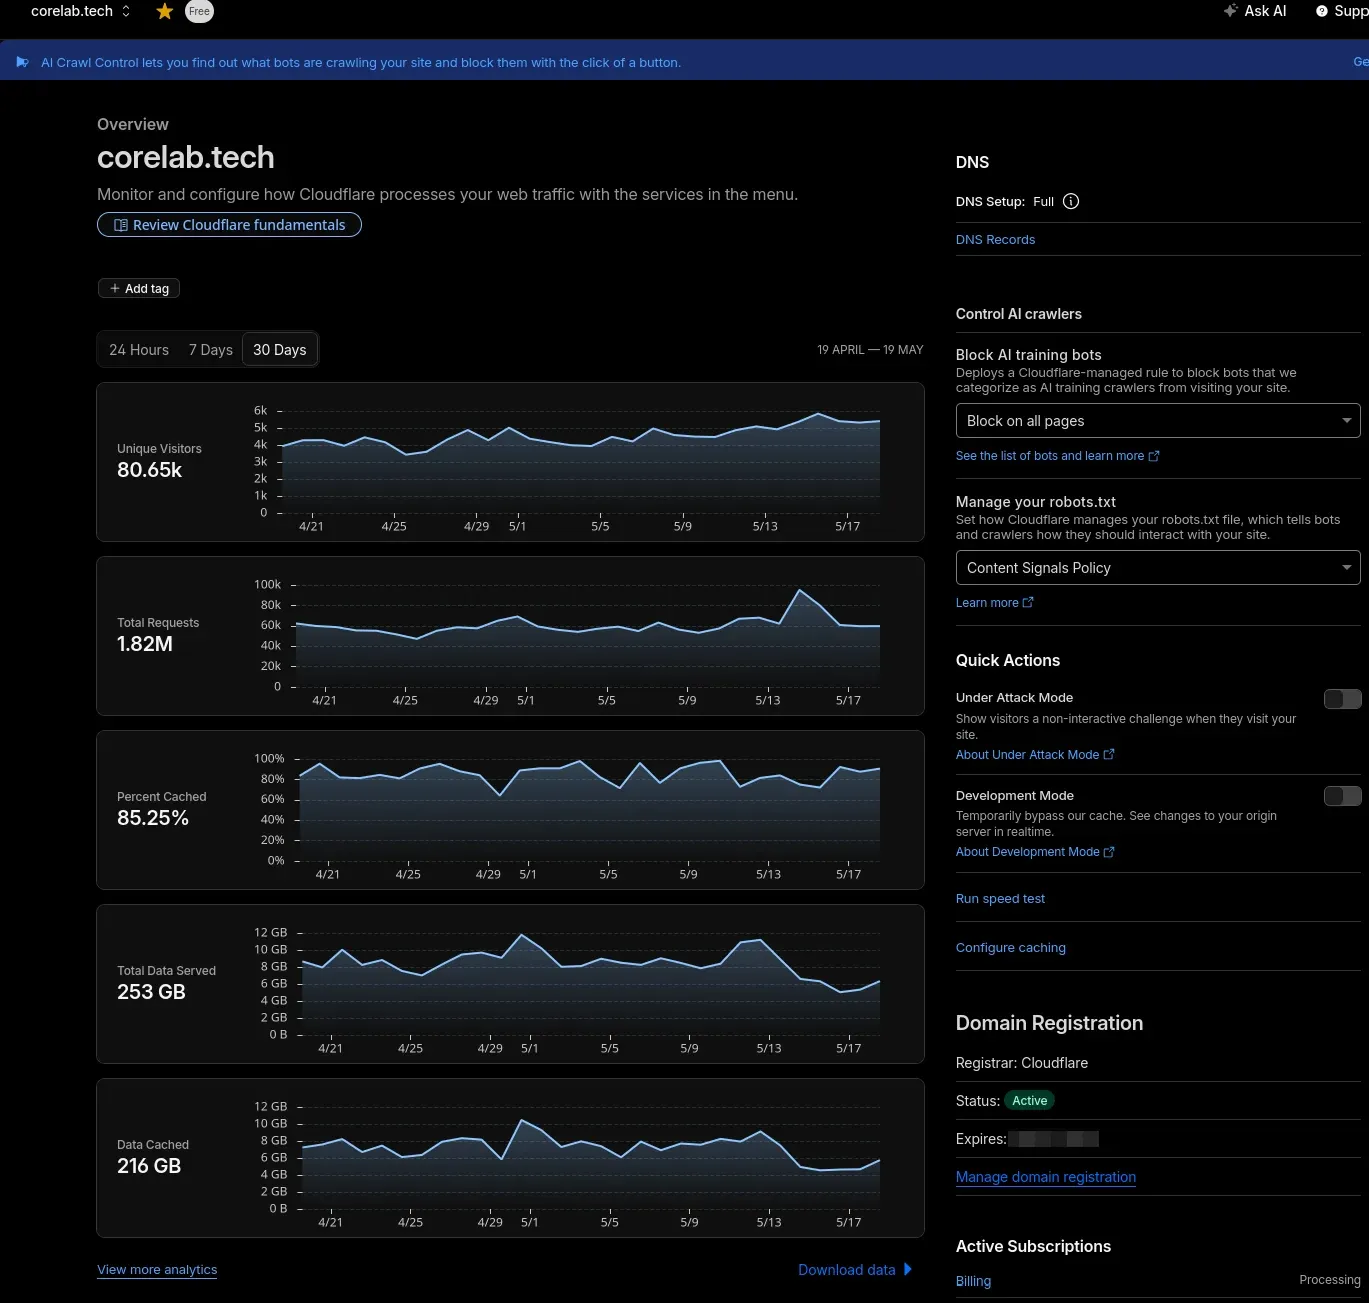
Don't be cute. Buy a domain. I recommend Cloudflare Registrar because they sell domains at cost (no markup) and their security tools are free. Can see more info on them here👉[Cloudflare Domain Setup & Protection Series!]
- Example:
corelab.tech
2. The "Hairpin" Problem (Split-Horizon DNS)
The Problem: If you are at home and type corelab.tech, the request goes out to the internet and tries to come back in. Some routers hate this (NAT Reflection), and it's inefficient. The Fix: Since you run OPNsense, use Unbound DNS Overrides.
- Log into OPNsense.
- Go to Services -> Unbound DNS -> Overrides.
- Add a Host Override:
- Domain:
corelab.tech - IP:
10.10.10.50(The internal IP of your Docker Server) - Description: Local Reflection for Homelab
- Domain:
- Click Apply.
Result: When you are home, traffic goes direct to your server at LAN speed (10Gbps+). When you are away, it goes via Cloudflare. Explaining how to do split-DNS for every DNS software/app/firewall/router is way beyond this roadmap, but I do cover this for OPNsense firewall.
Level 2: The Traffic Cop (Nginx Proxy Manager)
You can also deploy SWAG in minutes and come back here.
Before we install Nginx Proxy Manager (NPM), you need to decide what kind of Homelabber you are.
- Path A: The Visual Learner (Recommended for Beginners)
- The Tool: Nginx Proxy Manager (NPM).
- The Vibe: A beautiful GUI. You click buttons to set up SSL and proxies. It is easy, visual, and fast.
- The Catch: It is harder to automate or secure with advanced tools like CrowdSec later.
- Verdict: Stick with this guide if this is your first time self-hosting.
- Path B: The "Core Lab" Standard (Semi-Advanced)
- The Tool: SWAG (Secure Web Application Gateway).
- The Vibe: No GUI. You edit text files (
nginx.conf). - The Payoff: This is what I use in my advanced security guides. It integrates natively with CrowdSec, Authelia, and "complex" mod-security rules.
- Verdict: If you are comfortable with config files and want to be "Future Proof" for my advanced tutorials, Skip to my SWAG Guide instead of installing NPM.
We are using Nginx Proxy Manager (NPM) for this stage of your journey.
- Why? It has a beautiful GUI. It allows you to see your hosts and SSL certificates visually. It also allows you to completely set it up in the GUI!
- (When you are ready for the advanced, config-file-based approach, you will graduate to Part 2: The SWAG Guide).👇
The Stack (Docker Compose)
Create a folder ~/docker/npm and create a docker-compose.yml:
services:
  app:
    image: 'jc21/nginx-proxy-manager:latest'
    container_name: nginx-proxy-manager
    restart: unless-stopped
    ports:
      - '80:80'   # HTTP (Required for Let's Encrypt validation)
      - '443:443' # HTTPS (The Main Entrance)
      - '81:81'   # Admin Web Interface
    volumes:
      - ./data:/data
      - ./letsencrypt:/etc/letsencrypt
    # Optional: If you use a specific network
    # networks:
    #   - proxy_net
The Setup:
- Run
docker compose up -d. - Log in at
http://YOUR-SERVER-IP:81.- Default Email:
[email protected] - Default Password:
changeme
- Default Email:
- Port Forward: On your OPNsense router, forward Port 80 and 443 to this server's IP (
10.10.10.50).
⚠️ Security Note: Even though Port 80 is open, NPM will automatically force everything to HTTPS. We only need Port 80 open so Let's Encrypt can verify we own the domain.
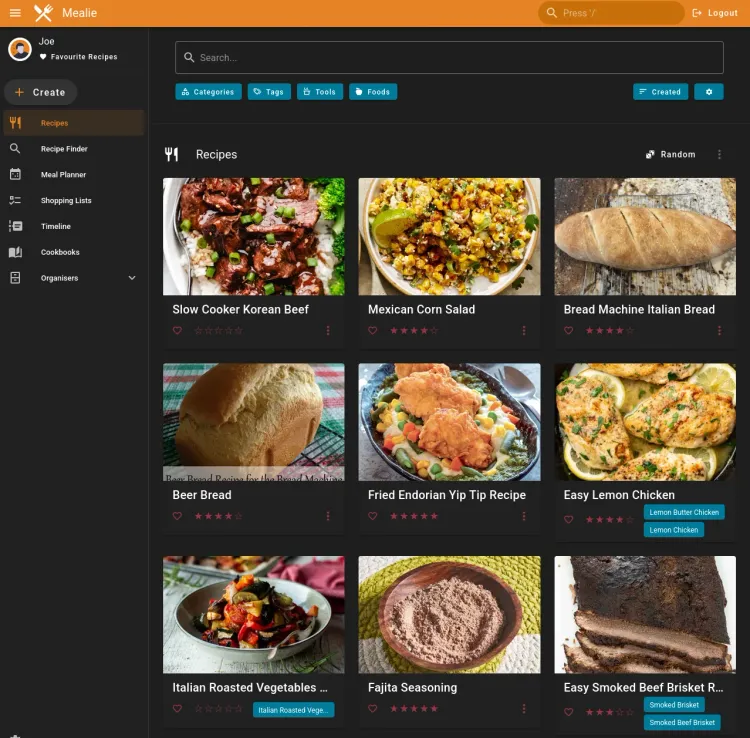
Level 3: Serving an Important App (Home Assistant)
Let's verify the plumbing works by hosting something public.
1. The Container
Create ~/docker/homeassistant/docker-compose.yml:
services:
  homeassistant:
    image: lscr.io/linuxserver/homeassistant:latest
    container_name: homeassistant
    network_mode: host # Critical for detecting Google Cast, HomeKit, and Sonos
    environment:
      - PUID=1000
      - PGID=1000
      - TZ=America/Toronto
    volumes:
      - /path/to/homeassistant/data:/config
    ports:
      - 8123:8123 #optional
#    devices:
#      - /path/to/device:/path/to/device #optional
    restart: unless-stopped

# Core Lab recommendations, mosquitto and zigbee if needed
  mosquitto:
    image: eclipse-mosquitto
    container_name: mosquitto
    ports:
      - 1883:1883
      - 9001:9001
    volumes:
      - /yourpath/mosquitto/config:/mosquitto/config
      - /yourpath/mosquitto/data:/mosquitto/data
    restart: unless-stopped

  zigbee2mqtt:
    image: koenkk/zigbee2mqtt
    container_name: zigbee2mqtt
    devices:
      - /dev/serial/by-id/usb-ITead_Sonoff_Zigbee_...:/dev/ttyACM0
    volumes:
      - /yourpath/zigbee2mqtt/data:/app/data
    environment:
      - TZ=America/Toronto
    restart: unless-stopped
Run docker compose up -d.
2. The Proxy Rule
- Go to NPM (Port 81).
- Click Proxy Hosts -> Add Proxy Host.
- Domain Names:
ha.corelab.tech - Forward Host:
10.10.10.50(Your Server IP) - Forward Port:
8123
- Domain Names:
- SSL Tab:
- Select "Request a new SSL Certificate".
- Toggle Force SSL.
- Toggle HTTP/2 Support.
- Enter your email and click Save.
Result: Anyone in the world can now visit ha.corelab.tech, and they get a secure lock icon. You have successfully self-hosted, ALREADY!Level 4: The "Private" Vault (Obsidian)
Now for the scary part. You want to sync your Obsidian Notes, but you don't want the world reading your diary and you're sick of paying for Obsidian sync?
1. The Container
Create ~/docker/obsidian/docker-compose.yml.
services:
  obsidian:
    image: lscr.io/linuxserver/obsidian:latest
    container_name: obsidian
    networks:
      app_network:
        ipv4_address: 10.0.0.X (Whatever IP you pick)
    security_opt:
      - seccomp:unconfined #optional
    environment:
      - PUID=1000
      - PGID=100
      - TZ=America/Toronto
    volumes:
      - /yourpath/DOCKERS/obsidian/config:/config
    ports:
      - 3000:3000 # Point reverse proxy here!
      - 3001:3001 # For local browser access via IP
# Uncomment below for GPU acceleration non-NVIDIA
    devices:
      - /dev/dri:/dev/dri #optional
    shm_size: "1gb"
    restart: unless-stopped

networks:
  app-network:
    driver: macvlan (Or ipvlan)
    driver_opts:
      parent: enpxyz.7
    ipam:
      config:
      - subnet: 192.168.0.0/24
        gateway: 192.168.1.1
2. The DNS & Proxy
- Cloudflare: Add an
A Recordforobsidian.corelab.techpointing to your Home IP. - NPM: Point
obsidian.corelab.techto Port3000.
The Danger: Right now, the login page is exposed to the internet. We need a Bouncer.
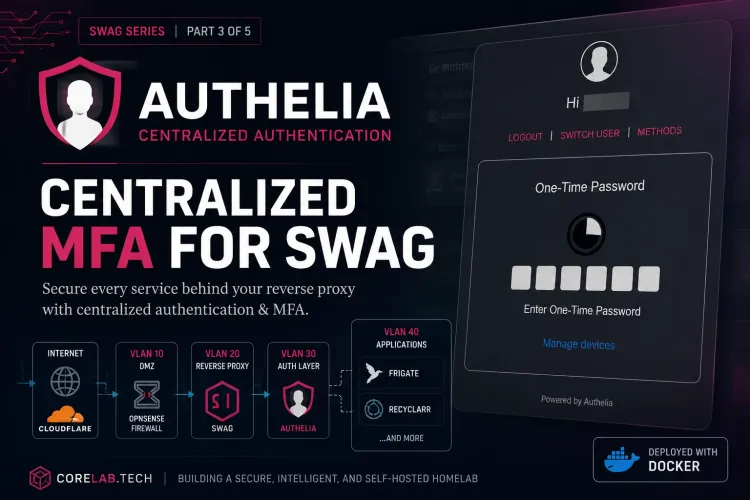
Level 5: The Guard Dog (Authelia)
This is the graduation step. We will put Authelia in front of Obsidian so that before the request even hits the database, the user must prove they are you via Multi-Factor Authentication (MFA).
1. The Setup
Authelia requires its own container. (See our [Authelia Guide] for the full config). Crucially, you connect Authelia to Duo Push or Google Authenticator.
2. The Integration
In Nginx Proxy Manager:
- Edit your
obsidian.corelab.techhost. - Go to the Advanced tab.
- Add this "Custom Nginx Configuration":
# Protect this location with Authelia
auth_request /authelia;
auth_request_set $target_url $scheme://$http_host$request_uri;
error_page 401 =302 https://auth.corelab.tech/?rd=$target_url;
Result:
- You open Obsidian on your phone at Starbucks.
- Obsidian tries to connect.
- NPM stops the request. "Who are you?"
- It redirects you to
auth.corelab.tech. - You approve the notification on your phone.
- Authelia gives you a "Pass" cookie, and NPM lets you through.
Summary: The Core Lab Stack
By following this roadmap, you have moved from "messing around with ports" to a legitimate, Enterprise-grade architecture.
- Public Traffic: Flows freely to your Blog / Home Assistant / Choice of App.
- Private Traffic: Hits a brick wall (Authelia) unless it's you.
- Local Traffic: Stays on your LAN (thanks to OPNsense).
Ready for the Next Level?
Mastered the basics? Eventually, you will hit the limits of what a GUI can do. When you are ready to implement military-grade intrusion detection (CrowdSec) and Zero-Trust auth (Authelia), you will want to migrate from NPM to SWAG. Don't worry—the concepts you learned today (DNS, Ports, Proxy Passes) are exactly the same. The only difference is typing them instead of clicking them.
1️⃣ Next → SWAG Reverse Proxy Guide
https://corelab.tech/swag-reverse-proxy-guide/
2️⃣ Secure Your Stack → Digital Castle (SWAG + CrowdSec + Authelia)
https://corelab.tech/digital-castle-swag-crowdsec-authelia/

3️⃣ Build the Full Media Server
https://corelab.tech/ultimate-media-server-guide/

❓ Frequently Asked Questions (FAQ)
Why does my self-hosted site load slowly (or fail) when I'm on my home network?
This is the "hairpin" problem: when you're home and type your domain, the request goes all the way out to the internet and tries to come back in, which some routers handle badly (NAT reflection) and is inefficient regardless. The fix, if you run OPNsense, is a Split-Horizon DNS override (Services > Unbound DNS > Overrides) that points your domain directly to your server's internal IP when you're on the LAN, while still routing normally through Cloudflare when you're away.
Should I use Nginx Proxy Manager or SWAG for my reverse proxy?
Nginx Proxy Manager gives you a GUI, which is friendlier if you want visual configuration. SWAG (also NGINX-based) is the primary choice used throughout this roadmap and integrates more tightly with the security stack — CrowdSec, Fail2Ban, Authelia — described later in the path. Either is a valid starting point; you can deploy SWAG separately and come back to this guide.
Do I need a reverse proxy for every self-hosted app, even internal-only ones?
Not strictly — but it's the recommended path once you want secure remote access, custom subdomains, or centralized authentication. Apps meant to stay fully internal can skip exposure entirely; apps you want to reach outside your home network should go through the reverse proxy rather than a raw port forward.
What does Authelia add on top of a reverse proxy?
Authelia adds centralized multi-factor authentication in front of your self-hosted apps. Instead of each app handling its own login security independently, Authelia sits in front of the reverse proxy and requires a second factor before traffic is even allowed through to apps like Home Assistant or Obsidian — a single, consistent MFA layer for your whole stack.
What's the right order to build out this self-hosting roadmap?
Start with DNS and domain setup (Level 1), add a reverse proxy (Level 2), then expose your first real app like Home Assistant (Level 3), add a private app like Obsidian behind the same proxy (Level 4), and finish by layering Authelia's MFA on top (Level 5). Each level builds on the previous one rather than being independent choices.


Member discussion