
Plex Media Server Optimization Guide 2026
If your Plex server buffers, transcodes when it shouldn’t, crashes with “Not Enough Disk Space,” or feels sluggish when loading posters - this guide fixes it.
In 2026, Plex performance problems almost always come down to one of five things:
- Slow metadata storage (HDD IOPS bottlenecks)
- Misconfigured RAM transcoding (Docker 64MB trap)
- Hardware acceleration not actually working
- The Plex Relay “Indirect” speed cap
- Client-side limitations forcing unnecessary transcodes
This guide walks through real-world, proven optimizations for Docker, Linux, and Windows — including RAM disk setup, GPU passthrough verification, network tuning (BBR), and eliminating the Relay trap.
This post is part of a Plex Mastery Series:
Plex Mastery Guides
Media Server Strategy
Part 1: Plex, Jellyfin & the Aarrs, an overview!
Curated Plex Server Builds
Part 2: Best Plex Hardware Selection
Transcoding Deep Dive
Part 3: Understanding Transcoding, NVENC vs QuickSync and why it matters?
Ultimate Plex Optimization
Part 4: How to Tune Plex to run like a powerhouse on your already existing hardware.
By the end of this post, your Plex server should feel invisible - instant playback, no buffering, and proper 4K HDR tone mapping.
Tested on Plex Media Server (2026 builds), Docker, and NVIDIA GPUs. Last updated: March 2026.
I really enjoy Plex Media Server (PMS) and have been using it since roughly 2013! A lot has changed in that time in Plex and the world, and at times, as my media library grew larger and larger, it started to feel sluggish... That's how this guide was born, through experience.
With a few strategic tweaks, you can dramatically improve it's performance and responsiveness. We'll delve into advanced optimization techniques beyond the basic setup. I'll update this post if I find new relevant info to share.
⚡ TL;DR: The "Instant Win" Checklist
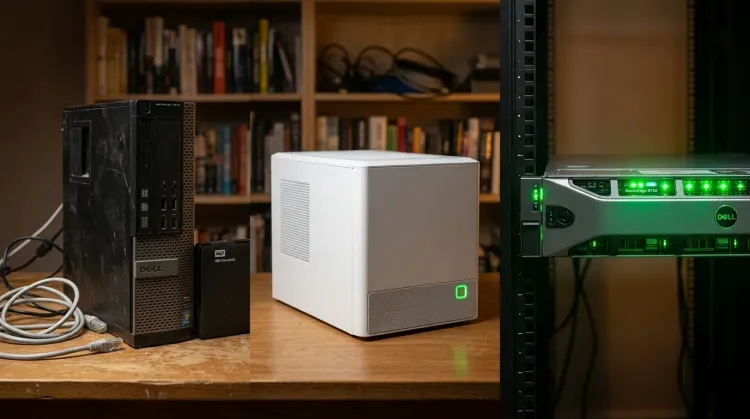
- AppData to NVMe/SSD: Mechanical HDDs kill database performance.
- RAM Transcoding: Stop burning through SSD write cycles.
- Kill the "Relay": Don't let Plex throttle you to 1–2Mbps.
- Hardwire Everything: Wi-Fi is the enemy of 4K and consistent streams.
- Check Tone Mapping: If HDR content buffers, your GPU might not support tone mapping in your OS.
- Hardwire (Properly): Most Smart TV ethernet ports are trash (100Mbps). Use 5GHz Wi-Fi or a USB Gigabit adapter.
How to Fix Plex Buffering Issues (2026 Complete Guide)🧠
If your posters take forever to load, your CPU isn't the problem - your IOPS (Input/Output Operations Per Second) are.
Plex uses an SQLite database to track every file, actor, and "watched" status. If this database lives on a spinning Hard Drive (HDD), and you have a lot of media, your experience will be miserable.
1. The NVMe Rule
Plex's SQLite database performs thousands of tiny "lookups" per second.
- HDD: ~150 IOPS (Sluggish, "spinning" icons).
- NVMe: ~500,000+ IOPS (Instant posters, snappy searching).
- The Move: Even a cheap 256GB NVMe is better than a 20TB HDD for your AppData.
2. Database Cache Size (The Secret RAM Tweak)
In Settings → Server → Library→Advanced, look for "Database cache size."
- Default: 40MB (Fine for 2013, not for 2026).
- My Recommendation: 512MB to 2048MB. This keeps your most-searched metadata in RAM rather than fetching it from the disk.
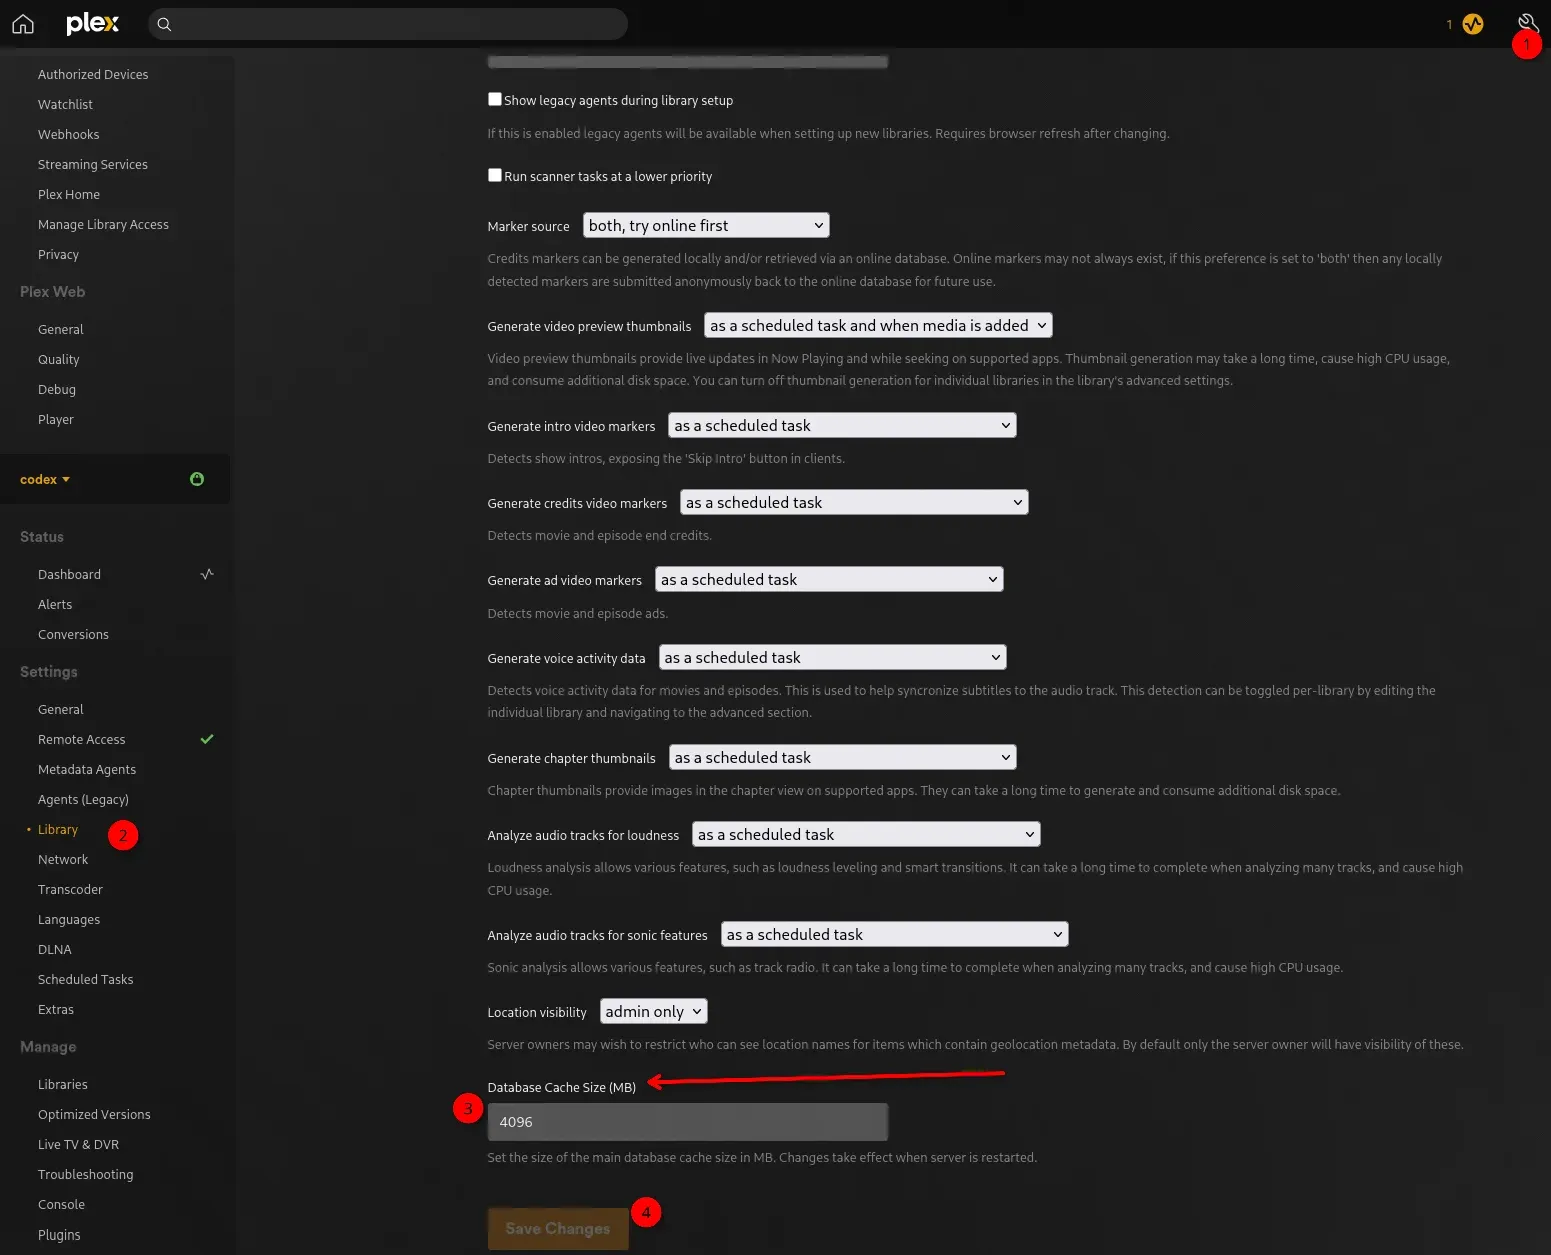
This cache is what the Plex DB uses to store the most frequently accessed data, in RAM so that it's performant. I've noticed increased performance myself from just this change.
How to Set Up RAM Transcoding in Plex (Docker, Linux & Windows)⚙️
Transcoding is brutal. It converts heavy video files into streamable chunks on the fly, generating thousands of temporary files. This process is a "speed vs. lifespan" trade-off. If you leave it on your OS drive, you're looking at massive SSD wear—potentially writing petabytes of data over the life of a busy server. Not AS much of a concern as it used to be, the lifespan and wear-leveling tech of newer drives has been greatly improved.
Option 1: The "Set it and Forget it" (Dedicated NVMe/SSD)
Best for: Systems with limited RAM (16GB or less) or high-volume servers with 10+ simultaneous users. Instead of using your expensive OS drive, use a cheap, dedicated "scratch" SSD. If it burns out in 3 years? No big deal; your OS and Plex database stay safe.
- How to do it: Plug in a secondary SSD and point the Plex Transcoder temporary directory to a folder on that drive.
- Docker Tip: Map the volume like this:
-
-v /mnt/scratch_ssd/plex_transcode:/transcode.
-
Option 2: The "Speed Demon" (RAM Transcoding)
Best for: Users with 32GB+ of RAM who want near-instant seeking and zero SSD wear. RAM is orders of magnitude faster than an SSD and doesn't "wear out" from writes.
The Docker Trap (Read Carefully!)⚠️
By default, Docker containers limit /dev/shm (shared memory) to a tiny 64MB. A single 4K transcode will crash this instantly. The Fix: You must explicitly increase the size in your docker-compose.yml:
services:
  plex:
    shm_size: '8gb' # 2-4GB for 1080p, 8GB+ for 4K heavy lifting!
    volumes:
      - /dev/shm:/transcode
Bare Metal Linux
Most Linux distros use tmpfs for /tmp or /dev/shm. You can point Plex directly to /dev/shm, but ensure your fstab isn't limiting its size.
Windows
Windows doesn't have a built-in RAM disk. You’ll need a FOSS (Free and Open Source) tool like ImDisk Virtual Disk Driver.
- Create a 4GB (or larger) RAM disk.
- Mount it as drive
R:(or similar). - Point Plex to
R:\.
Option 3: The "Hybrid" (The Throttle Buffer Trick)
Best for: Any setup where you want to balance performance and storage space. The Transcoder default throttle buffer is your secret weapon. By default, it’s 60 seconds.
- The Advice: Set this to 300 (5 minutes).
- Why? This tells Plex to "get ahead" of the viewer. It fills your RAM disk or SSD with 5 minutes of footage immediately. This prevents buffering if your CPU spikes momentarily as is a fantastic optimization if you have strong transcoding with a GPU or Quicksync etc.
- Warning: If you have a small RAM disk (e.g., 2GB), don't set this too high (like 3600), or a single movie will fill the RAM disk and crash the stream.
🛠️ Finalizing the Settings
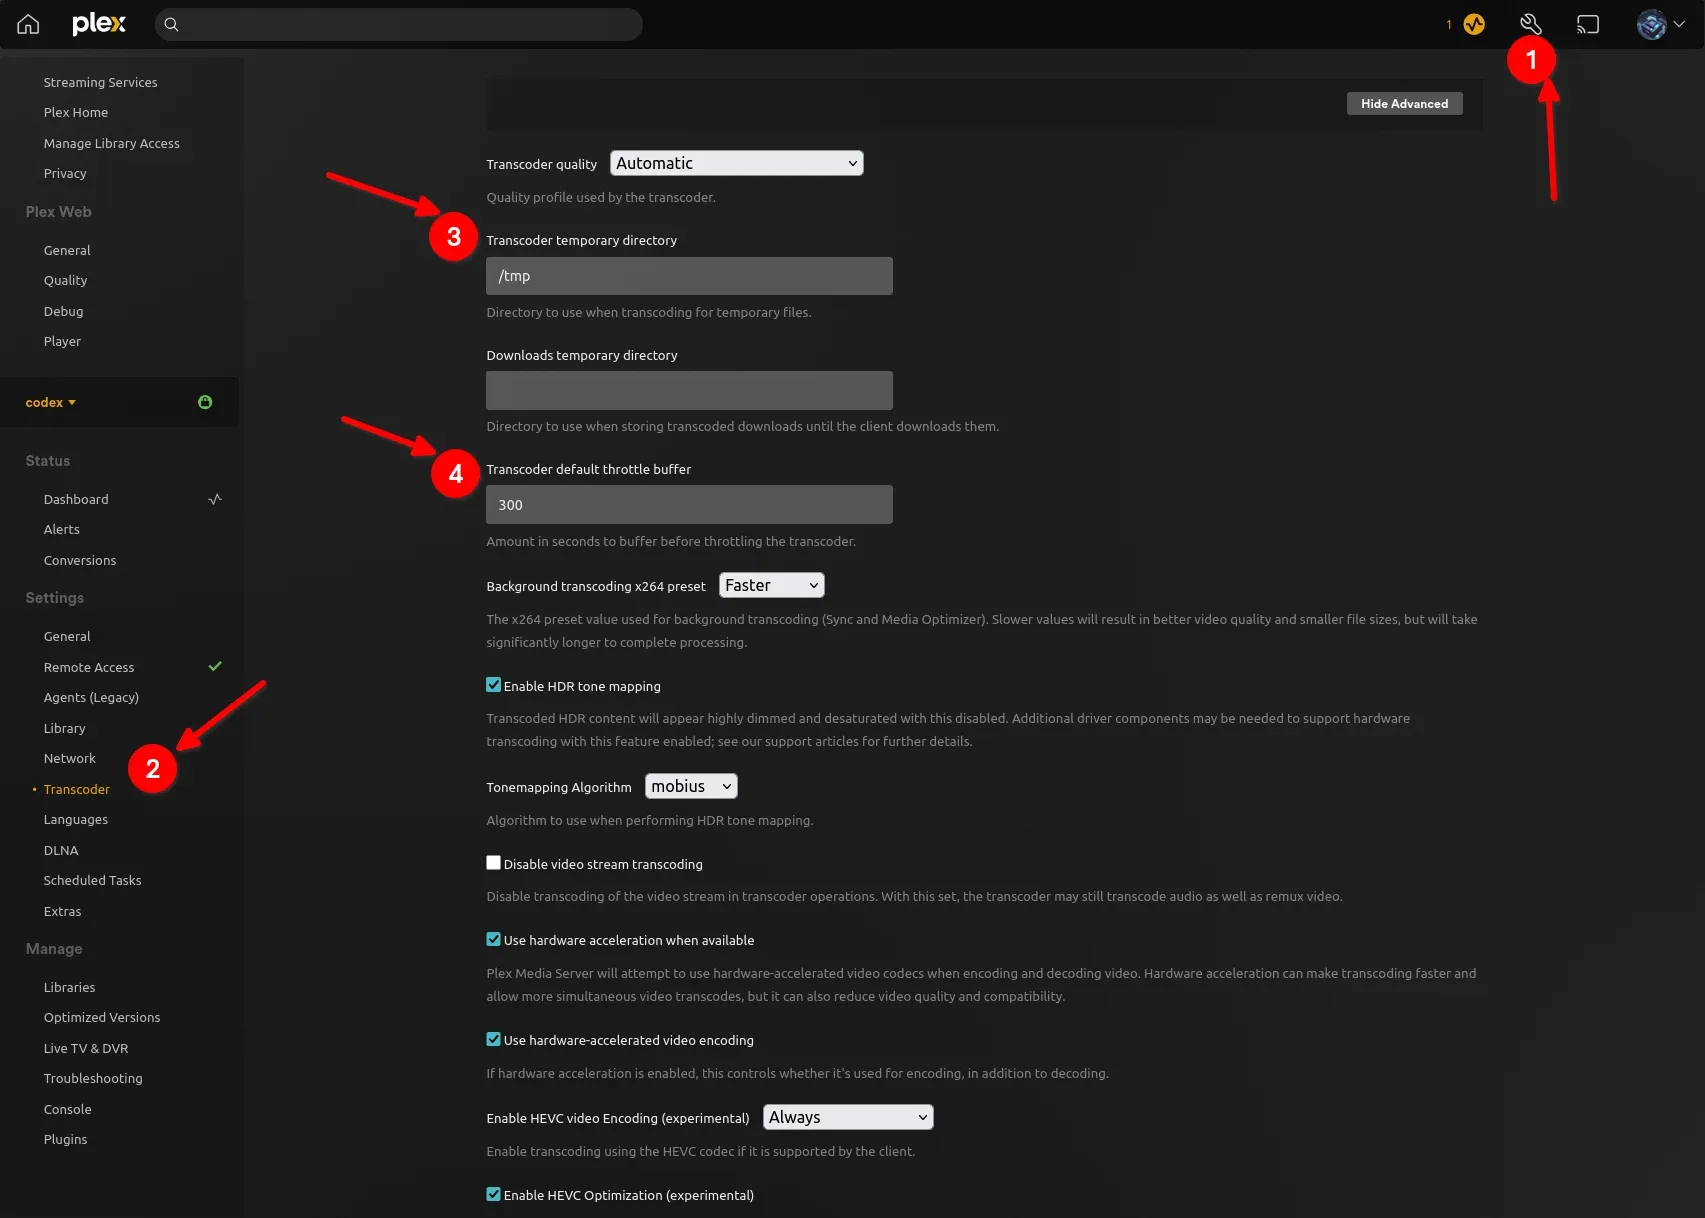
Once you've chosen your path, head to: Plex → Settings (Wrench) → Transcoder
- Transcoder quality: Set to [Automatic].
- Transcoder temporary directory:
- Docker:
/transcode - Linux Bare Metal:
/dev/shm - Windows:
R:\(or whatever your RAM disk letter) - SSD Method: The path to your dedicated scratch folder.
- Docker:
- Transcoder default throttle buffer: Set to 300.
Pro-Tip for 4K: If you are transcoding 4K HDR content, each "chunk" is much larger. If you have the RAM, a 8GB to 16GB RAM disk is the "goldilocks" zone for high-end users.
You simply click the wrench icon in the top right of your Plex instance, scroll down on the left side of Settings, and hit the Transcoder submenu.
You can fill up a RAMdisk so you can't just slap 3600 seconds in there for 1 hour and call it a day. Unless you have a massive pile of RAM. Then, you can! You could also redirect this to a large 1TB NVME drive with the Transcoder temporary directory setting... Choices abound!
This will already give you a significant performance boost when clicking the ▶️ button.
🛑 Troubleshooting: The "Not Enough Disk Space" Error
If you’ve switched to RAM transcoding and your streams are crashing with a "disk space" error, don't panic. You haven't run out of actual RAM; you've likely hit a software ceiling.
1. The Docker "64MB" Ceiling
This is the #1 culprit. By default, Docker containers only allow /dev/shm to use 64MB, regardless of how much RAM your PC has. A single 1080p movie will fill that in seconds.
- The Fix: You must add
shm_size: '4gb'(or larger) to yourdocker-compose.yml. If you use the Portainer UI, look for the "Shared Memory Size" setting under "Runtime Resources."
2. The "Buffer vs. Size" Math
If you set your Throttle Buffer to 3600 (1 hour) but only created a 2GB RAM disk, you have a math problem.
- The Math: A high-bitrate 1080p movie can easily take up 2GB to 4GB for an hour of transcoded footage. If the buffer asks for more space than the RAM disk has, Plex kills the stream.
- The Fix: Either lower your Throttle Buffer to 300 or increase your RAM disk size to 8GB+.
3. The Linux tmpfs Default
On bare-metal Linux, /dev/shm usually defaults to 50% of your total physical RAM. If you are running a server with only 8GB of RAM, your "disk" is only 4GB.
- The Fix: You can manually resize this in your
/etc/fstabfile by addingsize=XGto the mount options.
4. Ghost Chunks (The Cleanup Bug)
Occasionally, if a stream crashes or a user loses internet, Plex might fail to delete the old temporary "chunks" from your RAM disk. Over a few days, these "ghost" files can fill the drive.
- The Fix: A simple server restart clears RAM completely. If this happens often, check your folder permissions to ensure Plex has "Write" and "Delete" access to the transcode directory.
When in doubt: Go bigger. If you are transcoding 4K content, 4GB is the bare minimum. I recommend 8GB to 16GB for a seamless, multi-user 4K experience.
📹Ensure Proper Video Drivers are Installed
It should go without saying you need the GPU drivers installed & operating properly for it to be used by Plex for transcoding. Regardless of vendor (NVIDIA, Intel, AMD etc).
- If you're running Plex in a container, follow this guide to setup & enable Plex docker to take advantage of your GPU
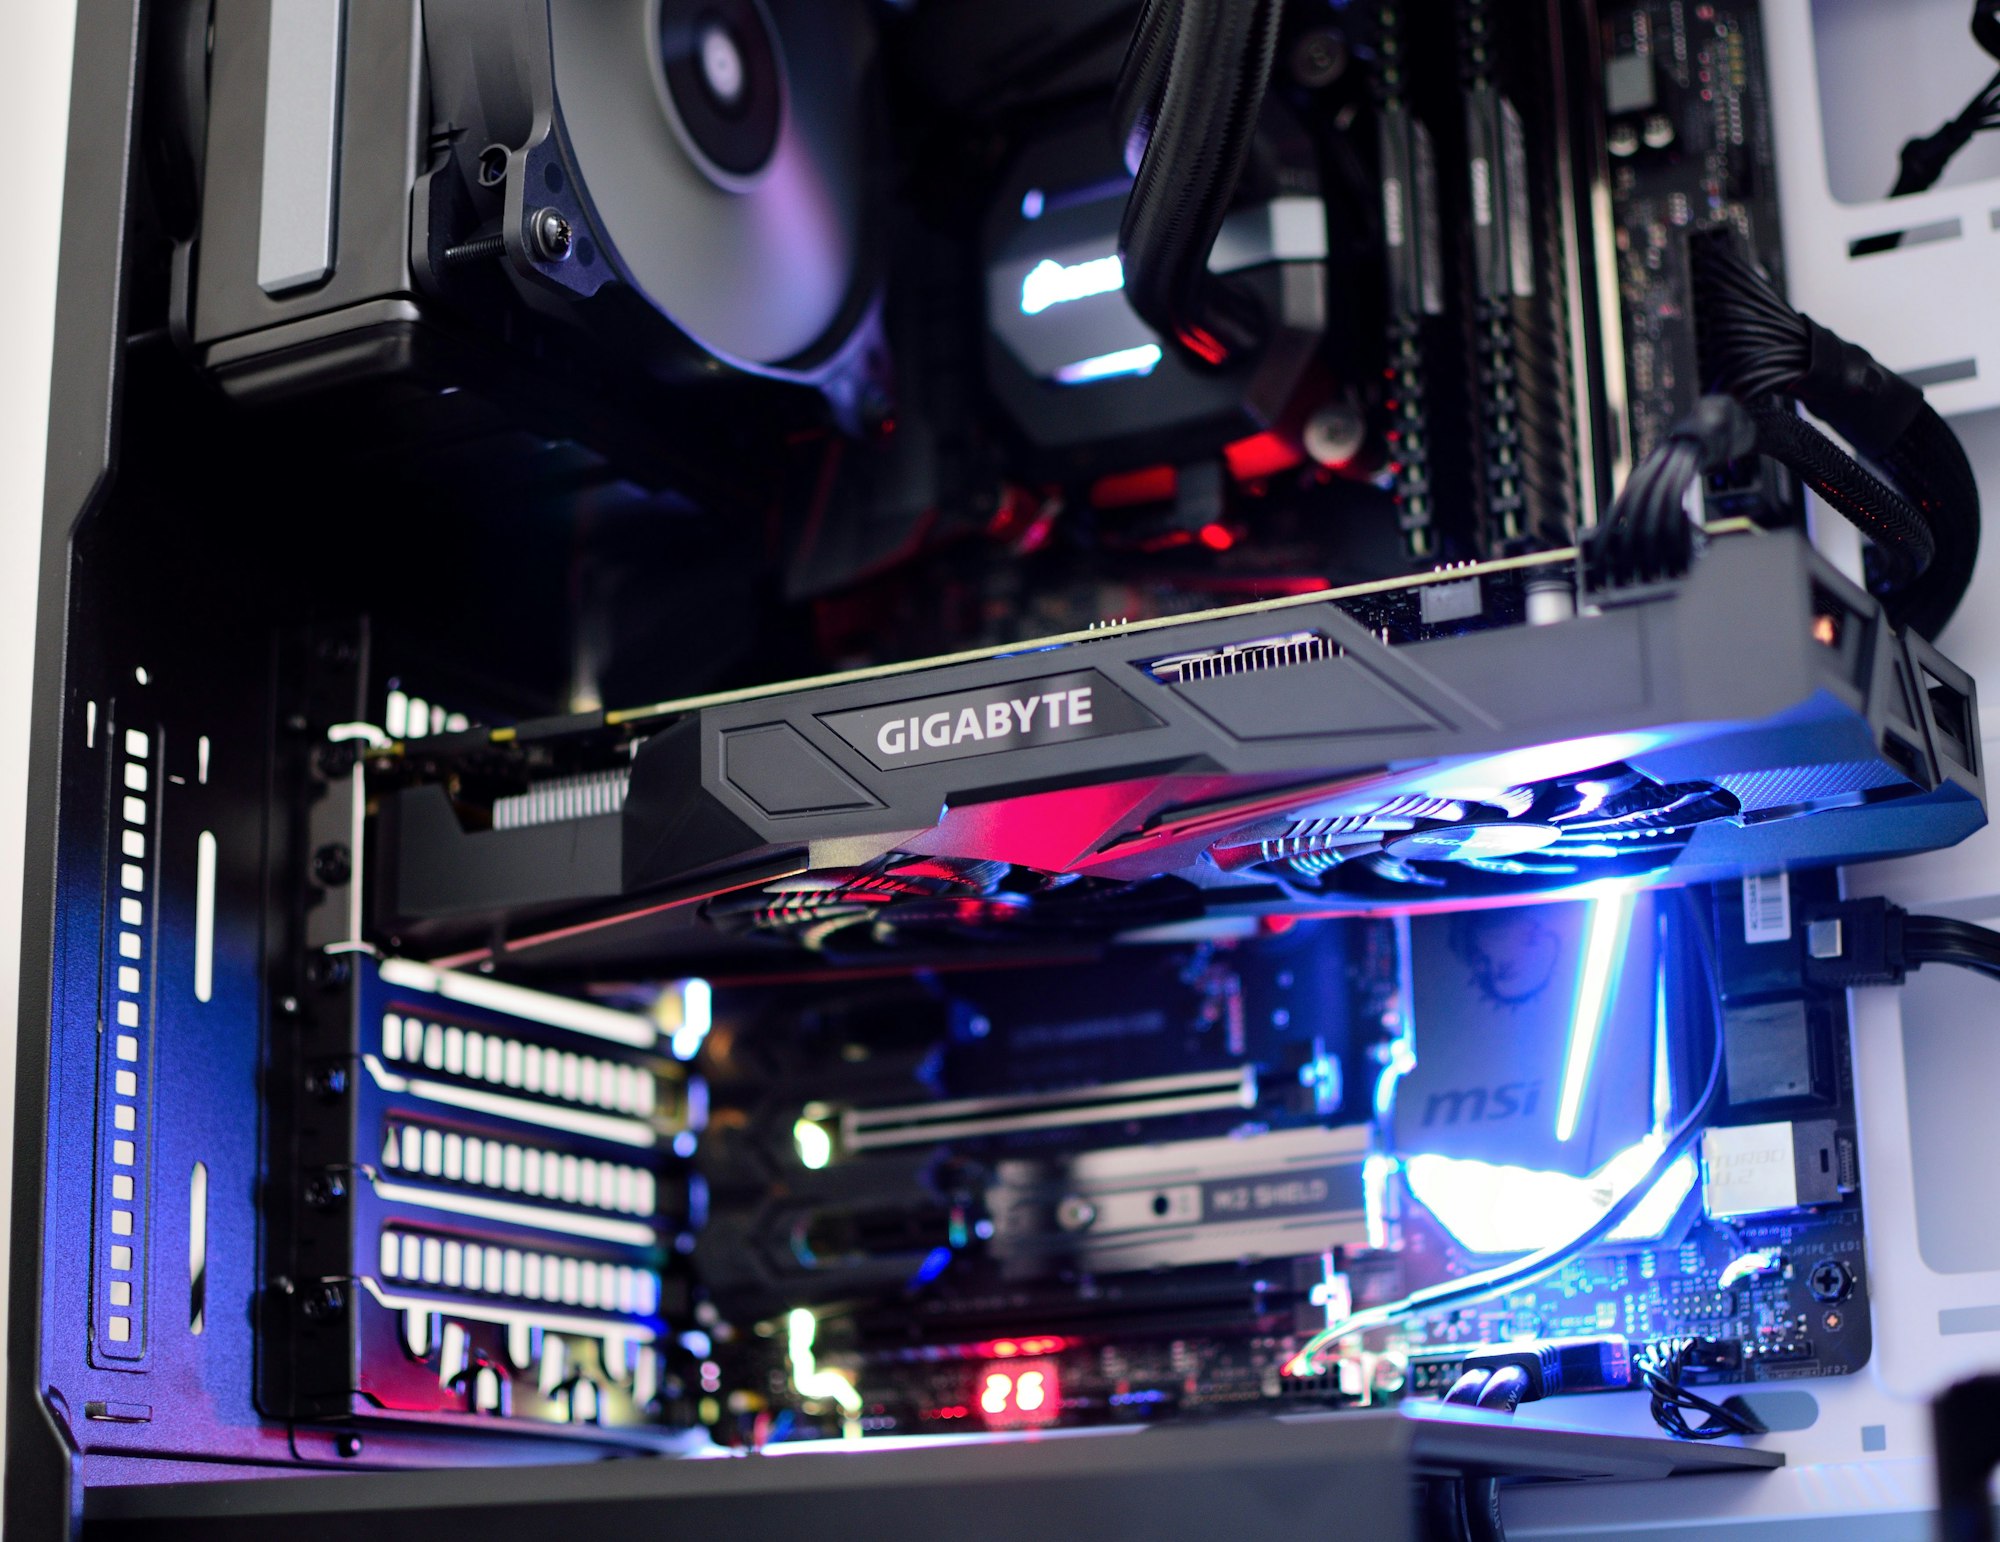
📹 Section 3: Hardware Tier List (2026 Update)
Not all GPUs are created equal. If you are buying hardware specifically for Plex, use this hierarchy. If you're already thinking, wait, wouldn't having a GPU be really beneficial here? You're right in a lot of cases...
| Tier | Hardware | Why? |
| S-Tier | Intel QuickSync (UHD 770 / Arc A380) | The undisputed king. Low power draw, incredible quality, and supports AV1 decode. An i3-12100 can beat a $500 GPU. |
| A-Tier | NVIDIA Ampere (RTX 3050 / 3060) | Excellent quality and supports "Tone Mapping" easily. Uses more power than Intel but is a beast for other lab tasks (AI/LLMs). |
| B-Tier | NVIDIA Pascal (Quadro P2000) | The old standard. Cheap and reliable, but lacks modern codec support (no AV1) and produces slightly lower quality images than modern cards. |
If you'd like to look into more hardware, jump over to my hardware guide here:
Top Causes for Transcoding
- Client device cannot natively play the media file due to video container or codec incompatibility.
- Client device cannot natively play the media file due to audio codec or format.
Either or apply, if the video is playable but the audio is not, transcoding occurs and opposite as well - Client device cannot play/utilize the subtitle enabled, requiring 'burn in'.
Avoid by utilizing plain text subs such as SRT! Avoid image-based subs like PGS or VOBSUB - Client device or client network cannot handle the bandwidth requirements to play the media at the native bitrate.
Example: You're visiting family who have terrible internet and their smart tv is being fed by 10Mbps internet, of which your 1080p HDR file has to now be transcoded down to 720p 4Mbps...
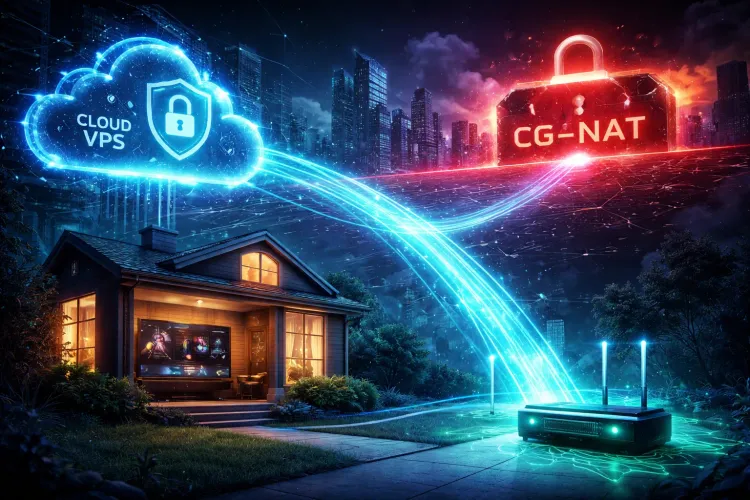
Fix Plex Local Play & “Indirect Connection” and Relay Speed Limits🌐
Don't want to get stuck locked out of Plex if your internet goes down?
- Login to your Plex locally:
http://yourplexip:32400/web - Click
Settings->Network->LAN Networks- Put your LAN subnet into this field and click "Save Changes".
- If you don't know what your subnet is, you can safely put this in:
10.0.0.0/8,192.168.0.0/16,172.16.0.0/12
This is simply the RFC1918 IP addressing for locally assigned subnets (Non internet routable). 99% of home networks worldwide will have a network in these ranges.
The Plex Relay Trap
If your friends say "Plex looks blurry" or "like a potato" or "It keeps buffering at 720p," they are likely stuck in the Relay Trap.
- The Penalty: Free users are capped at 1 Mbps❗
- Even Plex Pass subscribers are capped at 2 Mbps🤯
- The Fix: Manually Port Forward 32400 in your router. Do not trust UPnP - it is a security risk and often fails.
1. What is Plex Relay? If Plex cannot make a direct connection to your server (due to firewall or network issues), it routes traffic through Plex's own servers.
- The Penalty: Free users are capped at 1 Mbps. Plex Pass users are capped at 2 Mbps.
- The Symptom: Your 4K movie is forced down to 720p Potato / Peasant Quality.
2. The Fix: Port Forwarding Do not rely on UPnP. Log into your router (or OPNsense) and manually forward Port 32400 (TCP) to your Plex Server's IP.
- Verification: Go to Settings -> Remote Access. It must say "Fully Accessible Outside Your Network" in Green. If it says "Indirect," you are in the Relay Trap.
Advanced Plex Optimization: Network Tweaks, BBR & Database Maintenance
BRR Congestion Control Network Tweaks (Linux Only)
While not a Plex setting, Google’s BBR algorithm is the 'Secret Sauce' for Linux admins. It makes remote streams feel like local ones by fixing how packets are handled over shaky internet.
What's BBR?
- Purpose: This setting forces the system to use the BBR (Bottleneck Bandwidth and Round-trip Time) congestion control algorithm.
- What it does: BBR is designed to be particularly effective in environments with variable network conditions (like streaming) because it adapts to the network's current state. It estimates the bottleneck bandwidth and uses this information to adjust its transmission rate, minimizing packet loss and jitter.
- Why it’s beneficial: Traditional congestion control algorithms (like Reno or Cubic) can struggle with fluctuating network conditions, leading to buffering and poor streaming quality.
- Google Research Paper (2014): This is the foundational research. https://arxiv.org/abs/1406.4052 – This paper demonstrated BBR's superior performance in high-bandwidth, high-latency networks, which is exactly what streaming servers often operate in. YOU might have a good network but do your parents who you're streaming to? ;)
- Reddit Discussions & Community Feedback: Numerous discussions on Reddit (r/plex, r/homelab) and other tech forums have reported positive results with BBR. While anecdotal, the sheer volume of reports suggests a real benefit.
- Plex Support Documentation: Plex officially recommends using BBR for optimal streaming performance. https://support.plex.tv/articles/201740257-bbr-congestion-control-for-plex-media-server/
1. sysctl.conf Adjustments (Network Optimization)
- Purpose: These changes aim to mitigate bufferbloat and improve fairness in local network traffic prioritization.
- Key Changes:
- Edit
/etc/sysctl.conf - Add the lines
net.ipv4.tcp_congestion_control = bbr(BBR – Bottleneck Bandwidth and Round-trip Time) - Run:
sudo sysctl -pto apply the changes.
- Edit
Final Linux System Tweaks
- Disable IPv6 (if not used):
sudo sysctl -w net.ipv6.conf.all.disable_ipv6=1(This can simplify network configuration and reduce overhead). - Increase Swap Size (if needed): Ensure you have sufficient swap space to prevent performance degradation during heavy transcoding. You only need this if you're lacking RAM or you see your swap being used to a heavy extent (75-80%).
- Monitor System Resources: Use tools like
top,htop, orbtopandiotopto identify any resource bottlenecks.
Important Notes:
- Testing: After making these changes, thoroughly test your streaming performance. And test it again, then again!
Move Plex Metadata to SSD or NVMe (Why It Matters)
We'll cover MS Windows and Linux (Debian)
You should chose an NVME or at least an SSD if you're to make the move from a mechanical drive. Also if you're running out of space on your OS or root partition, may as well enhance the performance!
Part 1 - Windows Plex Metadata Storage – Moving to a New Drive
I don't recommend running Plex on MS Windows in general, but many do and many who just start out do. I do not run it this way, so the Windows instructions here have been compiled from a few different sources like the Plex forums and Reddit.
Moving your metadata to a separate drive can alleviate strain on your primary drive and improve access times.
- Intro/Explanation of Solution: The metadata database file grows as your library grows. The steps below allow you to move the Plex install to a faster drive, along with it's Metadata and "trick" Windows & Plex into thinking nothing has changed via a "Junction" link. This is basically MS Windows version of a symlink in Linux! Metadata DB can be 10's of GB if you have a large library. It will take awhile to copy/move this and your Plex instance.
- Step-by-Step:
- Stop Plex Media Server.
- Close the bottom right corner tray icon
- Go into services & turn off or end the plex update service
- Close any/other services that would utilize or reach out to plex
- 💽Backup Plex from original location: Navigate to
%LOCALAPPDATA%\Plex Media Server\- Copy it somehere safe (This may take awhile! You might want to ZIP it as well)
- 🚀MOVE the Plex files to your newly chosen location
- Must be internal drive (SATA, NVME, etc) NOT external/USB drive.
- Must also be NTFS formatted drive / storage.
- Don't dump the
Plex Media Serverfolder directly onto the root of the drive, eg,E:\. This will cause problems as the root of each drive is somewhat more 'protected' and will cause problems, let alone a bunch of 'hidden' folders are at the root for Windows to operate the drive. - Ensure original Directory does not exist at original location now.
C:\Users\joe\AppData\Local\Plex Media Serverdelete the Plex Media Server folder, if it's still there post-move.
- Use the Junction command for mkLink (Windows version of a Hardlink)
- Stop Plex Media Server.
- Open command prompt, prob with admin privs and then type:
mklink /J “C:\FAKE DIRECTORY” “P:\REAL LOCATION”- Spaces in the name force usage of "
- If more than 1 person login to the Windows machine running the Plex server, you must complete this step for each user of the system.
mklink /J “C:\Users\joe\AppData\Local\Plex Media Server” “P:\Plex\Plex Media Server”- Repeat for as many users as are on your system.
- P:\ is just an example, maybe your chose location has been mounted as D:\, E:\ etc...
Part 2 - Linux Plex Metadata Storage – Moving to a New Drive
- Intro/Explanation: The process for Linus (Debian) based systems hasn't changed much over many years luckily.
- Step-by-Step:
- Stop Plex Media Server:
sudo systemctl stop plexmediaserver- Then make sure with
killall -u plex
- Then make sure with
- Copy the Plex folder:
- For smaller libraries, cp works fine.
cp -rf '/var/lib/plexmediaserver/Library/' /new/dir/to/plex/ - Larger libraries or moving from 1 system to a new system/external/network storage, better to use rsync.
rsync -azvh /var/lib/plexmediaserver/Library/ /new/dir/to/plex/Library/
- For smaller libraries, cp works fine.
- Stop Plex Media Server:
Rsync command flags:
*   `-a`: Archive mode – preserves permissions, timestamps, etc.
*   `-v`: Verbose – shows the files being copied.
*   `-p`: Preserve permissions
*   `-r`: Recursive (needed for directories)
*   `-g`: Preserve group
*   `-t`: Preserve modification times
*   `-D`: Preserve device files
*   `-z`: Compress data during transfer (useful over a network)
*   `--progress`: Shows the transfer progress
- Rename old Plex directory in case things go wrong:
mv '/var/lib/plexmediaserver/Library/Application Support' '/var/lib/plexmediaserver/Library/Application Support.OLD' - Create symbolic link:
ln -s '/new/dir/to/plex/Application Support' '/var/lib/plexmediaserver/Library/ - Fix Permissions in new location:
chown -R plex:plex '/var/lib/plexmediaserver/Library/Application Support'- Verify with
ls -ltra /new/dir/to/plex/Application Support
- Verify with
- Start Plex and ensure it's fully functional:
systemctl start plexmediaserver- Follow that up with
systemctl status plexmediaserverto see if it stayed running!
- Follow that up with
- Remove old Plex location:
rm -rf '/var/lib/plexmediaserver/Library/Application Support.OLD'
Important Notes for Debian:
- File Permissions: Ensure that the Plex user (usually
plex) has read and write access to the new cache and metadata locations. - Mount Points: Use appropriate mount points for your storage devices.
systemctl: This command is used to manage systemd services, including Plex Media Server.
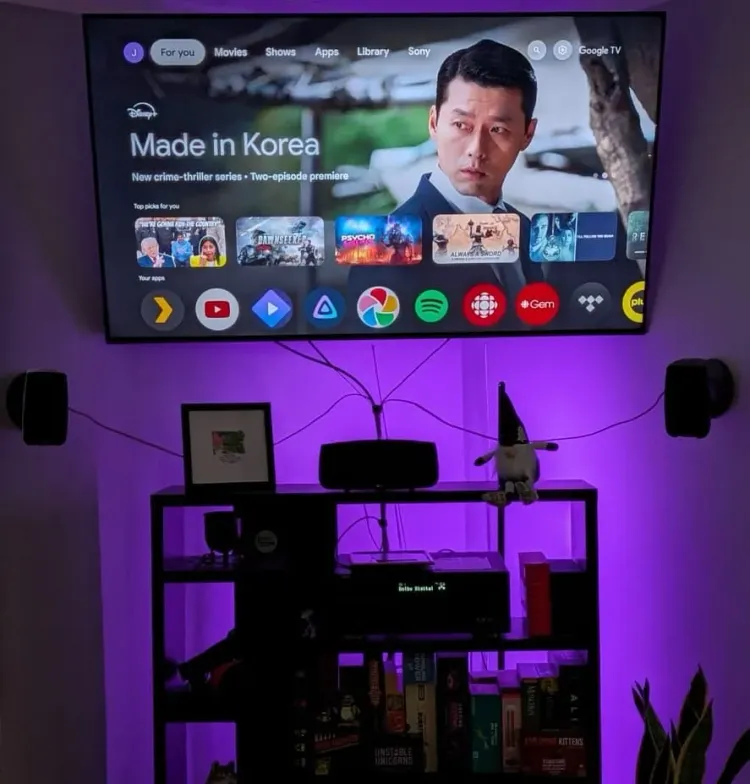
📺 Section 4: The Client Manifesto (Direct Play is King)
You can have a $5,000 server, but if your client is a $20 Fire Stick, you will still buffer. Direct Play is the goal, even though it won't always happen.
The Golden Rule: Transcoding is a fallback; Direct Play is the goal. You want your server to do nothing but send the file. This is easy work for devices now days! Even a 10 year old computer can sling a 1080p out no problem.
1. The "100 Mbps" Smart TV Trap Almost all Smart TVs (LG OLEDs, Samsung, Sony) have Ethernet ports limited to 100 Mbps.
- The Problem: A 4K Remux (high bitrate) movie can spike to 150 Mbps+.
- The Result: Your TV's physical network port causes the buffering, forcing Plex to transcode.
- The Fix: Use Wi-Fi (5GHz/6GHz often beats the wired port on TVs) or buy a dedicated streamer.
- OR (Advanced): Buy a USB 3.0 based Network Interface Card for the TV, enable NIC via USB in your TV/Android TV's settings via Developer Options, and use this to hardware your TV at 1Gbps!
2. Recommended Clients If you want flawless playback of 4K DoVi (Dolby Vision) and TrueHD Atmos audio, you need specific hardware.
NVIDIA Shield TV Pro
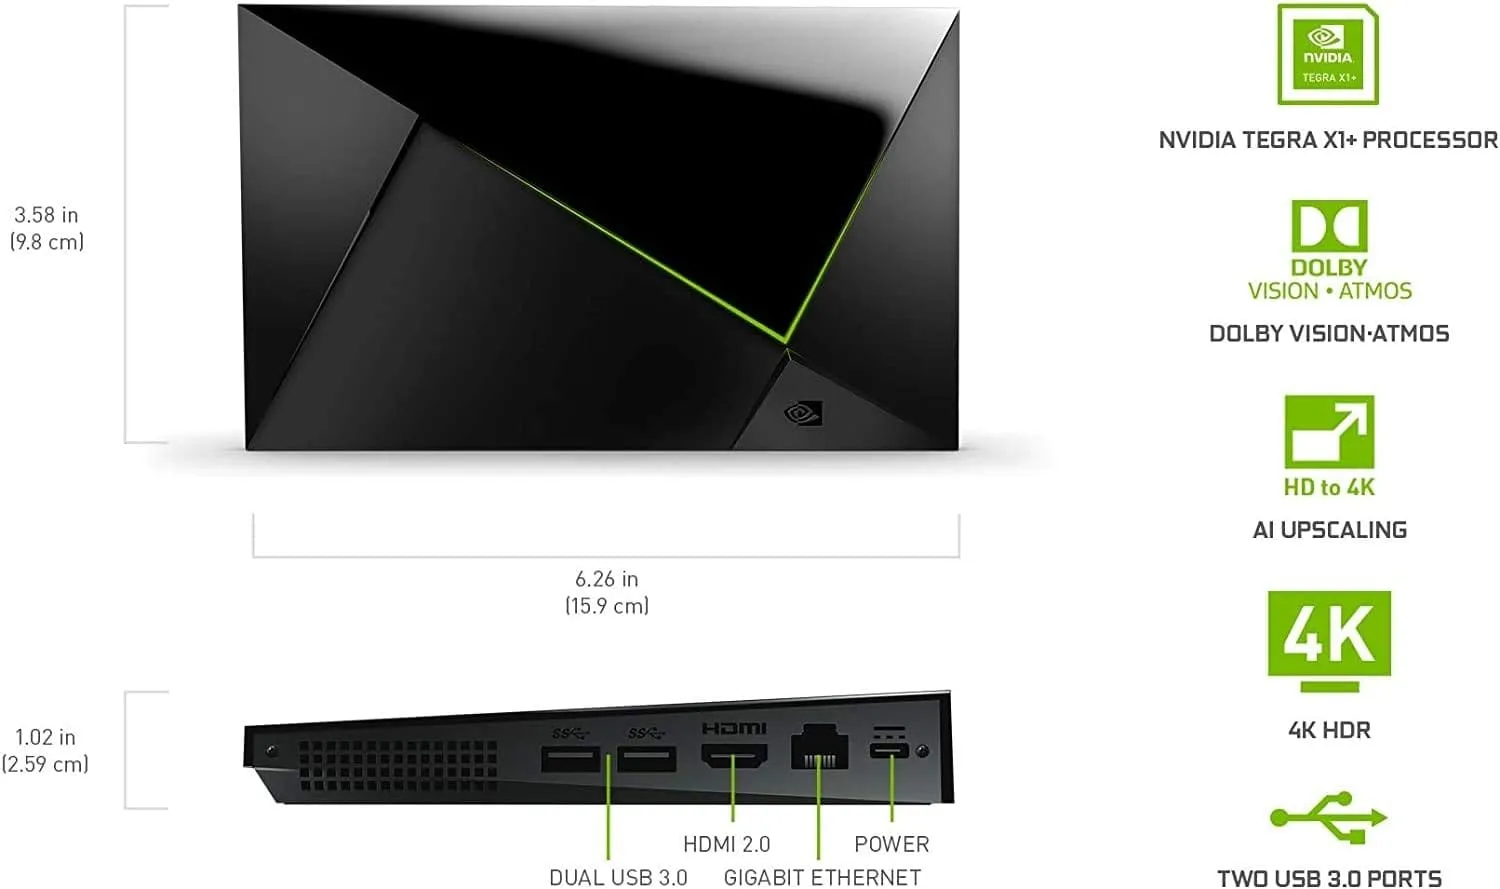
NVIDIA Shield Pro
Android TV Pro | 4K HDR Streaming Media Player, High Performance, Dolby Vision, 3GB RAM, 2x USB, Works with Alexa
- Why it’s great: This is the top recommendation performance wise. The only mainstream device that plays everything (TrueHD, DTS-X, DoVi) without forcing a transcode basically ever. The Shield TV Pro boasts a powerful Tegra processor, excellent Android TV support, and a robust developer ecosystem. It’s renowned for its ability to handle demanding IPTV apps, including those with complex streaming protocols.
- Sideloading: Excellent. It’s designed for developer tinkering.
- Key Features: Dolby Vision/Atmos support, native 4K streaming capabilities w/AI up scaling builtin, customizable interface.
- Price: $250 - $350 (depending on storage)
Google TV Streamer 4K
Google TV Streamer 4K
Fast Streaming Entertainment With Voice Search Remote - Watch Movies, Shows, Live TV, and Netflix in 4K HDR - Smart Home Control - 32 GB Storage
- Why it’s great: This is the top recommendation and hits the "sweet spot" of price/performance. The Google TV Streamer 4K has a powerful Amlogic quad core processor, excellent Android TV (v14!) support, and support for all modern audio/visual codecs. Native playback for: AV1, H.265 (HEVC), H.264 (AVC) and audio wise, Dolby Digital, Dolby Digital Plus, Dolby Atmos. It’s renowned for its ability to handle demanding IPTV apps, including those with complex streaming protocols.
- Sideloading: Easily accomplished!
- Key Features: Dolby Vision/Atmos support, native 4K streaming capabilities, customizable interface and finally, price!
- Price: $99 - $130 CAD (frequent sales)
ONN 4K Android TV Streamer
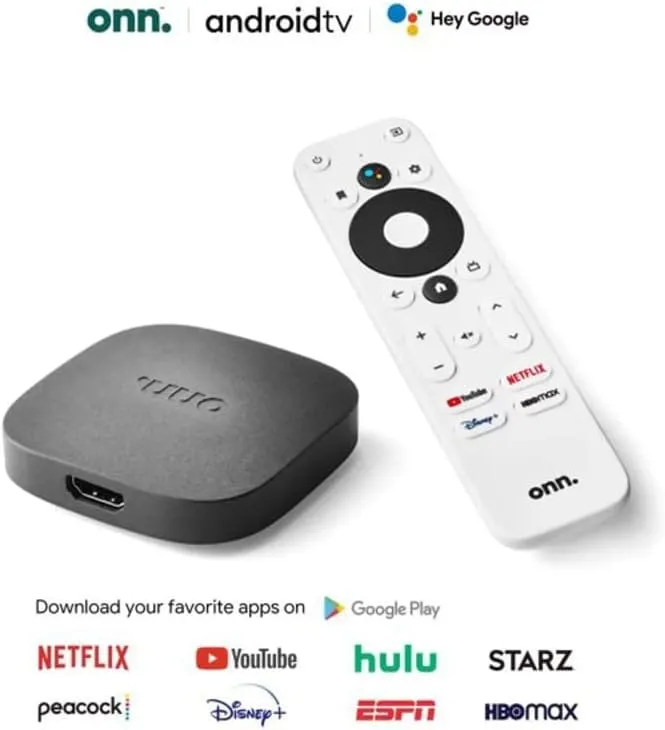
ONN 4K Android TV
4K UHD Streaming Device with Voice Remote Control Google Assistant & High Speed HDMI Cable
- Why it’s great: The entry of the Walmart Onn 4K into the Canadian market at a price point of approximately CAD $75 represents a massive disruption to the price-to-performance ratio previously dominated by Amazon’s Fire TV line.
- Sideloading: Easily accomplished since it's Android TV at it's core.
- Key Features: Native 4K streaming capabilities, Dolby Audio, price! The unit utilizes the Mali-G31 chipset, a quad-core ARM Cortex-A35 processor, supported by 2GB of RAM and 8GB of internal storage.
- Price: $50 - $75 CAD (frequent sales)
3. The "Original Quality" Setting Tell your users to do this immediately:
- In their Plex App Settings -> Video Quality.
- Set Remote Streaming to "Maximum" or "Original".
- By default, Plex apps limit remote streams to 720p (4 Mbps), forcing your server to transcode everything unnecessarily.
Noticing a trend here? Very often transcoding comes down to the client compatibility with your media file being served by Plex.
Having a GPU or an iGPU mitigates these issues and even an older "weak" GTX 1650 can pump out like 15 simultaneous transcodes without breaking a sweat!
Deep Dive on Transcoding here:
Section 6: WickedAddons, Enhancements!
Powerful final tweaks...
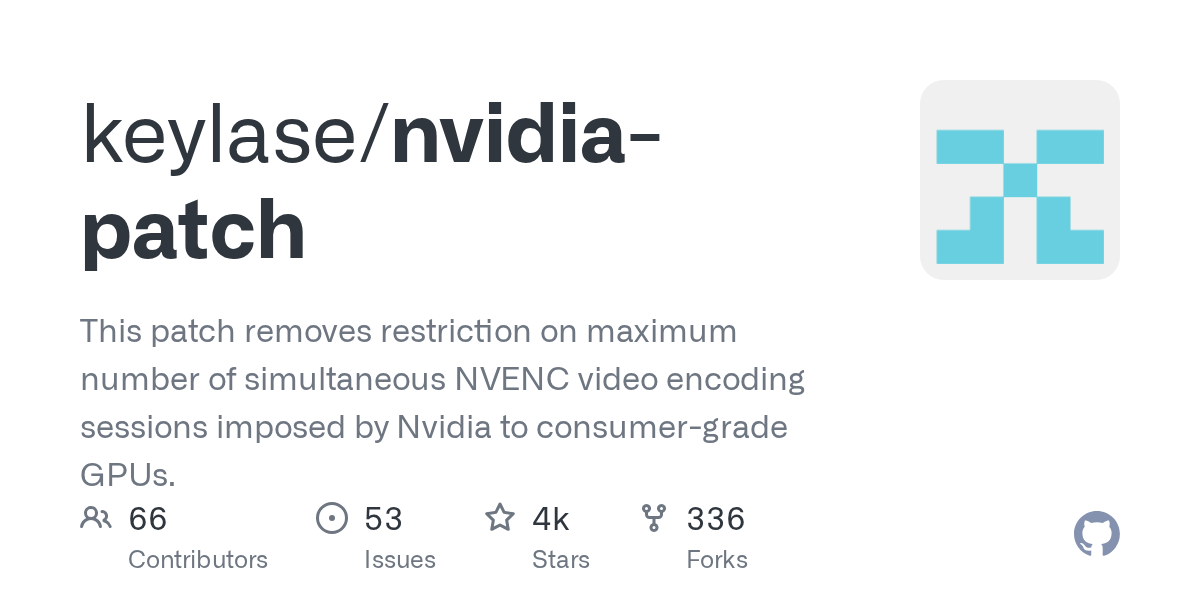
NVIDIA-Patch
First up is the keylase nvidia-patch. This unlocks the artificial limitation NVIDIA places on all consumer grade GPUs. That's right, oh you bought an RTX 4060 Super for transcoding? It's locked to 4 streams. So is an aging GTX 1650. So its an RTX 5090! Wait, why?!
So they can sell Enterprise grade GPUs and APUs
Enter the beautiful, amazing, open-source community of developers F-T-W! Instructions at the link, but now you can enjoy the full power of that NVIDIA GPU.
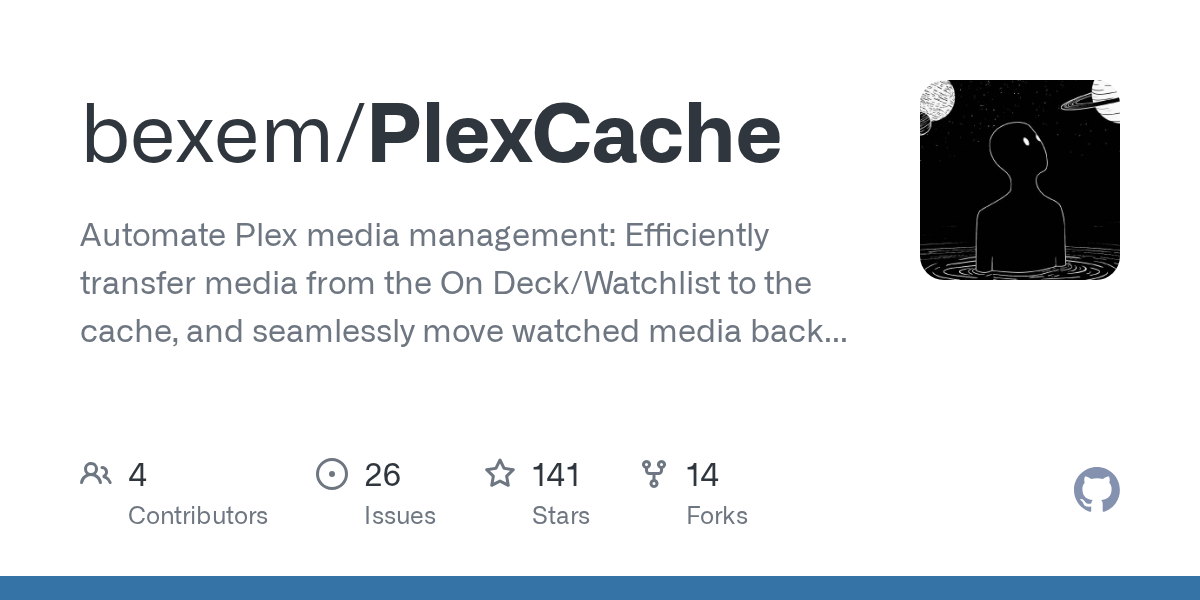
PlexCache
Last but not least, PlexCache! This allows you to efficiently "pre-cache" or fetch a specified number of media files and seamlessly move them to a faster or higher performing storage medium!
You can chose a specified number of episodes from "On Deck" and/or "Watchlist" for main user and/or other users.
Details at the link:
🛠️ One Final Tweak: The Subtitle "Killer"
Avoid Image-based subs (PGS/VOBSUB). These force "Subtitle Burning," which is a single-threaded CPU task that can make even a Threadripper cry. Action: Stick to SRT (SubRip) text subtitles for 100% compatibility.
The "Instant GPU" Docker Compose Configuration (2026 Edition)
This template includes the SHM Fix, RAM Transcoding, and Hardware Passthrough out of the box. Free sign up to access! 👇
Join the Core Lab Inner Circle
Access all the Core Lab Code Snippets!
🔑 Why this configuration works:
shm_size: '8gb': This is the "kill switch" for that 64MB Docker default. By declaring this at the service level, you're telling Docker to let Plex breathe./dev/shm:/transcode: Instead of creating a complex virtual drive in your OS, we are mounting the container's transcode directory directly to the host's shared memory (RAM). It's the cleanest way to achieve zero SSD wear.network_mode: host: While some prefer bridge mode,hostis the gold standard for Plex. It handles GDM (local discovery), DLNA, and remote access mapping without you having to manually forward 10 different ports in Docker.
🕵️♂️ The "Is It Actually Working?" Verification Checklist
Installing Plex is step one; verifying your optimizations is where the pros live. Run these three checks to ensure your "Engine Room" is actually firing on all cylinders.
Level 1: The "Sanity Check" (CLI/Terminal)
Before you even open the Plex app, make sure the OS and Docker are talking to your hardware.
- The RAM Disk Check: Is your transcode folder actually in RAM?
- Command:
df -h /dev/shm(Linux/Docker) - Goal: Watch the "Used" column while you start a movie. If it stays at 0, your transcode path is wrong.
- Command:
- The GPU Handshake: Can the container see your graphics card?
- NVIDIA:
docker exec -it plex nvidia-smi - Intel/Arc:
docker exec -it plex ls /dev/dri - Goal: You should see your GPU model or the
renderD128device. If you get "Command not found" or "No such file," your drivers or passthrough are broken.
- NVIDIA:
Level 2: The Dashboard Check (The "hw" Hunt)
Open your Plex Web UI, start a heavy 4K movie, and head to Settings → Dashboad.
- The (hw) Tag: Look at the "Now Playing" card. You want to see (hw) next to both Video Decode and Video Encode.
- Only one (hw)? Your CPU is still doing half the work.
- No (hw) at all? Hardware acceleration is either disabled in settings or your drivers are mismatched.
- The "Transcode Reason": Hover your mouse over the "Transcoding" text. Plex will tell you why it's transcoding (e.g., "Color space not supported" or "Bandwidth limit exceeded"). This is the fastest way to spot the Relay Trap.
Level 3: The HDR Tone Mapping "Acid Test"
This is the ultimate test for a 2026 server. Playing a 4K HDR movie on a 1080p SDR screen (like an old phone or laptop).
- Start a 4K HDR movie.
- Force the quality to 1080p.
- Check the Colors: * Passed: The colors look vibrant and natural. (Hardware Tone Mapping is working).
- Failed: The movie looks "washed out," grey, or dull. (Tone Mapping is either failing or running on the CPU, causing massive buffering).
📋 The "Optimization" Cheat Sheet
| Check | Success Criteria | If it fails... |
| RAM Path | /dev/shm shows usage during playback. | Check your Volume Mapping in Docker. |
| GPU Status | (hw) appears in the Plex Dashboard. | Check Settings → Transcoder → Use HW Acceleration. |
| Remote Speed | Shows "Direct Connection" (Green dot). | You're in the Relay Trap. Check Port 32400. |
| Disk Space | No "Not enough disk space" errors. | Increase shm_size in your Docker Compose. |
| Subtitle Play | Movie starts instantly with SRT subs. | You might be using PGS/VOBSUB "image" subs. |
Pro-Tip: If you see (hw) but the movie still buffers, check your Upload Speed in Settings → Remote Access. If you haven't told Plex your actual upload speed, it might be trying to squeeze a 40Mbps file through a 10Mbps pipe!🏁 Final Thoughts: The "Invisible" Server
The goal of all these tweaks isn't just to see high numbers in a dashboard—it's to make your technology invisible. When you can click play on a 4K Remux from a hotel room halfway across the world and have it start instantly without a hiccup, you’ve won the self-hosting game.
By prioritizing your database IOPS, shielding your SSDs with RAM transcoding, and ensuring your network isn't choking on legacy protocols, you’ve built a server that’s ready for 2026 and beyond. Plex is a journey, not a destination, so keep an eye on your logs and stay curious!
🗨️ Join the Conversation
I’ve shared my "Engine Room" secrets, now I want to hear yours.
- What hardware are you running in 2026?
- Did the BBR tweak or the RAM disk finally kill your buffering issues?
- Are there any "hidden gem" clients you're using that I missed?
Drop your setup and your results in the comments below—let’s help each other build the ultimate library!
Plex Optimization FAQ (2026)
Why is Plex buffering even on a powerful server?
Buffering is usually caused by slow metadata storage (HDD IOPS), the Plex Relay indirect connection cap, client bandwidth limits, or hardware acceleration not being enabled correctly.
Does RAM transcoding improve Plex performance?
Yes. RAM transcoding dramatically improves seek speed and eliminates SSD wear. In Docker, you must increase shm_size or Plex will crash with disk space errors.
Why is Plex using CPU instead of GPU?
Common causes include missing GPU drivers, incorrect Docker passthrough configuration, disabled hardware acceleration in Settings → Transcoder, or unsupported tone mapping.
What is the Plex Relay speed limit?
When Plex cannot establish a direct connection, it routes traffic through Plex Relay. Free accounts are capped at 1 Mbps and Plex Pass users at 2 Mbps, causing low-quality remote streams.
How much RAM is needed for 4K transcoding?
For 4K HDR transcoding with tone mapping, 8GB–16GB of RAM per active stream is recommended when using RAM disk transcoding.
Why does Plex say “Not Enough Disk Space” when I have free space?
In Docker, the default shared memory (/dev/shm) is limited to 64MB. You must increase shm_size in docker-compose to prevent crashes.
Does moving Plex metadata to NVMe really help?
Yes. Plex uses an SQLite database that performs thousands of small disk operations. Moving metadata from HDD to SSD/NVMe significantly reduces UI lag and poster load times.
Resources & Further Research


Member discussion