
The Definitive Guide to Docker Compose: Infrastructure as Code (2026)
Your hardware is built. Thermal paste applied. BIOS tuned. OS installed. Good.
Now it’s time to make the machine actually do something. That means containers - and more specifically, Docker Compose.
I’ve been running Docker since around 2014. Most beginners treat Docker like a junk drawer: they throw containers in, hope they stick, and pray the permissions don't break on a reboot. In 2026, we don't do 'hope.' Whether you're reviving an old OptiPlex for a Scrap-Lab or deploying on a fresh Ubuntu 24.04 LTS instance, you need a system of operations. This guide isn't just about 'installing Docker' - it's about building a Digital Fortress where your data is sovereign, your networking is tactical, and your infrastructure is code.
This post is a part of my Docker & Self-Hosting Master Series:
Docker & Self-Hosting Mastery
Docker Compose Fundamentals
Part 1: What Is Docker Compose and Why Does Every Homelab Use It?
Definitive Docker Compose Guide
Part 2: Learn Docker Compose from Beginner to Power User
Real-World Docker Deployment
Part 3: Build the Ultimate Arr Stack with Docker Compose
Backup & Disaster Recovery
Part 4: Protect Your Containers with Simple Backup Strategies
It might sound overkill for a homelab - but if you’ve ever saved a config file in a text editor, you’re already thinking this way.
Now comes the engine that makes it all work.
✅ Phase 0: The Flight Check (Prerequisites)
Do not proceed until you can check off these three boxes.
- The Hardware: Any x86 (Intel/AMD) or ARM (Raspberry Pi/Orange Pi) machine.
- The Operating System: A Debian-based Linux distribution.
- Recommended: Ubuntu Server 24.04 LTS or Debian 13.
- (I use Debian exclusively - my personal favorite!)
- Note: This guide is written for standard Linux. If you are using Unraid, TrueNAS Scale, or Synology, this guide does not apply to you (use their built-in App stores, or, install Docker Compose directly on them.)
- The Access: You must have SSH access (Terminal) to your server. You cannot do this part through a web browser yet.

🚀 The Fast-Track: 60-Second Deployment Script for Ubuntu 24.04+
This script bypasses the fluff. It updates the system, pulls the official Docker GPG keys (using the modern signed-by standard), installs the full engine suite, and fixes permissions in one go.
Here's the install script for Ubuntu 24.x:
# 1. Update and install prerequisites
sudo apt update && sudo apt install -y ca-certificates curl gnupg

# 2. Add Docker's official GPG key
sudo install -m 0755 -d /etc/apt/keyrings
curl -fsSL https://download.docker.com/linux/ubuntu/gpg | sudo gpg --dearmor -o /etc/apt/keyrings/docker.gpg
sudo chmod a+r /etc/apt/keyrings/docker.gpg

# 3. Add the repository to Apt sources (Ubuntu 24.04 Noble)
echo \
  "deb [arch=$(dpkg --print-architecture) signed-by=/etc/apt/keyrings/docker.gpg] https://download.docker.com/linux/ubuntu \
  $(. /etc/os-release && echo "$VERSION_CODENAME") stable" | \
  sudo tee /etc/apt/sources.list.d/docker.list > /dev/null

# 4. Install the Docker Engine & Compose Plugin (V2)
sudo apt update && sudo apt install -y docker-ce docker-ce-cli containerd.io docker-buildx-plugin docker-compose-plugin

# 5. Enable non-root usage (Optional but Recommended)
sudo usermod -aG docker $USER

echo "Installation complete. Please log out and back in to apply group changes."
🌀 The Debian 13 (Trixie) Fast-Track Script
This script is optimized for Debian’s stricter security model. It handles the GPG keys and sets up the official Docker repo specifically for the trixie codename.
# 1. Update and install prerequisites
sudo apt update && sudo apt install -y ca-certificates curl gnupg

# 2. Prepare the GPG Keyring
sudo install -m 0755 -d /etc/apt/keyrings
curl -fsSL https://download.docker.com/linux/debian/gpg | sudo gpg --dearmor -o /etc/apt/keyrings/docker.gpg
sudo chmod a+r /etc/apt/keyrings/docker.gpg

# 3. Add the Official Debian Repository (Trixie/Stable)
echo \
  "deb [arch=$(dpkg --print-architecture) signed-by=/etc/apt/keyrings/docker.gpg] https://download.docker.com/linux/debian \
  $(. /etc/os-release && echo "$VERSION_CODENAME") stable" | \
  sudo tee /etc/apt/sources.list.d/docker.list > /dev/null

# 4. Install the Engine & Compose Plugin
sudo apt update && sudo apt install -y docker-ce docker-ce-cli containerd.io docker-buildx-plugin docker-compose-plugin

# 5. Permission Handshake
sudo usermod -aG docker $USER

echo "Installation complete. Log out and back in to start hunting."
Why Debian 13 is the "Scrap-Lab" King and my #1 Choice:
Since you’re likely running this on older or repurposed hardware, Debian 13 is actually the superior choice over Ubuntu 24.04 for a few reasons:
- Zero Bloat: No
snapdrunning in the background eating CPU cycles. - Stability: In 2026, the Kernel 6.x series in Trixie is rock solid for older Intel/AMD NICs. Incredible amount of builtin drivers at the kernel level.
- Efficiency: Idle RAM usage on a fresh Debian 13 install is significantly lower than Ubuntu, leaving more "room" for your containers.
🛠️ Step 1: How to Install Docker and Docker Compose on Linux (Debian/Ubuntu - Official Method)
We are going to use the official Docker convenience script. It is cleaner, faster, and less prone to user error than setting up manual repositories.
What's this script do⁉️
- It detects your OS (Ubuntu/Debian).
- It adds the Official Docker Repository to your
/etc/apt/sources.list.d/. - It adds the GPG Keys for security.
- It installs the packages.
1. Update your system
Always start fresh.
sudo apt update && sudo apt upgrade -y
(If prompted, hit Enter to accept defaults).
2. Install Curl
We need this tool to grab the installer script.
sudo apt install curl -y
3. Run the Installer
This single command detects your hardware (Pi vs Intel) and installs the correct version of Docker Engine and Docker Compose.
curl -fsSL https://get.docker.com -o get-docker.sh
sudo sh get-docker.sh
4. Set Permissions (Crucial Step)
By default, Docker requires root (sudo) privileges to run. This is annoying and can lead to permission errors later. Let's add your current user to the Docker group.
sudo usermod -aG docker $USER
⚠️ Stop! You must log out now.
Linux needs to refresh your group membership. Type exit to close your SSH session, and then log back in.
Test it: Type docker ps. If you see a list of columns and don't get a "Permission Denied" error, you are ready for Step 2.
Because this script adds the official Docker repository to your system, you don't need to run this script ever again. Standard system updates (sudo apt upgrade) will keep Docker fresh automatically.
📂 Configuring Your Docker Directory Structure: The /opt/ Standard
Most beginners put their Docker files in their home folder (~/). Do not do this. It gets messy, permissions get weird, and backups become a nightmare. It's just the lazy 'quick' way but you'll never move out of the home folder.
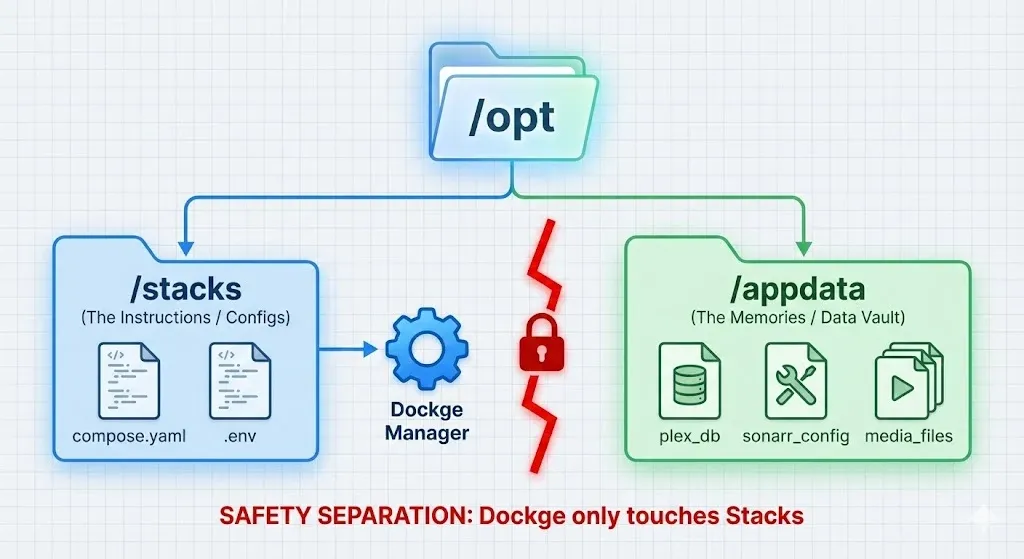
We are going to create a dedicated "Brain" for your server using the Two-Folder Rule.
/opt/stacks: This is where your YAML files live. (The Instructions)./opt/appdata: This is where the containers save their data. (The Memories).
Create them now:
sudo mkdir -p /opt/stacks
sudo mkdir -p /opt/appdata
sudo chown -R $USER:$USER /opt/stacks
sudo chown -R $USER:$USER /opt/appdata
🎓 Core Concept: Why do we separate them?
By default, Docker containers are amnesiacs. If you start a Minecraft server container, build a castle, and then restart the container... the castle disappears. This is because the data lived inside the disposable container layer.
By mapping volumes (like ./data:/app/data), we are punching a hole through the container wall. We tell the application: "Don't save files inside yourself. Save them out here, on the host's hard drive."
This is why the /opt/appdata folder is the most important folder on your machine. It holds the "Soul" of your server. The containers are just the "Body."
Key Differences Bind Vs Volume Mounts:
Feature | Docker Volumes | Bind Mounts |
|---|---|---|
Management | Managed by Docker | Managed by host OS |
Location | Docker's storage directory | Any host path |
Portability | High | Low |
Abstraction | High | Low |
Use Case | Persistent application data, databases | Development, configuration files, host resource access |
⚠️ Critical: Speed vs. Storage (Read this before you fill your drive)
You created the /opt/appdata folder, but strictly speaking, physics matters.
If you want a fast, responsive server, you must follow the Golden Rule of Storage:
1. The "Hot" Data (SSD/NVMe)
- What goes here: The
/opt/appdatafolder. - Why: This folder contains Databases (Plex metadata, Sonarr lists, Home Assistant logs). These require thousands of tiny, random reads/writes per second (IOPS).
- The Risk: If you put
/opt/appdataon a spinning Hard Drive (HDD), your Plex menus will lag, and your interface will feel sluggish. If you put it on a Network Share (NFS/SMB), you risk database corruption (SQLite hates network latency). - Verdict: Keep
/opt/appdataon your local, fast SSD.
2. The "Cold" Data (HDD)
- What goes here: Your Movies, TV Shows, and Music.
- Why: These are large, sequential files. HDDs are cheap and perfect for streaming a movie file.
- The Setup: You will usually "Mount" your large HDD storage into a separate folder (e.g.,
/mnt/storageor/media) and map that into your containers later.
- My Real-World Use case (As an example)
Docker stores everything by default here:
/var/lib/docker/overlay2
So this is with the OS on root partition right? This should benefit from NVME or SSD speeds which will greatly boost the performance of your dockers.
This can build up over time to many GB of usage, but we'll cover how to clean up our dockery messes later. At Core Lab, we're running 54 dockers, utilizing 51.4GB of space. To see how much space the images are using, you can run 1 command.
docker system df
You should see something like this -
TYPE TOTAL ACTIVE SIZE RECLAIMABLE
Images 52 51 54.42GB 3.001GB (5%)
Containers 54 54 4.102GB 0B (0%)
Local Volumes 65 5 12.73MB 11.41MB (89%)
Build Cache 0 0 0B 0B
Volume vs Bind mounts in Docker
In short, volume mounting in docker allows docker to manage the storage itself and usually mounts the storage to the same path, usually in /var/lib/docker/volumes.
This is the more modern and recommended (default) approach now days. Volume mounts are best used for scale, as it enhances portability and is useful when deploying a docker swarm or K8s cluster. For home use, not really required. You can refer to them by name throughout your docker compose like a variable, but that's about it.
Note: If you're running docker from Windows, bind mounts have a performance hit so you should use volumes in this case!
Bind mounting is the 'old' way however extremely useful way which leaves the storage to be managed by the host machine and much easier for you to interact with. The host also has direct access to the docker storage this way and if you need to say, modify config files of a particular docker, like frigate's yml, it's easily accessible without having to docker exec -it "jump" into the docker for example.
It also allows you to place all logs into a single directory for a logging service/container to gobble up!
Lastly, you don't want to run the risk of filling up your root partition with all your docker data and with bind mounts, you can put your docker data basically anywhere.
📝 Step 2.5: The "Cheat Sheet" (.env)
You are about to start pasting a lot of code. You will see lines like TZ=America/Toronto or PUID=1000 over and over again. Instead of typing these manually into every single container (and inevitably making a typo), we use a feature called Environment Variables.
Think of the .env file as your server's "Global Settings Menu."
1. Find your "User Details"
Linux has strict permissions. We need to tell the containers who to pretend to be so they can read/write your files without permission errors.
Run this command:
id $USER
You will see output like: uid=1000(yourname) gid=1000(yourname).
- PUID (User ID) =
1000 - PGID (Group ID) =
1000(Yours might be different, but 1000 is standard for the first user).
2. The Standard Variables
Whenever you create a new stack in the next steps (like Dockge), you will create a .env file right next to your compose.yaml. Here is the "Golden Standard" list you should save in a notepad right now:
# YOUR SERVER SETTINGS
PUID=1000
PGID=1000
TZ=America/New_York  # Change to your real timezone
🧠 Part 1 Theory: The Mental Models
Before we touch the terminal, you need to understand why Docker is the backbone of the modern homelabs. If you’re running on a 10-year-old OptiPlex or a modest Raspberry Pi, efficiency isn't just a goal - it's a tactical necessity.
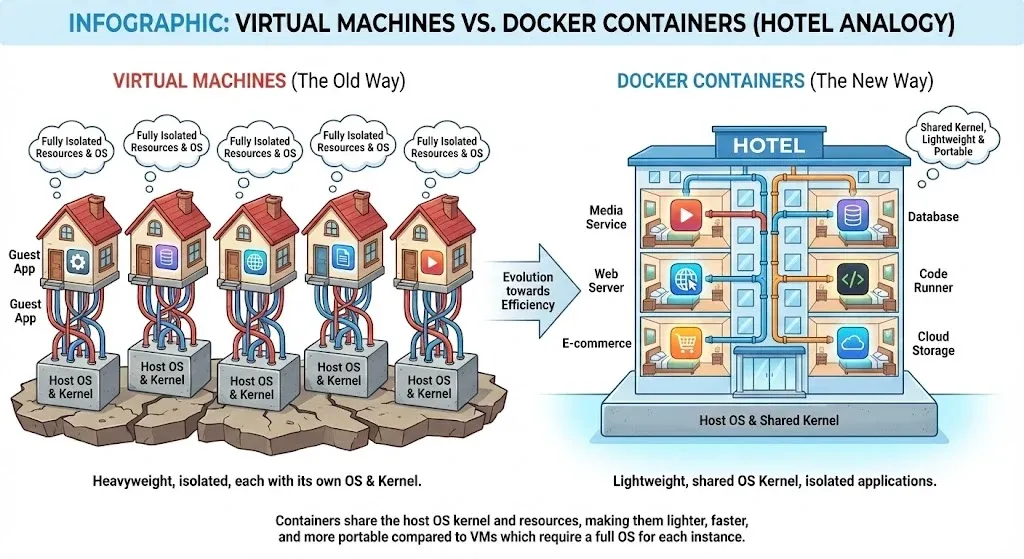
a1. Docker vs. Virtual Machines (The Apartment Model)
In the old days of self-hosting, we used Virtual Machines (VMs).
- The VM Model: Like a row of standalone houses. Each house has its own foundation, plumbing, and heating (The Guest OS). It’s secure, but it's an incredible waste of space and resources.
- The Docker Model: Like a modern apartment complex. Every unit (Container) shares the same heavy-duty foundation and plumbing (The Linux Kernel), but the tenants (Apps) remain isolated.
The Scrap-Lab Win: Because containers don't need to boot an entire operating system, you can run 50+ apps on a machine that would choke trying to run just three VMs.
| Feature | Virtual Machines (VMs) | Docker Containers |
| Foundation | Full OS per VM (Heavy) | Shared Host Kernel (Light) |
| Boot Time | Minutes | Seconds |
| Efficiency | High Overhead | Bare-Metal Performance |
| Portability | Clunky Snapshots | Portable YAML "Code" |
2. Image vs. Container (The Blueprint vs. The Build)
This is where the "Infrastructure as Code" magic happens.
- The Image (The Blueprint): A read-only file you pull from the internet (e.g., "The Plex Image"). It never changes. Think of it as the Cookie Cutter.
- The Container (The House): The actual running instance. It’s the Cookie.
The "Digital Fortress" Rule: If a container starts acting up, we don't spend hours troubleshooting inside the "room." We nuke it and redeploy from the blueprint. In a proper Docker setup, your containers are disposable; your data is what matters.
Cattle, not pets!
Why this matters: If your cookie (Container) breaks, you don't try to glue it back together. You throw it away and press the cutter (Image) down again to make a fresh one. This is why Docker is so powerful - it is disposable. The images are immutable.
Key Differences Summarized:
Feature | Virtual Machines (VMs) | Docker Containers |
|---|---|---|
OS | Full OS per VM | Shared host OS |
Resource Usage | High | Low |
Boot Time | Longer | Faster |
Isolation | Stronger | Weaker (but still good) |
Portability | Moderate | Very High |
Use Cases | Multiple OS, strong isolation | Microservices, lightweight apps |
🏗️ Step 3: Picking a WebGUI Management Tool
If you’ve been in the homelab game for a while, you probably have a "management stack" that looks like a Christmas tree: Dockge for your YAML, Dozzle for your logs, and maybe Watchtower or Portainer for updates.
🎯 The Beginner vs. Advanced Verdict
| Feature | Dockge (The Beginner Choice) | Dockhand (The Advanced Choice) |
| Focus | Just Compose Stacks | Full Lifecycle (Logs, Updates, Scans) |
| Learning Curve | 5 Minutes | 20 Minutes |
| Networking | Local Only | Multi-host & Remote Agent support |
| Security | Minimal | Integrated CVE Scanning & MFA |
Welcome to the Future, Dockhand!
Advanced: Graduating to Dockhand (The Consolidation Play)
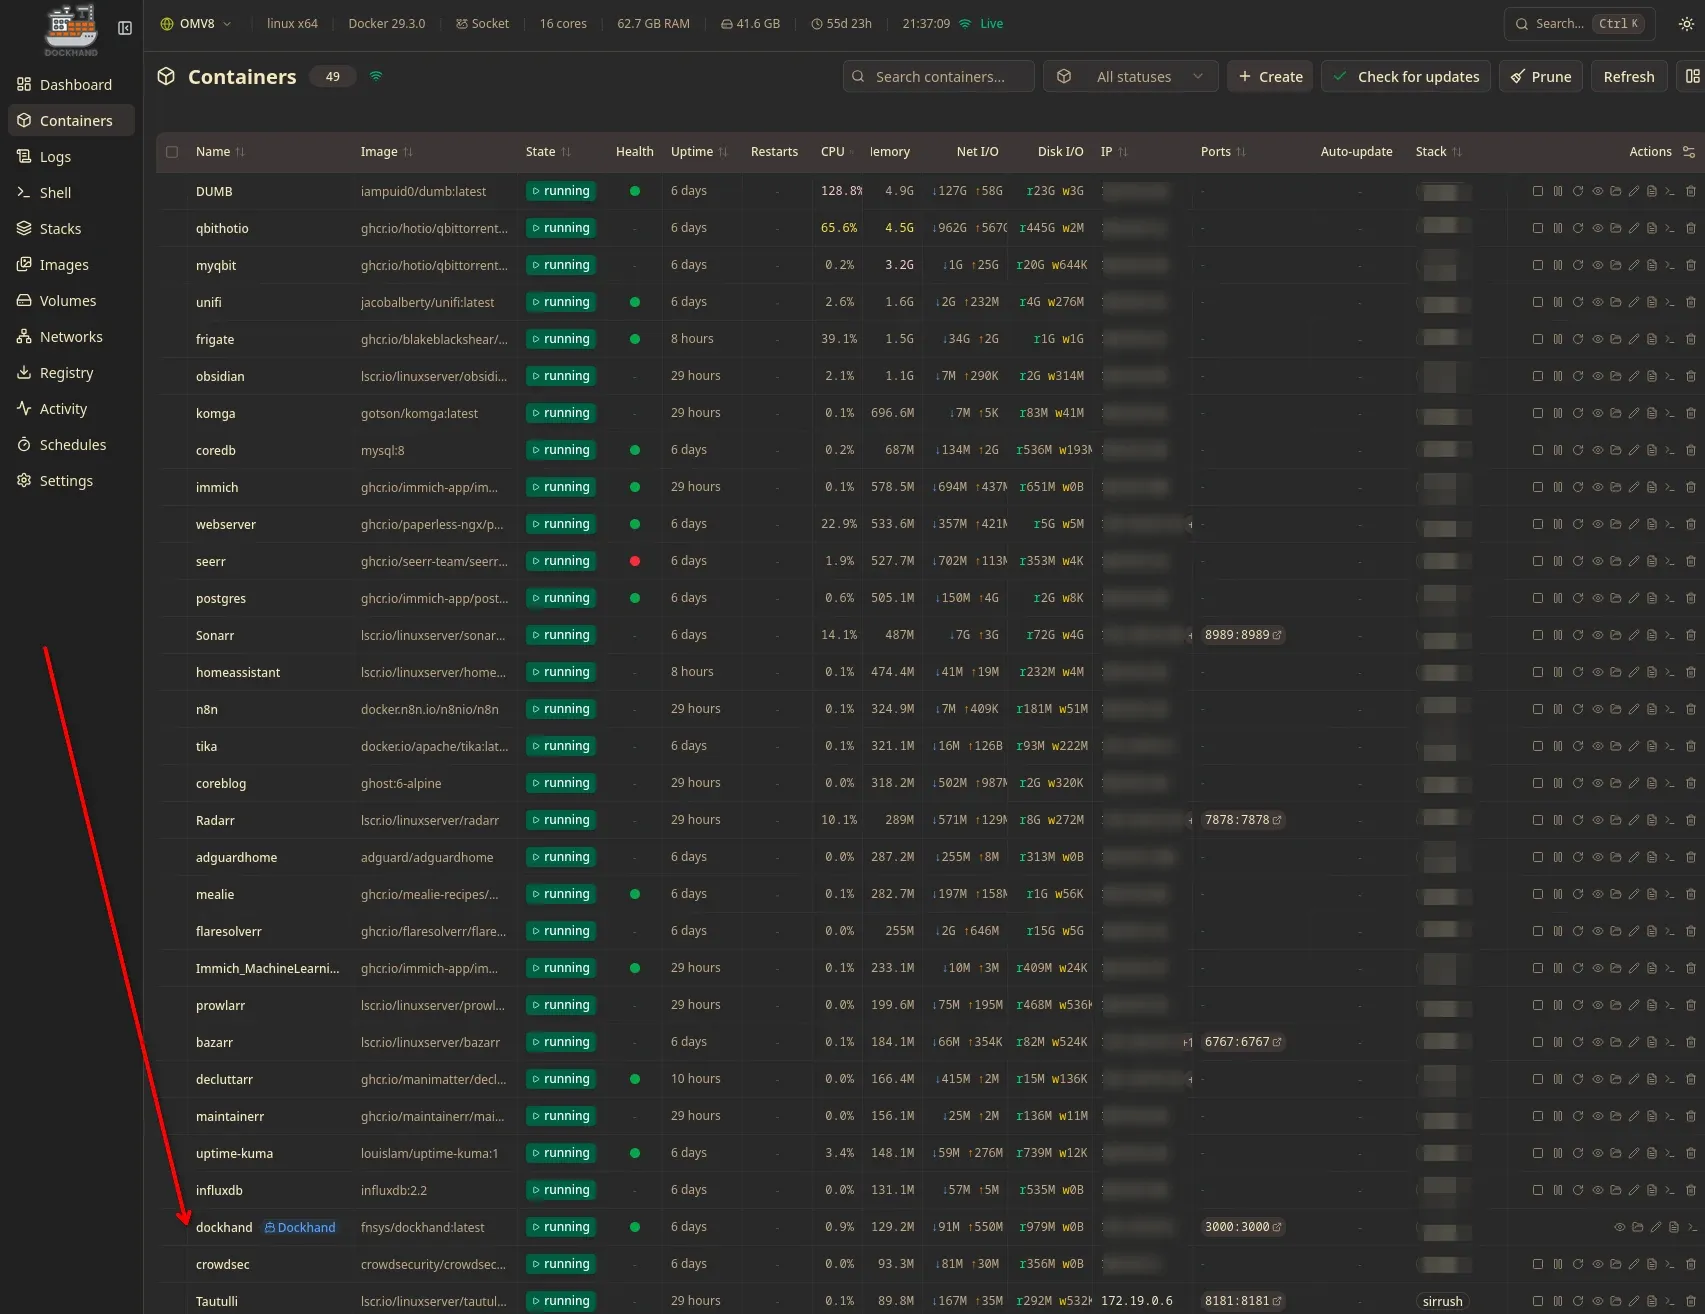
I used to recommend Dockge & Dozzle for new users, but I've since discovered Dockhand, a wildly powerful web-gui for docker management.
Dockhand is the "Management-Stack-Slayer" that just hit the scene, and for a Scrap-Lab, it’s a game-changer. It pulls all those functions into a single, lightning-fast binary with zero telemetry.
Why replace Dockge & Dozzle?
- The Single Pane of Glass: You get Dockge-style Compose management plus real-time, searchable logs (the Dozzle killer) in one UI.
- Built-in Hardening: It includes native vulnerability scanning (using Grype/Trivy) to check your images before you even deploy them.
- This can seem scary at first, but if you pull images from Linuxserver.io and other trusted repos, you're 99% fine. Just don't download JimBob's or Imran's custom image who has no ratings or reviews, no discussion on Reddit or Github.
- GitOps Ready: Unlike Dockge, which is mostly local-file based, Dockhand handles Git-sync natively. Push a change to GitHub, and your lab updates itself.
🚀 Deploying Dockhand
Since we already have Docker and Compose installed from the previous steps, deploying Dockhand is a one-liner. We’re going to mount the Docker socket (the "brain") so Dockhand can manage the host.
  dockhand:
    image: fnsys/dockhand:latest
    container_name: dockhand
    restart: unless-stopped
    ports:
      - 3000:3000
    volumes:
      - /var/run/docker.sock:/var/run/docker.sock
      - /opt/DOCKERS/dockhand_data:/app/data
The "Pro" Transition Logic
If you are moving from Dockge, the transition is manual but worth it:
- Stop your Dockge containers.
- Point Dockhand to your
/opt/stacksfolder. Dockhand can "adopt" existing Compose files. - Enable "Safe-Pull" updates. This replaces Watchtower. Dockhand will pull the new image, scan it for CVEs, and only then restart your container.
The Simple GUI Manager (Dockge)
This is the recommended path for beginners users.
In the past, we all used & recommended Portainer. While powerful, Portainer hides your compose files inside its own internal database. If Portainer breaks, you lose your config. In 2026, we use Dockge & other modern tools.
The folder tree:
/opt/
├── stacks/                  <-- DOCKGE WATCHES THIS
│   ├── dockge/
│   │   └── compose.yaml     <-- The Manager's instructions
│   ├── plex/
│   │   └── compose.yaml     <-- Plex's instructions
│   └── sonarr/
│       └── compose.yaml     <-- Sonarr's instructions
│
└── appdata/                 <-- DOCKGE CAN'T TOUCH THIS
    ├── dockge/              <-- Dockge's internal DB
    ├── plex/                <-- Plex's library DB
    └── sonarr/              <-- Sonarr's configs
Dockge is a "Compose Manager." It reads and writes directly to your /opt/stacks folder. It gives you a beautiful UI, but keeps your files pure text.
1. Create the Dockge directory:
mkdir -p /opt/stacks/dockge
cd /opt/stacks/dockge
2. Create the Compose File:
nano compose.yaml
3. Paste the following configuration:
Notice how we map volumes. We give Dockge access to /opt/stacks (to manage files) but we isolate it from /opt/appdata (to protect your data).
services:
  dockge:
    image: louislam/dockge:1
    container_name: dockge
    restart: unless-stopped
    ports:
      - 5001:5001
    volumes:
      - /var/run/docker.sock:/var/run/docker.sock
      # 1. Dockge's own data (Save it in The Vault)
      - /opt/appdata/dockge:/app/data
      # 2. The Stacks to Manage (Watch The Playground)
      - /opt/stacks:/opt/stacks
    environment:
      # Tell Dockge where to find your other stacks
      - DOCKGE_STACKS_DIR=/opt/stacks
      # Use our Cheat Sheet Variables
      - TZ=${TZ}
4. Create the .env file:
Before starting, create the .env file and paste your "Golden Standard" variables inside.
5. Start it up:
docker compose up -d
Now, navigate to http://YOUR-SERVER-IP:5001. You have a professional dashboard that respects your file system.
💡 Core Lab Tip: The "LinuxServer.io" Standard
When you search for Docker images (like Plex or Sonarr), you will see dozens of versions. In this lab, we standardized on images maintained by LinuxServer.io (LSIO).Consistency: They all use the same folder structures.Permissions: They pioneered thePUIDandPGIDvariables which solves 99% of "Access Denied" errors.Rule of Thumb: If LSIO makes an image for it, use that one.
🤓 The Manual Management Method (For the Purists)
You can skip this step if you installed Dockge or Dockhand above. This is for users who want zero overhead and total control.
Some admins prefer not to use a manager at all. They want to work directly with the raw files. This is actually the most robust way to run a server because it relies on nothing but the Linux file system.
If you choose this path, you are the manager. Here is your workflow and the "raw compose" folder tree:
/opt/
├── stacks/                  <-- THE CONTROL ROOM (Git-Ready)
│   ├── plex/
│   │   ├── compose.yaml     <-- The "Blueprint" for Plex
│   │   └── .env             <-- Passwords/Timezones for Plex
│   │
│   ├── arr-stack/           <-- Advanced: Multiple apps in one file
│   │   ├── compose.yaml     <-- Defines Sonarr, Radarr, Prowlarr together
│   │   └── .env
│   │
│   └── pihole/
│       └── compose.yaml
│
└── appdata/                 <-- THE VAULT (Backup this!)
    ├── plex/                <-- Plex writes its library database here
    ├── sonarr/              <-- Sonarr saves its configs here
    ├── radarr/              <-- Radarr saves its configs here
    └── pihole/              <-- Pihole saves its query logs here
1. Create the Control Room folder:
mkdir -p /opt/stacks/dozzle
cd /opt/stacks/dozzle
2. Create the Compose File:
nano compose.yaml
3. Paste the Configuration:
Notice how we manually point the volume to the "Vault" (/opt/appdata).
services:
  dozzle:
    image: amir20/dozzle:latest
    container_name: dozzle
    restart: unless-stopped
    ports:
      - 8888:8080
    volumes:
      - /var/run/docker.sock:/var/run/docker.sock
4. Launch it:
docker compose up -d
💡 Why do this? The massive advantage of this method is Git. You can turn your/opt/stacksfolder into a Git repository and push your entire server configuration to GitHub (excluding the.envfiles). If your server dies, you can clone your configs to a new machine in seconds.
🕵️ Step 4: The Observer (Dozzle)
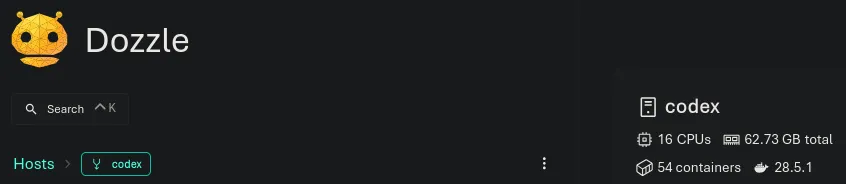
You need to see what your containers are doing. Docker logs are messy in the terminal. Dozzle makes them beautiful, searchable, and real-time.
Let's use our new tool, Dockge, to install Dozzle!
- Go to your new Dockge Dashboard (
:5001). - Click "Compose" (New Stack).
- Name it
dozzle. - Paste this into the editor:
services:
  dozzle:
    image: amir20/dozzle:latest
    container_name: dozzle
    restart: unless-stopped
    ports:
      - 8888:8080
    volumes:
      - /var/run/docker.sock:/var/run/docker.sock
- Click Deploy.
Boom. Go to http://YOUR-SERVER-IP:8888. You can now see real-time logs for every container on your system.
⚡ Work Smarter: The Docker Compose Generator🤯
Now that you understand how to write a Compose file, you shouldn't have to type them out from scratch every time. It’s prone to typos and hard to remember! It can be a lot to absorb at first.
I have built a custom Docker Compose Generator specifically for this community.
- Select your Apps: Pick from the lists
- Customize: Input your PUID/PGID once in the generated
.envand input your network settings and applicable VPN configs in the generator! - Generate: It spits out perfect, error-free YAML code ready to paste directly into Dockge or use raw in a compose file!
[👇 Access the Generator] (Free for all Core Lab members. Just create an account to download your configs!)
Need another container added to the generator? Drop a comment below or email me, happy to get feedback! 😃
🛡️ The "Core Lab" Optimization: daemon.json
This is the "Secret Sauce" for a stable Scrap-Lab. By default, Docker logs grow infinitely until your SSD hits 100% capacity. This configuration limits every container to three 10MB log files, preventing "Disk Death" on day 90!
Path: /etc/docker/daemon.json
{
  "log-driver": "json-file",
  "log-opts": {
    "max-size": "10m",
    "max-file": "3"
  },
  "dns": ["1.1.1.1", "8.8.8.8"]
}
🌐 Step 5: Demystifying Networking (The Apartment Model)
This is where everyone gets stuck. "Why can't I reach my container?" "Why does Sonarr say it can't find Radarr?"
Think of your Server as an Apartment Building. Think of your Containers as Apartments.
One of the great things about containerization, you have a robust plethora of choices when it comes to connectivity. You've got:
- Bridge (Default)
- Host (Sharing)
- MACVLAN (My current preferred mode)
- IPVLAN
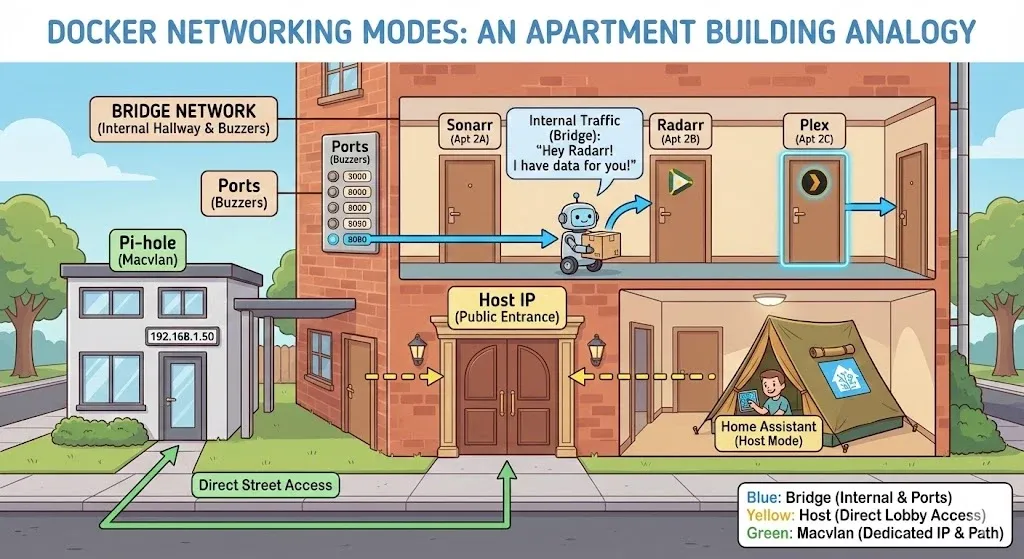
I love pictures, this one is a bit messy but once you read about the network types below it'll make more sense.
flowchart TD
    %% Docker Networking Top-Down with Host, Internet, and Networks

    %% Internet
    subgraph Internet["🌐 Internet"]
        NET["🌐 External Internet"]
    end

    %% Docker Host
    subgraph Host["🖥️ Docker Host"]
        H["💻 Host OS"]
    end

    %% Bridge / Default Network
    subgraph BridgeNet["🌉 Bridge Network (Default)"]
        B1["🐳 Container 1"]
        B2["🐳 Container 2"]
        B3["🐳 Container 3"]
        H --> B1
        H --> B2
        H --> B3
        B1 --- B2
        B2 --- B3
        B1 --- B3
        B1 --> NET
        B2 --> NET
        B3 --> NET
    end

    %% Host Network Mode
    subgraph HostNet["🏠 Host Network Mode"]
        HN1["🐳 Container A (shares host network)"]
        H --> HN1
        HN1 --> NET
    end

    %% Macvlan Network
    subgraph MacvlanNet["🔗 Macvlan Network"]
        M1["🐳 Container X"]
        M2["🐳 Container Y"]
        M1 --- M2
        M1 --> NET
        M2 --> NET
        %% Optional host communication (needs special config)
        class M1,M2 note
    end

    %% IPVLAN Network
    subgraph IpvlanNet["🌐 IPVLAN Network"]
        I1["🐳 Container Alpha"]
        I2["🐳 Container Beta"]
        I1 --- I2
        I1 --> NET
        I2 --> NET
        %% Optional host communication (needs special config)
        class I1,I2 note
    end

    %% Node Styling
    style H fill:#f88,stroke:#333,stroke-width:2px,color:#111
    style B1 fill:#d8b4fe,stroke:#333,stroke-width:1px,color:#111
    style B2 fill:#d8b4fe,stroke:#333,stroke-width:1px,color:#111
    style B3 fill:#d8b4fe,stroke:#333,stroke-width:1px,color:#111
    style HN1 fill:#93c5fd,stroke:#333,stroke-width:1px,color:#111
    style M1 fill:#5eead4,stroke:#333,stroke-width:1px,color:#111
    style M2 fill:#5eead4,stroke:#333,stroke-width:1px,color:#111
    style I1 fill:#60a5fa,stroke:#333,stroke-width:1px,color:#111
    style I2 fill:#60a5fa,stroke:#333,stroke-width:1px,color:#111
    style NET fill:#fff,stroke:#333,stroke-width:2px,color:#111

    %% Subgraph Styling (dashed outlines)
    style Host fill:transparent,stroke:#888,stroke-width:1px,stroke-dasharray:4 4
    style BridgeNet fill:transparent,stroke:#888,stroke-width:1px,stroke-dasharray:4 4
    style HostNet fill:transparent,stroke:#888,stroke-width:1px,stroke-dasharray:4 4
    style MacvlanNet fill:transparent,stroke:#888,stroke-width:1px,stroke-dasharray:4 4
    style IpvlanNet fill:transparent,stroke:#888,stroke-width:1px,stroke-dasharray:4 4
    style Internet fill:transparent,stroke:#888,stroke-width:1px,stroke-dasharray:4 4

    %% Special note for macvlan/IPVLAN host communication
    classDef note stroke-dasharray: 2 2,color:#111,stroke:#666,stroke-width:1px;
1. The Bridge Network (The Hallway)
By default, Docker creates a "Bridge" network. This is like the internal hallway of the building.
- Apartment A (Sonarr) can talk to Apartment B (Radarr) by walking down the hallway.
- The Magic: They don't need to know IP addresses. They can just knock on the door named
radarr. - In technical terms: This is automatic DNS resolution.
http://radarr:7878works inside the network.
➤ Summary:
- Docker's default networking mode.
- Containers are connected to an internal bridge network.
- NAT is used to access external networks.
✅ Pros:
- Easy to use and secure.
- Container DNS works out of the box.
- Ideal for internal communication between containers.
❌ Cons:
- Not directly accessible from LAN unless ports are published.
- Host cannot touch the dockers and vs versa (host isolation).
2. The Ports (The Buzzers)
People outside the building (You, on your laptop) cannot get into the hallway. To access an apartment, you need a Buzzer on the front of the building.
This is the ports section in your Compose file:
ports:
  - "8080:80"
- 8080 (Left Side): The Buzzer on the street. (What you type in your browser).
- 80 (Right Side): The Door number of the apartment. (What the container listens on).
Troubleshooting Tip: If you can't reach a site, you probably forgot to install the "Buzzer" (Map the ports).
🎓 Advanced Networking: Breaking the Walls
Skip this if you've already decided to keep it simple to start and will use the default bridge mode above.
The "Apartment" (Bridge) mode we described above is the default for 90% of containers. But sometimes, you need to break the rules.
There are two other common networking modes you will encounter. Let's stick to our Apartment Building analogy to understand them.
1. Host Mode (network_mode: host)
The Analogy: The container moves out of the apartment and sets up a tent in the Building Lobby.
- It doesn't have its own front door anymore. It shares the main building's front door.
- It shares the Building's IP address directly.
When to use it:
- Performance: It is slightly faster (no translation needed).
- Complex Protocols: Apps like Home Assistant or Plex often prefer this to discover other devices on your network easily.
The Catch:
- Port Conflicts: Since it's in the lobby, if it wants to use port 80, and the building is already using port 80, it crashes. You can't remap ports (e.g.,
8080:80) in Host mode because there is no "Buzzer"—it just is port 80.
services:
  homeassistant:
    image: homeassistant/home-assistant
    # No ports section needed!
    network_mode: host
➤ Summary:
- Container shares the host's network stack, even the same MAC address.
- No isolation; container uses host's IP and ports.
✅ Pros:
- No NAT = faster networking.
- Useful when apps need to listen on specific host ports.
- SIMPLE!
❌ Cons:
- Port conflicts with host.
- No network isolation.
- Certain apps / devices might not function properly due to sharing MAC.
2. Macvlan Mode (networks: ...)
The Analogy: You build a brand new Annex attached to the building.
- The container gets its own unique Street Address (IP Address).
- It looks like a totally separate physical device to your router.
When to use it:
- Network Admin Tools: Pi-hole, AdGuard Home, or Unifi Controller.
- Why? These tools need to see the real IP addresses of devices connecting to them. If you run them in Bridge mode, everything looks like it's coming from the "Hallway" (Docker Gateway), hiding the true source.
The Catch:
- Complexity: It is harder to set up. You have to define subnets and gateways.
- The "Safety Feature": By default, the Host (Building) cannot talk to the Macvlan Container (Annex) for security reasons. You need a "Shim" to fix this (but that's a guide for another day).
Example Config (The Complex One):
services:
  pihole:
    image: pihole/pihole
    networks:
      my_macvlan_network:
        ipv4_address: 192.168.1.10 # Dedicated IP!

networks:
  my_macvlan_network:
    driver: macvlan
    driver_opts:
      parent: eth0 # Your physical network card
    ipam:
      config:
        - subnet: 192.168.1.0/24
          gateway: 192.168.1.1
🔧 3. MACVLAN
➤ Summary:
- Each container gets its own IP address on your LAN (like a separate physical device).
- Requires a physical interface.
- Container is invisible to the host (by default).
- Can be modified via a 'shim' to reach host.
Example very similar to what I have running:
services:
  nginx:
    image: nginx
    container_name: nginx_vlan
    networks:
      macvlan_vlan42:
        ipv4_address: 192.168.42.100

networks:
  macvlan_vlan42:
    driver: macvlan
    driver_opts:
      parent: eth0.42
    ipam:
      config:
        - subnet: "192.168.42.0/24"
          gateway: "192.168.42.1"
          ip_range: "192.168.42.100/32"
🧪 Test the MACVLAN Interface
docker exec -it nginx_macvlan ping -c 4 192.168.1.1     # ping gateway
docker exec -it nginx_macvlan ip a                       # check assigned IP
✅ Pros:
- Great for legacy applications.
- Allows containers to be reached directly from the LAN.
- Each container has it's own MAC and seems like a valid network device.
❌ Cons:
- More complex.
- Host can’t talk to containers unless extra setup (e.g., IP alias, shim network) is done.
Implementing MACVLAN (You sure?!)
Let's say you want to use macvlan and need some of your dockers to be able to talk to your host as well as your LAN? You can use IPVLAN OR, OR, create a macvlan bridge network.
✅ Solution 1: Create a “macvlan bridge” on the host
You can create a separate MACVLAN interface on the host that resides on the same MACVLAN network as the containers.
🛠️ Step-by-step:
1. Create the MACVLAN interface on the host:
sudo ip link add macvlan-shim link eth0 type macvlan mode bridge
sudo ip addr add 192.168.1.200/32 dev macvlan-shim
sudo ip link set macvlan-shim upeth0= your physical LAN interface192.168.1.200= host’s MACVLAN IP (must be unused)- Use same subnet and gateway as your containers
2. Test connectivity:
ping 192.168.1.100 # Container IP✅ Solution 2: Use ipvlan instead of macvlan
If your switch or NIC doesn't like multiple MACs, ipvlan allows host ↔ container communication without this workaround.
🔧 4. IPVLAN
➤ Summary:
- Like MACVLAN but shares a MAC address with the parent (host).
- Containers are reachable from the LAN.
- Better compatibility with switches/security appliances that block multiple MACs per port.
✅ Pros:
- Lightweight.
- More efficient in some hardware environments.
❌ Cons:
- Host-to-container communication needs workaround (similar to MACVLAN).
🧩 Tips
- MACVLAN/IPVLAN require:
- Static IP assignment (via
ipam). parentinterface must be specified (eth0,ens18, eth0.42 (vlan!) etc).- On some systems, you must create the network manually via CLI first.
- Static IP assignment (via
- Bridge networks are internal to Docker, useful for service-to-service communication.
- Host is often used for Frigate, Home Assistant, or similar apps that rely on multicast or local discovery.
Core Lab Recommendation: Stick to Bridge Mode (Default) unless you have a specific reason to leave. It is the safest, easiest, and most portable way to run Docker.
🧠Docker Networking Modes Comparison Table:
| Mode | Host IP? | LAN IP? | Container DNS | Best For |
|---|---|---|---|---|
| Bridge | ❌ | ❌ | ✅ | Default, internal services |
| Host | ✅ | ✅ | ❌ | High-performance or host-bound apps |
| MACVLAN | ❌ | ✅ | ❌ | LAN-facing legacy or IoT devices |
| IPVLAN | ❌ | ✅ | ❌ | Efficient LAN routing on routers |
🍒 Step 6: The Cherry on Top (Automated Notifications)
You have a Manager (Dockge) and an Observer (Dozzle). But you don't want to log in every day just to check for updates.
Let's deploy one final stack to prove you've mastered the concepts. We will install Diun (Docker Image Update Notifier). It watches your containers and emails you (or pings Discord) when a new version is available.
1. Create the Stack: In Dockge or Dockhand, create a new stack called maintenance.
2. The Compose Block:
services:
  diun:
    image: crazymax/diun:latest
    container_name: diun
    restart: always
    volumes:
      - /opt/appdata/diun:/data
      - /var/run/docker.sock:/var/run/docker.sock
    environment:
      - TZ=${TZ}
      - "DIUN_WATCH_WORKERS=true"
      - "DIUN_WATCH_SCHEDULE=0 */6 * * *" # Check every 6 hours
      # (Optional) Add Discord Webhook here later
3. Deploy! Congratulations. You now have a fully managed, observable, and self-updating infrastructure.
🛠️ Step 7: Day 2 Operations (Keeping the Scrap-Lab Lean)
Getting your containers running is only half the battle. If you just walk away, your server will eventually succumb to "Image Bloat" and outdated vulnerabilities. In a Scrap-Lab environment with limited SSD space, Day 2 Operations are mandatory.
Here is how you maintain the Digital Fortress. We'll cover the manual "Purist" path and the automated "Dockhand" path.
1. The Purist Path (Manual CLI Maintenance)
If you prefer to know exactly what your server is doing at all times, the command line is your best friend.
A. The Update Cycle (The Pull & Recreate) Containers do not update themselves like standard Linux packages. You must pull the new "Blueprint" and rebuild the "House." Navigate to your stack directory (e.g., /opt/stacks/plex) and run:
docker compose pull
docker compose up -d
What this does: It downloads the newest image and seamlessly replaces the running container. Your data (stored in /opt/appdata) remains perfectly intact.
B. The Garbage Collection (Reclaiming SSD Space) Every time you update a container, the old image is left behind on your drive as a "dangling" image. After a few months, this can eat up 20GB+ of precious SSD space. Run the cleanup crew:
docker image prune -a
Tactical Warning: If you want to go nuclear and clear out unused networks and build cache as well, use docker system prune—but never use the --volumes flag unless you explicitly want to delete your persistent data!
C. Intelligence Gathering (Reading the Logs) If a container crashes, the answer is always in the logs.
docker logs -f <container_name>
(The -f flag "follows" the log output live, Matrix-style).
2. The Dockhand Path (Automated Maintenance)
If you deployed Dockhand in the advanced step, your Day 2 Operations are almost entirely automated. Dockhand shifts you from a "System Admin" to a "Fleet Commander."
A. "Safe-Pull" Auto-Updates Instead of manually typing docker compose pull, Dockhand handles this in the background.
- The Core Lab Advantage: Unlike older tools like Watchtower that blindly update everything (which can break things), Dockhand scans the new image for CVEs (vulnerabilities) first. If the new image is severely broken or insecure, it aborts the update and leaves your stable container running.
B. Visual Log Aggregation No more SSH-ing in just to check why Sonarr failed to grab a file. Dockhand gives you a unified, searchable web interface for all container logs. You can filter by error types and instantly spot network timeouts.
C. Scheduled Pruning In Dockhand's settings, you can toggle a weekly "Garbage Collection" schedule. It runs the equivalent of docker image prune every Sunday at 3 AM, ensuring your Scrap-Lab's drive never hits 100% capacity.
🛡️ The Core Lab Mandate: Backing up "The Soul"
We established earlier that /opt/stacks is the Body (replaceable) and /opt/appdata is the Soul (irreplaceable).
Before you consider this deployment finished, you must automate a backup of /opt/appdata. Since all your container data is mapped to this one directory, backing up your entire server infrastructure is as simple as copying a single folder.
 Core Lab Joe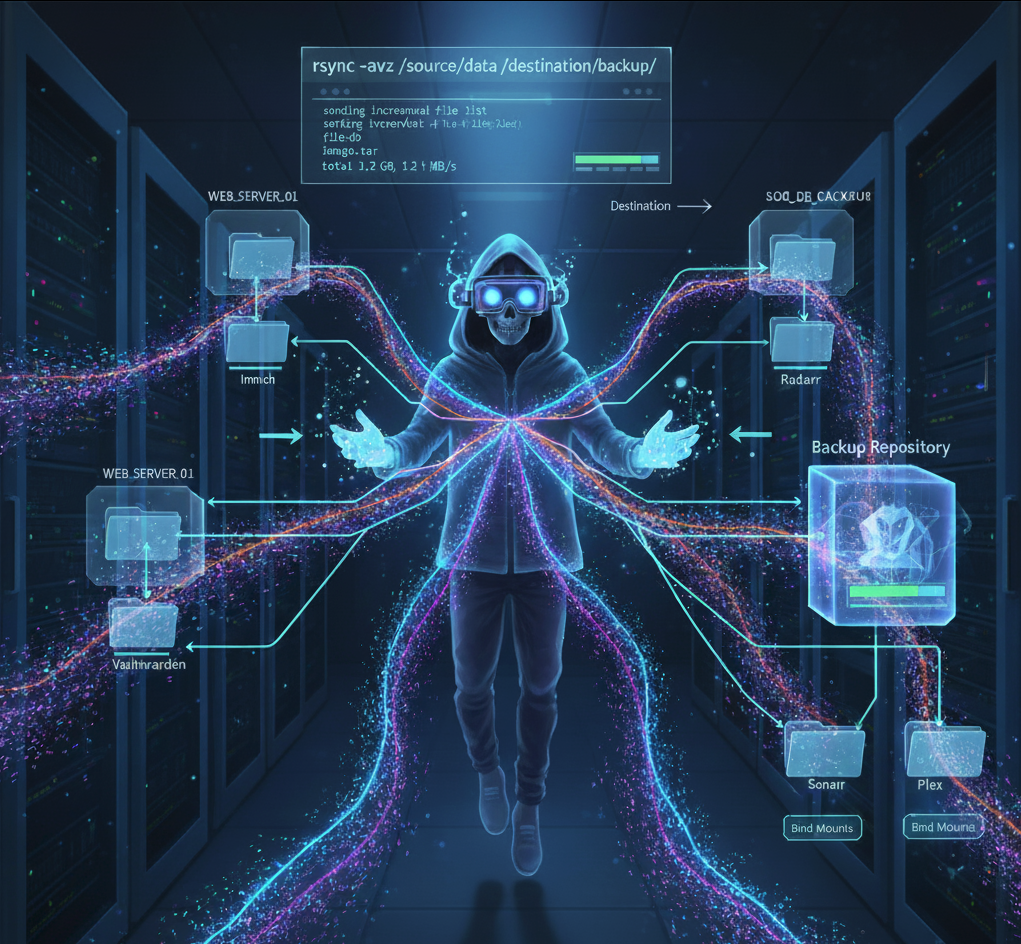
The Quick Cron-Tar Backup: Here is a fast way to compress your appdata into a single archive every night at 2 AM.
# Open your crontab
sudo crontab -e

# Add this line to backup /opt/appdata to a secondary cold-storage drive
0 2 * * * tar -czf /mnt/storage/backups/appdata_$(date +\%F).tar.gz /opt/appdata
Pro-Tip: If you run databases like PostgreSQL or MariaDB, it's best practice to run a proper database dump script before tarring the folder to prevent corruption, but for standard SQLite apps (like the Arrs or Plex), this nightly snapshot is a lifesaver.
🚀 What's Next?
You now have:
- Docker installed cleanly.
- Dockhand to manage your stacks & see their logs.
Dockge to manage your stacks.Dozzle to monitor your logs.- A Safe Folder Structure that allows for easy backups.
You are ready to start building.
Next Stop: The Ultimate Media Server Guide - Let's put this infrastructure to work.
 Core Lab Joe
🛡️ Footer Note: A Note on "Rootless" Docker
You might read about "Rootless Docker" (running the daemon without root privileges). While excellent for enterprise security, it adds significant complexity for home usage (e.g., mapping USB drives for Z-Wave sticks or using standard ports like 80/443).
For this guide, we use the standard Docker Engine but manage it with a non-root user group (Step 1). This strikes the perfect balance of security and usability for a Homelab.
The Super Common Commands!
Now that your compose & .env files are saved, you only need three commands:
- To Start:
docker compose up -d(This will pull the image and start the container in the "detached" background) - To Stop:
docker compose down(This stops and removes the container) - To Update:
docker compose pull && docker compose up -d(This pulls the latest image and restarts your container with it) - To Check Logs:
docker logs -f sonarr(Shows you a running live log at the console of the container, change name to whichever one you're interested in) - To Clean/Free up Space:
docker system prune -a(Removes all stale / unused images, networks, volumes etc. ⚠️ Be careful with this one!)
🙋♂️ The Definitive Docker & Compose FAQ (2026 Edition)
The Fundamentals
- What is Docker Compose actually used for? It is "Infrastructure as Code." Instead of running 20 manual commands to start a service, you define the services, networks, and volumes in one
.yamlfile. This makes your lab portable, backup-ready, and easy to fix. - What’s the difference between
docker-composeanddocker compose?docker compose(no hyphen) is the modern V2 plugin integrated directly into Docker. The hyphenated version is the old, deprecated Python script. Always use the space in 2026. - How do I stop or remove a stack? Run
docker compose downto stop and remove containers. If you want to wipe the internal Docker volumes too (careful!), usedocker compose down -v.
Storage & Persistence (The "Soul")
- Why use
/optinstead of my home folder? Using/opt/stacksand/opt/appdatafollows Linux standards for optional software. it prevents permission "ghosts" and keeps your user directory clean. - Bind Mounts vs. Docker Volumes: Which is better?
- Bind Mounts: Map a specific host folder (like
/opt/appdata/plex) to a container. Use these for configs you want to edit easily. - Volumes: Managed entirely by Docker. Use these for high-performance databases where you don't need to touch the files manually.
- Bind Mounts: Map a specific host folder (like
- What is a
.envfile? It’s your "Global Settings" menu. Instead of typing your Timezone or PUID into 50 different files, you define them once in.envand reference them as variables.
Networking Strategy
- Bridge vs. Macvlan: When do I switch?
- Bridge (Standard): Containers share the host IP. Easiest and most secure.
- Macvlan (Advanced): Each container gets its own IP on your home router. Use this only if a service (like certain IPTV or specialized networking tools) must appear as a physical device on your LAN.
Management & Leveling Up
- Can I run this on a low-RAM "Scrap-Lab"? Yes. Docker on Debian 13 is incredibly lean (idle <100MB). It’s the perfect way to get "enterprise" features out of a 10-year-old laptop.
- What is Dozzle? A lightweight, real-time log viewer. It lets you see what your containers are "thinking" through a web browser instead of hunting through the CLI.
- Dockge vs. Dockhand vs. Portainer?
- Dockge: Best for beginners who want a clean UI for YAML files.
- Dockhand: The 2026 choice for pros. It replaces Dozzle and Watchtower, adding security scanning and log management into one binary.
- Portainer: The "Heavyweight." Great for managing multiple servers, but often overkill for a single homelab.


Member discussion