
OPNsense Hardening & Active Defense: Building the Inner Walls (Part 2)

In Part 1, we laid the foundation – installing OPNsense, assigning interfaces, and setting up initial block-lists. Your firewall is running, but like any powerful system, the defaults are just the starting point. Now, we build the inner walls and install the guards. Later is part 3, Zenarmor WAF.
This guide focuses on hardening the OPNsense system itself, optimizing our rulesets, adding/enabling features like GeoBlocking aaaannndd CrowdSec, a powerful, community-driven threat intelligence system that actively blocks attackers based on observed behaviour across thousands of deployments.
Let's lock it down. 🔒
The OPNsense Architect
Looking for other advanced OPNsense Cybersecurity such as WAN obfuscation and attack surface reduction? Jump to my Ghosting the Scanners OPNsense Guide. 😉
Phase 1: Practical Hardening & Access Control
We'll start by securing the operating system and management access to OPNsense. This will be split into 2 parts, the first of which are the measures I recommend everyone take, followed by Enterprise/SMB focused optional hardening steps. As I am focusing on practical self-hosted cybersecurity, for a homelab, you may or may not agree with each step here. At least since we're using OPNsense, the choices (and power) are yours to decide upon!
If you're using OPN in a business/Enterprise environment, I strongly suggest enabling every piece of the hardening advice however!
Pre-Requisites:
- Running instance of OPNsense on some kind of hardware, configured at a basic level with at least a LAN and WAN interface; internet access for you to test with.
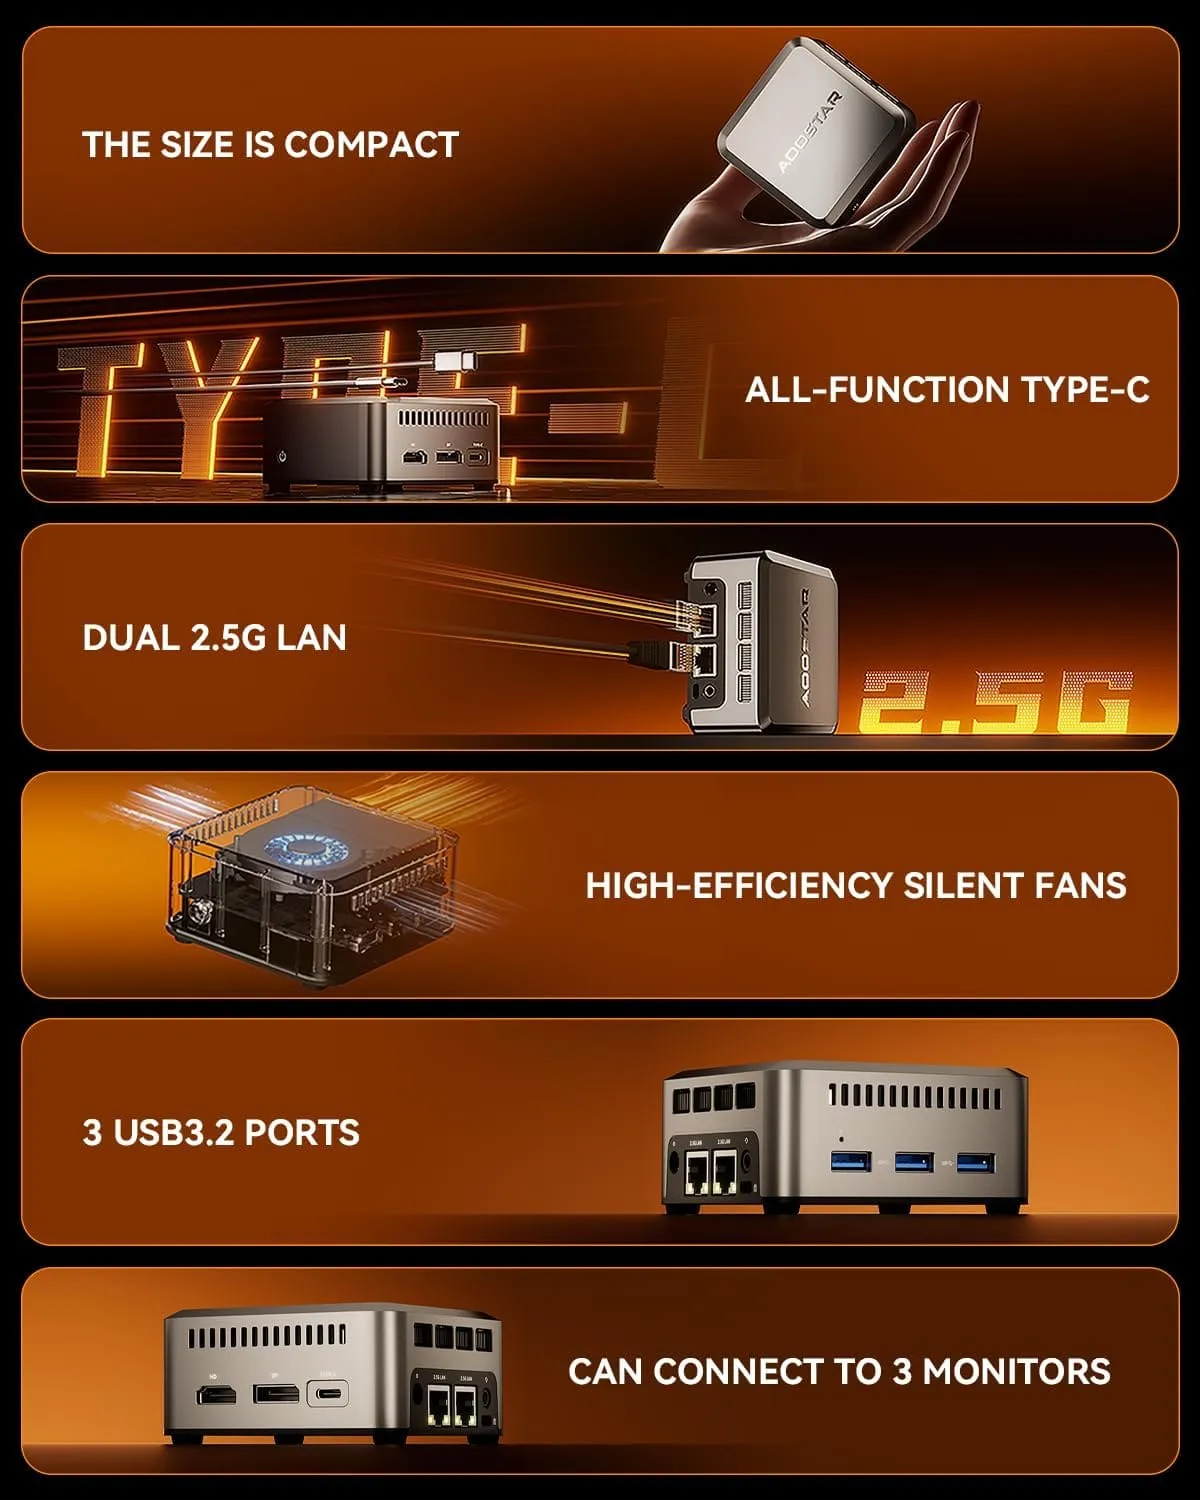
Intel Twin Lake N150 (Upgraded N100) Mini PC
Mini Desktop PC with LPDDR5 12GB RAM 512GB M.2 2242 SSD, Mini Computers 4K Triple Display/Dual 2.5G LAN/WiFi5/BT5 for Office/Business
Even cheaper - GMKtec M8!
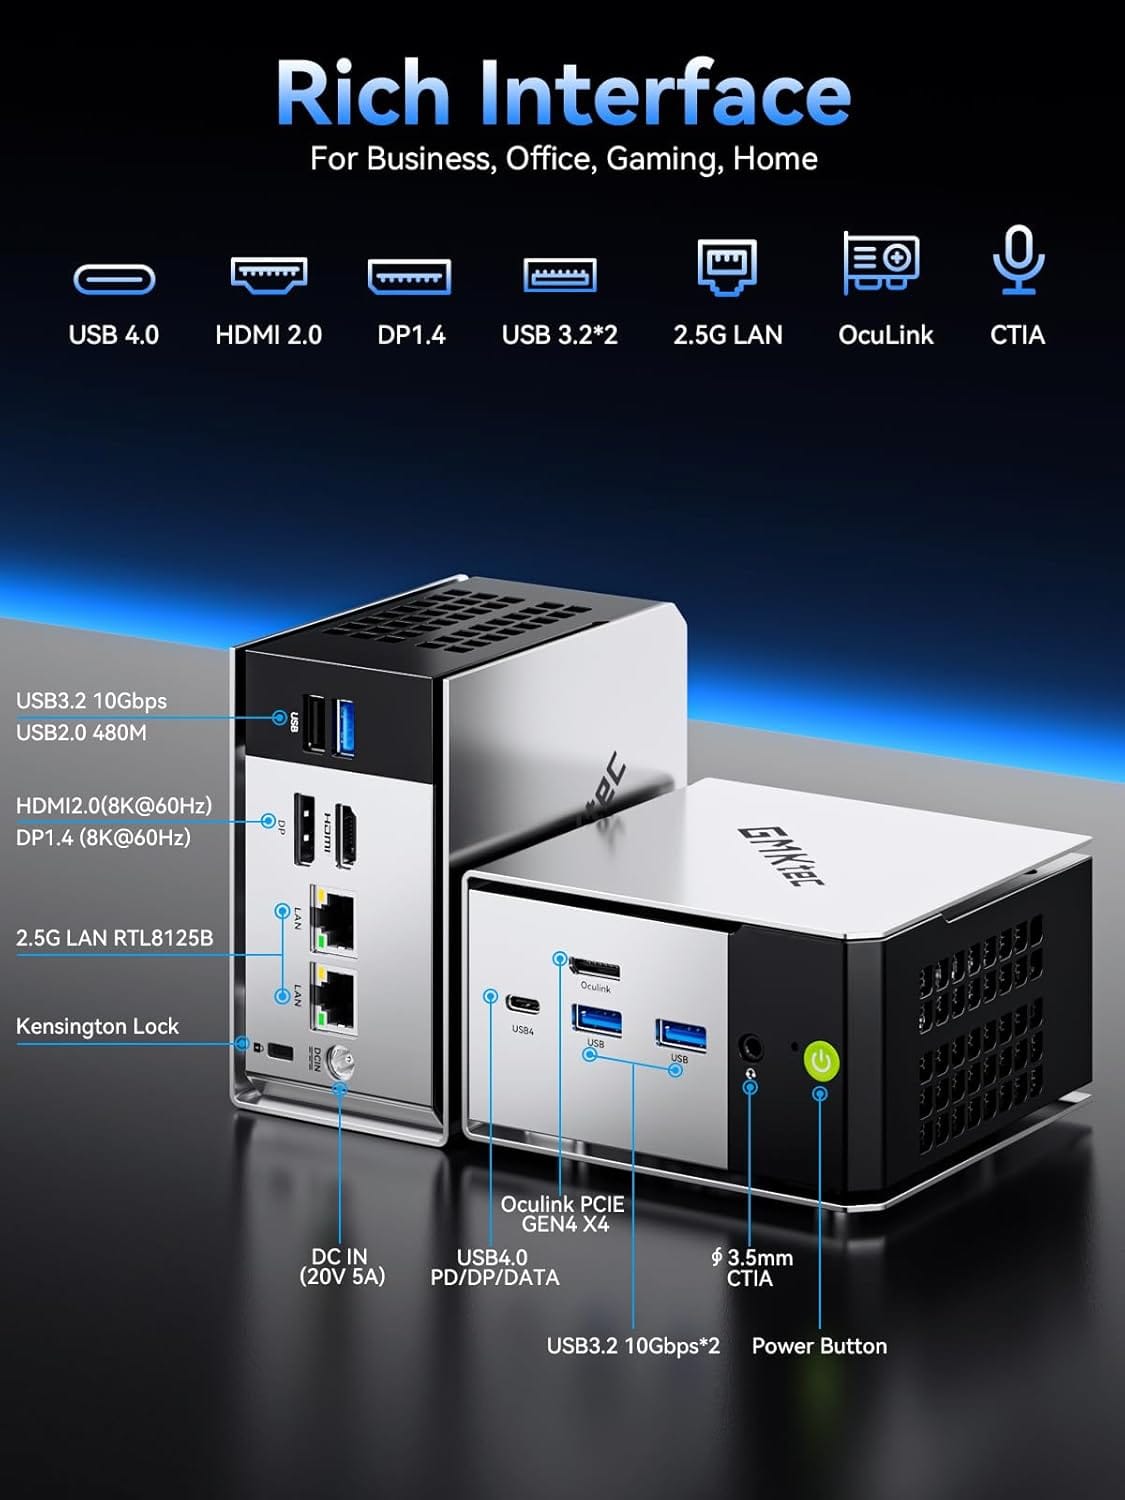
GMKtec Mini PC M8 Desktop Computer
- AMD Ryzen PRO 6650H (6C/12T 4.50Ghz)
- Dual NIC LAN 2.5GbE
- 16GB LPDDR5 RAM
- 512GB Hard Drive PCle SSD
- Oculink, USB4, HDMI, USB-C
Migrating to a Tagged Management VLAN
As a security best practice: running "mixed mode" with both untagged (VLAN 1) and tagged traffic on the same trunk port is not ideal nor recommended by OPNsense. The "purest" and most secure setup is to have all your networks, including your primary trusted one, be tagged VLANs.
This is a bit advanced so if you want to skip this part for now, that's ok, it'll be here when you're ready.
This guide will walk you through migrating your main LAN (which is untagged by default) to a new, tagged VLAN 8, which we will call HOME. You can name it anything you want and pick any number up to 4000 of course.
🚨🚨 CRITICAL WARNING: HIGH RISK OF LOCKOUT 🚨🚨
This is the most complex step in this guide, and you WILL 100% LOCK YOURSELF OUT of the OPNsense GUI if you perform these steps incorrectly or out of order.
You are about to change the "address" of the very interface you are using to access the GUI.
BEFORE YOU BEGIN, YOU MUST:Have a Backup: Go to System -> Configuration -> Backups and DOWNLOAD a backup of your OPNsense config.Know Your Switch: Be logged into your managed switch's web GUI in a separate browser tab. You must know how to change VLAN assignments on its ports.Have a Plan: Read this entire section before you click a single button. The order of operations between OPNsense and your switch is critical.Be Patient: After you apply the final changes, your computer must get a new IP address. You will need to unplug/replug your network cable or force a DHCP release/renew.
The Goal
Our goal is to change your network from this:
- OPNsense
igb1Port:LAN(Untagged,10.10.1.1/24)IOT(Tagged VLAN 30)GUEST(Tagged VLAN 20)
- Switch Trunk Port:
- Native VLAN:
1(forLAN) - Tagged VLANs:
20,30
- Native VLAN:
To this:
- OPNsense
igb1Port:HOME(Tagged VLAN 8,10.10.1.1/24)IOT(Tagged VLAN 30)GUEST(Tagged VLAN 20)
- Switch Trunk Port:
- Native VLAN: None (or a "black hole" VLAN)
- Tagged VLANs:
8,20,30
Notice that we are moving all the LAN settings (IP, DHCP, firewall rules) to a new tagged interface, HOME.
Step 1: Create the New HOME VLAN (OPNsense)
First, we just define the new VLAN tag.
- Navigate to Interfaces -> Other Types -> VLAN.
- Click
+(Add). - Parent: Select your physical
LANinterface (e.g.,igb1,em1,lan). - VLAN Tag:
8or whatever VLAN # you choose. - Description:
HOME - Save and Apply Changes.
Step 2: Re-Assign the LAN Interface (The "Point of No Return")
This is the most critical step. We are telling OPNsense that its LAN interface is no longer on the physical port (igb0/igb1), but is now on the virtual VLAN 8 we just created.
- Navigate to Interfaces -> Assignments.
- You will see your
LANinterface, likely assigned to your physical port (e.g.,igb1). - In the dropdown menu for the LAN interface, change the "Device" from the physical port (e.g., igb1) to the new VLAN you just created (VLAN 8 on igb1 (HOME)).[Image: OPNsense Interface Assignments screen showing LAN device dropdown]
- Click Save.
- YOU WILL BE IMMEDIATELY DISCONNECTED AND LOCKED OUT. This is normal. Your browser will spin, and the OPNsense GUI will be unreachable. Do not panic.
Step 3: Re-Configure Your Managed Switch (The "Recovery")
Your OPNsense firewall is now only sending LAN traffic on VLAN 8 (Tagged). Your computer and switch are still on VLAN 1 (Untagged). We must fix this.
- Go to your Managed Switch's web GUI (which you already have open in another tab, right?).
- Create VLAN 8: Go to your switch's VLAN settings and create
VLAN 8(Name:HOME). - Configure Your PC's Access Port:
- Find the switch port that your PC is plugged into.
- Change its port profile.
- Set its Native / Untagged VLAN to
8 (HOME). - Make sure it is not passing any other tagged VLANs (it should be an "access" port, not a trunk).
- Save/Apply.
- Configure the OPNsense Trunk Port:
- Find the switch port that your OPNsense firewall is plugged into.
- Change its port profile (the "Trunk" profile).
- Native / Untagged VLAN: Change this from
1 (LAN)toNone(or a "dummy" black hole VLAN like999if your switch requires one. Do NOT use1or8). - Tagged VLANs: Add
VLAN 8 (HOME)to the list of allowed tagged VLANs. The list should now include8, 10, 20, 30, 40, 50... all your VLANs. - Save/Apply. In Unifi it should look something like this -
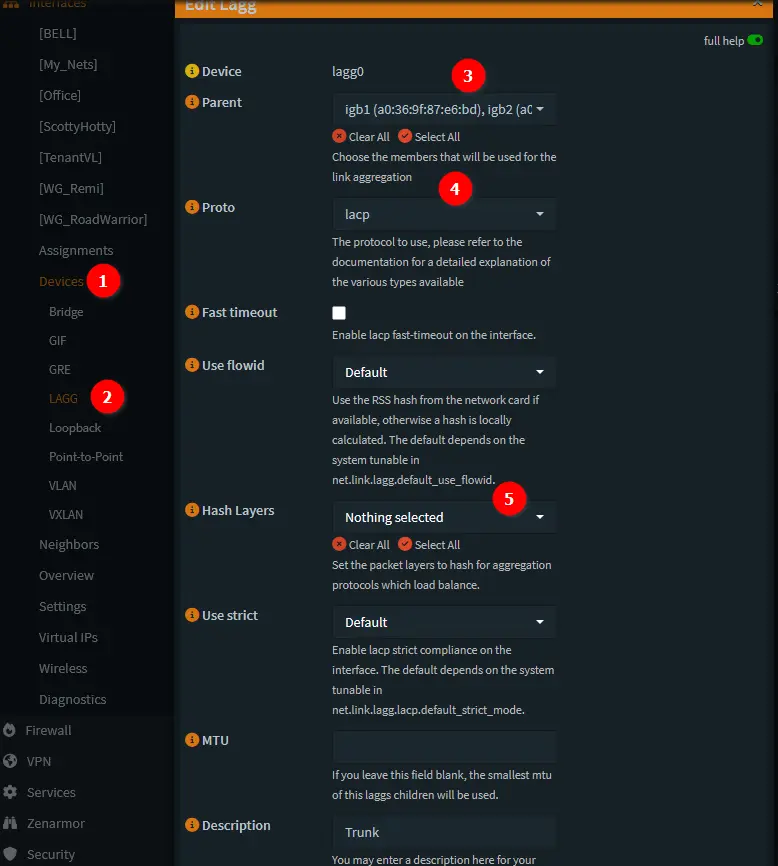
Note: You can "Allow All" VLANs, or tag them with the custom option - the choice is yours. To be more secure, technically you should lock it down with "Custom" and select each VLAN that you need. Example VLAN in this pic is 7, yours might be 8 like in the guide, or 888.
Step 4: Reconnect and Verify
- Your switch is now configured. Go back to your PC.
- Force a DHCP Renew: Your PC is still holding its old IP. The easiest way to fix this is to unplug your PC's network cable, wait 5 seconds, and plug it back in.
- (Alternatively, for Windows:
ipconfig /releasethenipconfig /renew. For Mac: Renew DHCP in Network Settings.)
- (Alternatively, for Windows:
- Your PC should now request an IP. The switch will tag this request as
VLAN 8, send it to OPNsense. OPNsense'sLANinterface (now on VLAN 8) will receive it and its DHCP server (which was already configured forLAN) will respond. - You should get an IP address in your
10.10.1.xrange. - Try to access your OPNsense GUI at
10.10.1.1(or whatever its IP is). - Success! You are now accessing your firewall over a fully tagged network.
Your LAN is now HOME (VLAN 8), all your firewall rules and DHCP settings for it were preserved, and your trunk port is no longer running in a mixed (tagged/untagged) mode, which is a significant security improvement.
Creating a Dedicated Admin User (Stop Using Root)
Using the root account for daily administration is bad practice and goes directly against the "Principle of Least Privilege". Using root or admin is bad practice in almost every system, tech stack and sense as a daily account. We'll create a new user with admin privileges.
- Navigate to System -> Access -> Users.
- Click the
+(Add) button in the top right. - Username: Choose a unique username (e.g.,
opnsense_admin, notadmin). - Password: Create a very strong, unique password and confirm it.
- Full name: Enter a descriptive name (e.g., "OPNsense Administrator").
- Group Membership: This is crucial. In the "Group membership" section, find the
adminsgroup in the left box ("Available Groups") and click the>arrow to move it to the right box ("Member of"). - Save: Click "Save".
- Log Out & Log In: Log out of the OPNsense web GUI. Log back in using your new username and password. Verify you have administrative access (you should see all menu options).
- (Optional but Recommended): Once confirmed, you can consider disabling password logins for the
rootuser entirely via the console menu if you are comfortable using only your new admin user. This is a great step as it automatically removes the option for an attacker to try and use the default account.
Securing SSH & Console Access
By default, SSH is enabled. If you don't need console access via SSH, disable it. If you do, restrict it. If you need to SSH into it, go back in and enable it while troubleshooting or only as needed.
- Navigate to System -> Settings -> Administration.
- Scroll down to the Secure Shell section.
- To Disable: Uncheck Enable Secure Shell.
- To Restrict (If Keeping Enabled):
- Listen Interfaces: Change from
Default (All)toLAN(or a specific management interface). Never set this toWAN!- Actually, never to WAN, ever!
- Permit root user login: Strongly consider unchecking this if you created a separate admin user.
- Authentication Method: Consider changing Permit password login to use Public Key Authentication only for maximum security (requires setting up SSH keys).
- Listen Interfaces: Change from
- Save.
The first thing an attacker will do when they gain a foothold into any system, is quietly dig around and pivot to another system, to maintain persistent access. Locking down SSH or turning it off on your firewall is another closed door to them at least!
Keep OPNsense Updated
Regular updates are critical for security.
- Navigate to System -> Firmware -> Updates.
- Check for updates regularly and apply them. OPNsense releases major updates twice a year and minor patches frequently.
- Consider enabling Periodic Check under System -> Firmware -> Settings for notifications.
Phase 2: Enterprise-Grade Identity Security
Enabling Two-Factor Authentication (TOTP)
Add another layer of security to your Web GUI login using Time-based One-Time Passwords (TOTP) like Google Authenticator or Authy. This subject can be expanded upon greatly, but this should get you started, and the official docs have the latest.
- Navigate to System -> Access -> Servers.
- Click
+(Add). - Descriptive name:
Local TOTP - Type: Select
Local + Timebased One Time Password. - Token length: Leave at
6digits (standard). - Save.
- Navigate to System -> Settings -> Administration.
- Under Authentication, change the Server dropdown from
Local DatabasetoLocal TOTP. - Save.
- Set up TOTP for your User: Go back to System -> Access -> Users. Edit your new admin user.
- Scroll down to the OTP seed section. Click the Generate key button.
- A QR code will appear. Immediately scan this QR code with your preferred TOTP app (Authy, Google Authenticator, etc.).
- Save the user settings.
- Log Out & Test: Log out. When you log back in, you'll be prompted for your password and then your TOTP code from your authenticator app. Verify it works.
- Recovery Tip: Keep a secure backup of the TOTP secret key or use an authenticator app with cloud backup in case you lose your phone!
Hardening the Web GUI (HTTPS & Listen Interfaces)
- Protocol: Ensure Protocol is set to
HTTPS. - Best to lock this down with a proper SSL cert if you're going to bother!
- TCP Port: Consider changing the default
443. While "security through obscurity" isn't foolproof, moving away from the default can reduce automated scans. Pick a high port number (e.g.,8443,9443). Remember you'll need to usehttps://<your_opnsense_ip>:<new_port>to access it. - Disable HTTP Redirect: Uncheck Disable web GUI redirect rule. This ensures anyone trying HTTP gets redirected to HTTPS.
- (Optional) Listen Interfaces: By default, it listens on all interfaces. For higher security, consider changing this to only
LAN(or your specific management VLAN) if you never need to access the GUI from other internal networks. This is generally safe to leave enabled as your default inbound blocks will block traffic from the internet to your firewall's admin interface, but this is another step to lock things down. - Save. You'll be disconnected and need to reconnect using the new port if you changed it.
Advanced Optional - Removing the Guardrails (Anti-Lockout & Default Allow)
When you first install OPNsense, it wants to be helpful. It assumes you might lock yourself out or struggle to get online, so it automatically generates two "safety net" rules on your LAN interface:
- The Anti-Lockout Rule: Allows access to the Web GUI and SSH from anywhere on the LAN.
- The Default Allow Rule: Allows all traffic from the LAN to go anywhere (Internet, other VLANs, etc.).
While these are great for the first 5 minutes of setup, in a secure "Fortress" environment, they are vulnerabilities.
The "Anti-Lockout" Risk The Anti-Lockout rule is practical for home users, but in an Enterprise or hardened environment, it is a massive gap. It implicitly trusts every device on your LAN to access your management interfaces (SSH, GUI). If a device on your LAN is compromised, that malware can immediately try to brute-force your firewall login because this hidden rule allows it to connect.
The "Allow All" Risk Similarly, the "Default Allow LAN to Any" rule negates any network segmentation you try to build later. If you create a strict rule to block a specific IP, but leave this "Allow All" rule enabled at the bottom, traffic might just slip through.
To see these hidden rules:
- Navigate to Firewall → Rules → LAN.
- At the very top of the list, click the small expand arrow (▼) next to "Automatically generated rules".
- You will see the specific rules authorizing port 80/443 (GUI) and 22 (SSH).
How to Disable Them (The Right Way) Note: Before you do this, ensure you have created a specific "Pass" rule for your Admin PC/Management VLAN to access the GUI, or you WILL lock yourself out!
- Disable Anti-Lockout:
- Go to System → Settings → Administration.
- Scroll down to the "Web GUI" section.
- Check the box: Disable anti-lockout.
- Click Save.
- Result: The automatic rule at the top of your LAN ruleset will vanish. Only the specific management rules you created (in Part 1) will now allow access.
- Disable Default Allow LAN:
- Go to Firewall → Rules → LAN.
- Find the "Default allow LAN to any rule" at the bottom.
- Click the green play button (✅) to toggle it to disabled (gray).
- Click Apply Changes.
- Result: Your LAN is now "Default Deny." You must explicitly create rules to allow traffic to the internet (like the
!RFC1918rule we discussed previously).
Now your firewall isn't just "working"—it's listening only to what you explicitly authorized.
Phase 3: Advanced Outbound Traffic Control
Why We Filter Outbound Traffic (Egress Filtering)
In OPNsense Part 1, we created aliases for block-lists. Now, let's create a more robust and maintainable outbound block rule using the Floating tab. This prevents potentially compromised devices on any of your internal networks from "phoning home" to known malicious servers. We'll start by grouping our internal interfaces together.
Since OPNsense allows all traffic to leave the firewall by default (outbound over WAN) this makes sense to move rules from each interface such as LAN/IOT/CAMs etc, to a floating outbound rule.


Verify Your Aliases
Go to Firewall -> Aliases. Ensure you have the aliases created for lists like:
Blocklist_FireHOL_L2Blocklist_FireHOL_L3Blocklist_Spamhaus / BL_KnownBaddies- (And any others from the list in our previous discussion, like CINS Army, Feodo, etc.)
- Crucially, ensure
Blocklist_FireHOL_L1is present but will NOT be used in this OUTBOUND rule. - Ensure there's a count on the alias page showing that these lists have items and are being updated. If you set them to update every 4 hrs per part 1 (scroll way up!) the date should be recent (today!).
Creating Interface Groups for Granular Control
Grouping your internal interfaces (LAN, IOT, Cameras, etc.) allows you to apply rules to all of them at once, simplifying management.
- Navigate to Interfaces -> Groups.
- Click the
+(Add) button in the top right. - Group Name: Give it a descriptive name, like
Internal_NetworksorLAN_Group. (Avoid spaces and special characters). I called mineMy_Nets - Group Members: In the "Available members" list on the left, select all your internal network interfaces (e.g.,
LAN,IOT,CAMERAS,GUEST). Do NOT selectWANorLoopback. What's nice is you can always go back and add more VLANs/interfaces here as you grow your homelab! - Click the
>arrow to move the selected interfaces into the "Members" box on the right. - Description: Add a helpful description, like "Group containing all trusted internal LANs and VLANs".
- Save.
Implementing Floating Block Rules
Now, we'll apply our blocklists to this group. Here's mine for reference:
- Navigate to Firewall -> Rules -> Floating.
- Click
+(Add) or find and edit your existing outbound block rule. - Action:
Block - Quick: Check this box (essential for Floating rules to ensure immediate action).
- Interface: Click in the field and select your newly created interface group (e.g.,
Internal_Networks). - Direction:
out - Protocol:
any - Source:
any(meaning any device on the interfaces within the selected group). - Destination: Click in the field. Start typing and add all your blocklist aliases EXCEPT
Blocklist_FireHOL_L1❗(e.g.,Blocklist_FireHOL_L2,Blocklist_FireHOL_L3,Blocklist_Spamhaus, CINS Army, etc.). - Log: Check this box to see what's being blocked.
- Description: "Block outbound traffic from Internal_Networks group to known malicious IPs (Excl. L1)".
- Save.
- Apply Changes.
Because we checked
Quick, if traffic matches this rule (outbound from any interface in your Internal_Networks group to a bad IP), it will be blocked immediately. This rule now neatly applies to all your internal segments without needing to list each one individually. If you add a new internal VLAN later, just add it to the Interface Group, and this rule will automatically cover it!References: OPNsense official docs & steps on outbound block rules.


Phase 4: Automated Threat Intelligence with CrowdSec
Why Community-Driven Defense Matters
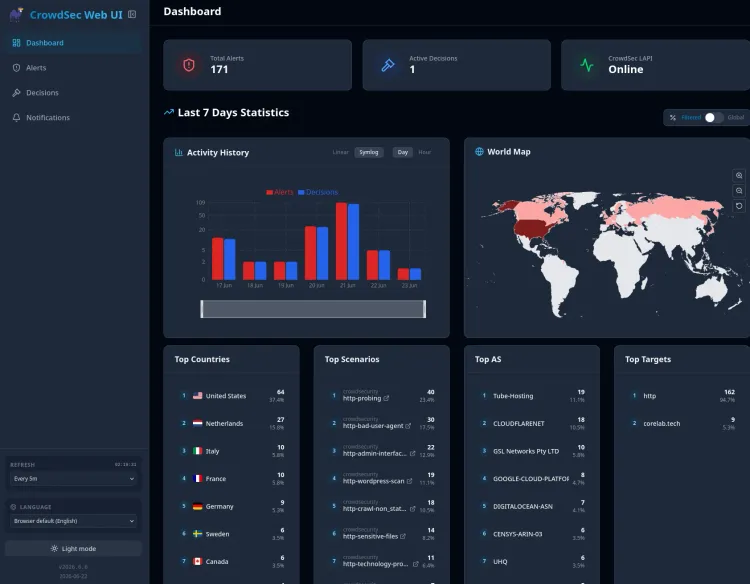
CrowdSec adds a dynamic layer. It monitors logs for malicious behavior (scans, brute force attempts, etc.) and shares detected attacker IPs with a central community blocklist. Your firewall then automatically blocks IPs flagged by the community. Think of it like a next-gen community driven Fail2Ban, if you're familiar with that. It's a fantastic and simplistic security feature which greatly helps you lock your perimeter down. For more details, visit them here.
Installing the CrowdSec Agent & Bouncer
- Navigate to System -> Firmware -> Plugins.
- In the search bar, type
crowdsec. - Find
os-crowdsecand click the+(Install) button next to it. Confirm the installation.
Basic CrowdSec Configuration
- Navigate to Services -> CrowdSec -> Settings.
- General Settings:
- Check Enable CrowdSec Agent. This runs the local service that analyzes logs.
- Check Enable Firewall Bouncer. This service takes the blocklist from the agent and applies it to the firewall.
- Save.
Note: If you don't enable the bouncer, nothing will be blocked!
Now if you go to your Firewall->Rules (new)-Floating and click the '👁️🗨️Inspect' at the top of the rules, you'll see enabling the bouncer has setup some new block rules!
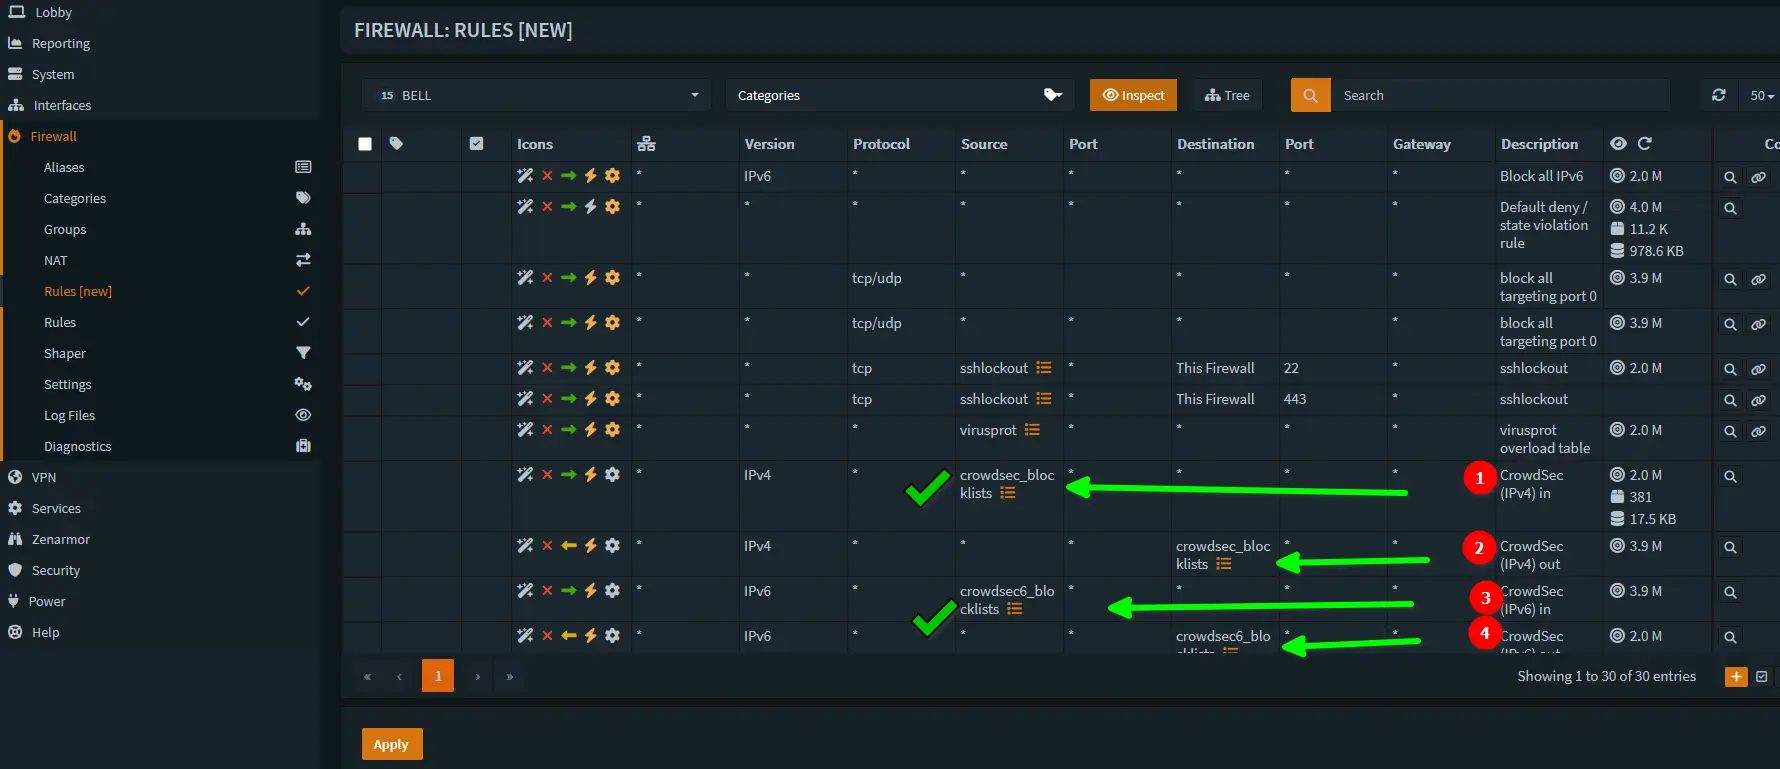
If you'd like to setup an instance of CrowdSec to work with your reverse proxy, check this out:
 Core Lab Joe
Check Status of CrowdSec (Is it operational?)
- Go to Services -> CrowdSec -> Overview.
- After a few minutes, you should see the Agent and Bouncer services running.
- Look at the Metrics section. You should eventually see "Active Decisions" (IPs currently being blocked) populate as the bouncer downloads the community blocklist.
- You can view the currently blocked IPs under Services -> CrowdSec -> Decisions.
CrowdSec is now running! It will analyze OPNsense logs (like firewall logs, web GUI access logs) and automatically update its blocklist based on both local detections and the global consensus list. Note: This instance of CrowdSec is protecting your OPNsense & firewall only. Not other services you are hosting and likely setup a NAT rule for, in OPNsense!
Later there will be a guide on creating a multi-server setup, integrating multiple bouncer agents into our OPNsense based CrowdSec for a truly unified and responsive defence network.
Phase 5: Implementing GeoIP Blocking
GeoIP blocking allows you to restrict traffic based on the geographical location associated with an IP address. This is commonly used to block incoming connections from countries known for high levels of malicious activity or to restrict access to your services from specific regions. NOTE: It's not effective if someone is targeting you specifically, vs just random scans. They can simply use a proxy or VPN to connect into your country, or even same city / geographic area and attack. If someone is targetting your homelab specifically, you've got bigger problems! If you're running OPN for some kind of company or Enterprise, you likely have an advanced persistent threat actor and GeoIP blocking alone will not save you.
Configuring MaxMind GeoLite2: Obtain a MaxMind GeoLite2 Account & License Key
OPNsense uses MaxMind databases for GeoIP functionality. You'll need a free GeoLite2 account.
- Go to the MaxMind Signup Page.
- Fill out the form to create a free account. (You might need to wait for approval).
- Once your account is active, log in to your MaxMind account.
- Navigate to "Manage License Keys" (often found under "My Account" or similar).
- Generate a new license key. Copy this key immediately and store it securely. MaxMind may only show it to you once. Give it a descriptive name like "OPNsense Key". Select "No" when asked if you use
geoipupdate. - You need to form the input for OPNsense as such -
https://AccountID:[email protected]/geoip/databases/GeoLite2-Country-CSV/download?suffix=zip

Which looks liike (sample/pretend accountID & liensekey:
https://748324:[email protected]/geoip/databases/GeoLite2-Country-CSV/download?suffix=zip
Configure MaxMind in OPNsense
- Navigate to Firewall -> Aliases -> GeoIP settings.
- Paste your copied MaxMind License Key into the corresponding field.
- Click Apply. OPNsense will download the GeoIP database in the background (this can take a few minutes). You can check the status under System -> Log Files -> Backend.
Creating Country-Based Aliases
Now, create aliases representing the countries you want to block.
- Navigate to Firewall -> Aliases. Click the
+(Add) button. - Name: Give it a descriptive name (e.g.,
GeoIP_Block_Countries). - Type: Select
GeoIP. - Content: Start typing the names of countries you wish to block (e.g., Russia, China, North Korea). Select them from the dropdown list. You can add multiple countries to a single alias.
- Description: "Countries blocked via GeoIP".
- Save.
Create Firewall Rule(s) to Block GeoIP Aliases
It's most common to block inbound traffic from these countries on your WAN interface.
- Navigate to Firewall -> Rules -> WAN.
- Click
+(Add). - Action:
Block - Quick: Check this box.
- Interface:
WAN - Direction:
in - Protocol:
any - Source: Select your GeoIP alias (
GeoIP_Block_Countries). - Destination:
any - Log: Check this box.
- Description: "Block Inbound traffic from specific GeoIP countries".
- Save.
- Apply Changes.
- You can optionally apply this as a floating rule to, but you could break your internets!


Best Practices for Geo-Blocking Rules
- Rule Order: Place this block rule near the top of your WAN rules, typically below any rules allowing essential traffic like VPNs if applicable.
- Outbound Blocking: Blocking outbound traffic to specific countries can break access to legitimate services or CDNs. Be very cautious if implementing outbound GeoIP rules.
- Accuracy: GeoIP databases are not perfect. There can be inaccuracies, and VPNs/proxies can easily bypass these restrictions. It's one layer of defense, not a complete solution.
How This Hardening Guide Relates to Real-World Cybersecurity
The firewall configuration you just went through is not just a "good idea"—it is a direct, practical application of the core principles found in the cybersecurity guidelines from all three major cybersecurity organizations across Canada & USA. 🌎
While they may not publish a specific guide for OPNsense, your rule (Allow to !RFC1918) is a textbook implementation of the high-level frameworks they all mandate, and that you would find across any of the "5 eyes" countries.🇨🇦🇺🇸🇦🇺🇳🇿🇬🇧👀
Here is how your OPNsense setup aligns with their recommendations.
1. Canadian🇨🇦 Centre for Cyber Security (CCCS)
The CCCS heavily emphasizes network segmentation and moving towards a Zero Trust model. Your rule directly supports this in your own environment.
- Guideline: "Top 10 IT security actions: No. 5 Segment and separate information" (ITSM.10.092)1
- What it says: The CCCS states that segmentation (using VLANs, firewalls, etc.) is a "foundational" security action to "reduce your organization's exposure to threats."2 The goal is to separate networks so that a compromise on one (like a Guest or IoT VLAN) cannot spread to critical ones (like your main LAN).
- How your rule applies: Your inverted rule enforces this separation. By explicitly denying traffic destined for other private
RFC1918addresses, you are containing the "blast radius." You are ensuring, at the source, that a compromised IoT device cannot even attempt to contact your main PC or server.
- Guideline: "Network and Security Strategy" (Canada.ca)
- What it says: This strategy outlines the Canadian government's move to a Zero Trust Architecture (ZTA), which "renounces any implied trust" and assumes the network is hostile.3
- How your rule applies: Your rule is the epitome of Zero Trust. You are not "trusting" your Guest VLAN. Instead of relying on the destination VLAN's (e.g., your LAN's) inbound rules to block the traffic, you are explicitly blocking it from ever leaving the source VLAN. You are verifying every request and denying by default.
2. NIST🇺🇸 (National Institute of Standards and Technology)
NIST provides the foundational frameworks for much of the Western world's cybersecurity, and your rule is a perfect match for their central concepts.4
- Framework: NIST SP 800-207, "Zero Trust Architecture"5
- What it says: ZTA is a set of principles that "assumes there is no implicit trust granted to assets or user accounts based solely on their physical or network location."6
- How your rule applies: This is exactly what you are doing. You are treating
VLAN_10as an untrusted network location. By creating the!RFC1918rule, you are enforcing a policy of "least privilege." You are giving the VLAN the absolute minimum access it needs to function (internet access) and nothing more.
- Framework: NIST SP 800-41, "Guidelines on Firewalls and Firewall Policy"
- What it says: This guide recommends a "deny-by-default" stance, where you only permit traffic that is explicitly allowed.
- How your rule applies: Your inverted rule is a more secure and elegant version of this. Instead of creating a long list of
Blockrules (e.g.,Block to VLAN_20,Block to VLAN_30, etc.), you have one singlePassrule that implicitly denies all inter-VLAN traffic. It achieves the "deny-by-default" goal for internal access while being easier to manage.
3. NSA🇺🇸 (National Security Agency) / CISA
The NSA and CISA (Cybersecurity and Infrastructure Security Agency) are focused on preventing and mitigating real-world attacks, with a major focus on stopping lateral movement.7
- Guideline: CISA's "Layering Network Security Through Segmentation"
- What it says: This guidance explicitly states that segmentation is used to "prevent a malicious actor's attempts to access high-value assets" and "mitigates the lateral spread" of an attack.
- How your rule applies: Lateral movement is the term for an attacker who breaches one device (like a smart-light) and then "moves laterally" across the network to attack more valuable targets (like a file server). Your rule shuts this down completely. By blocking all
RFC1918destinations, you make it impossible for that attacker to move from the IoT VLAN to the Server VLAN. You have effectively cut off their attack path.
In summary, these rules are a highly effective and standards-compliant method for creating a secure, segmented network. It perfectly implements the modern security principles of Zero Trust, Least Privilege, and Defence-in-Depth that are mandated by the CCCS, NIST, and the NSA/CISA.
Conclusion: Your Fortress is Secure
Be prepared to troubleshoot and add specific Pass rules as needed for devices that require inter-VLAN communication. Check the firewall logs frequently (Firewall -> Log Files -> Live View) after implementing this. 🔥
You've hardened the system access, refined outbound filtering, and added a dynamic, community-driven threat intelligence layer with CrowdSec.
When you're ready, head on over to part 3 for the best parts of OPNsense to come yet - Zenarmor & WAF!
 Core Lab Joe
 Core Lab Joe
Or back to the roadmap for more!


Member discussion