
Building the Ultimate Home Assistant Server (2026 Edition)
Since 2012, I’ve been wrestling with home automation. I’ve chased the promise of a "Smart Home" from unreliable X10 switches to wireless "G" media streamers (yes, it was as bad as it sounds).
For years, the advice was simple: "Buy a Raspberry Pi and flash Home Assistant OS."
In 2026, that advice is wrong.
If you want a toy, use a Pi. If you want a Digital Fortress, you build a server. In this guide, I’m going to show you how to deploy the "Core Lab" standard: Home Assistant Container running on Docker.
We are ditching the heavy VM. We are ditching the "Add-on Store" lock-in. We are building a stack that is faster, more resilient, and fully under your control & customization dreams.
This is part 1 of the Home Assistant series, if there's enough interest I'll drop a part 2 delving into advanced config, reverse proxy setup (free location awareness!), automations/scenes/integration and more!
The Great Debate: VM (HAOS) vs. Docker
Not sure why we aren't using the default Home Assistant OS? Read my full breakdown here: [Home Assistant Container vs. OS].
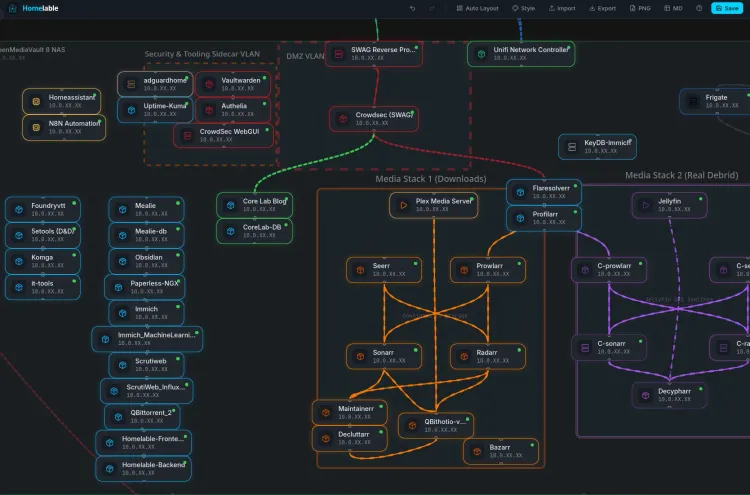
Diagram of the architecture we're aiming for, expand on a full screen to see or zoom in a lot!
flowchart TD %% ========================= %% INTERNET / EDGE %% ========================= User["🧑💻 User Devices"] Internet["🌍 Internet"] CF["☁️ Cloudflare
DNS • WAF • Cache"] %% ========================= %% FIREWALL %% ========================= OPN["🔥 OPNsense Firewall
NAT • Rules • IDS • VLANs"] %% ========================= %% VLAN 2 - HOME %% ========================= subgraph VLAN2[VLAN 2 - Home Zone] SWAG["🔐 SWAG / NGINX Proxy"] HA["🏠 Home Assistant Docker"] N8N["🔄 n8n Automation"] end %% ========================= %% VLAN 42 - MEDIA %% ========================= subgraph VLAN42[VLAN 42 - Media Zone] Jellyfin["🎬 Jellyfin"] Frigate["📷 Frigate NVR"] end %% ========================= %% VLAN 23 - INFRA %% ========================= subgraph VLAN23[VLAN 23 - Infrastructure Zone] AdGuard["🚫 AdGuard Home"] Influx["📊 InfluxDB"] Grafana["📈 Grafana"] MQTT["📡 Mosquitto MQTT"] end %% ========================= %% VLAN 234 - IOT %% ========================= subgraph VLAN234[VLAN 234 - IoT Zone] Z2M["🐝 Zigbee2MQTT"] ESP["📶 ESPHome"] end %% ========================= %% DOCKER HOST %% ========================= DockerHost["🐳 OpenMediaVault
Docker Host"] %% ========================= %% HARDWARE %% ========================= subgraph Hardware[Physical Devices] ZigbeeUSB["🔌 Zigbee USB Stick"] ZigbeeDevs["💡 Zigbee Devices"] ESPDevs["📟 ESP Devices"] Cameras["📷 IP Cameras"] end %% ========================= %% NORTH-SOUTH FLOW %% ========================= User --> Internet --> CF --> OPN --> SWAG SWAG --> HA SWAG --> Jellyfin SWAG --> Frigate SWAG --> Grafana %% ========================= %% EAST-WEST FLOW %% ========================= HA --> MQTT Z2M --> MQTT ESP --> MQTT N8N --> HA N8N --> MQTT %% ========================= %% HARDWARE LINKS %% ========================= Z2M --> ZigbeeUSB --> ZigbeeDevs ESP --> ESPDevs Frigate --> Cameras %% ========================= %% METRICS %% ========================= HA --> Influx --> Grafana %% ========================= %% HOST LINKS %% ========================= OPN --> DockerHost DockerHost --> VLAN2 DockerHost --> VLAN42 DockerHost --> VLAN23 DockerHost --> VLAN234 DockerHost --> Hardware %% ========================= %% SECURITY BOUNDARIES %% ========================= OPN -.->|🔥 North-South Control| VLAN2 OPN -.->|🔥 North-South Control| VLAN42 OPN -.->|🔥 North-South Control| VLAN23 OPN -.->|🔥 North-South Control| VLAN234 VLAN234 -.->|⛔ Blocked East-West| VLAN2 VLAN234 -.->|⛔ Blocked East-West| VLAN23 VLAN234 -.->|⛔ Blocked East-West| VLAN42 %% ========================= %% STYLING %% ========================= classDef user fill:#e3f2fd,stroke:#1e88e5,stroke-width:2px,color:#0d47a1; classDef edge fill:#ede7f6,stroke:#5e35b1,stroke-width:2px,color:#311b92; classDef firewall fill:#ffebee,stroke:#c62828,stroke-width:4px,color:#b71c1c; classDef home fill:#e8f5e9,stroke:#2e7d32,stroke-width:2px,color:#1b5e20; classDef media fill:#ede7f6,stroke:#512da8,stroke-width:2px,color:#311b92; classDef infra fill:#fce4ec,stroke:#c2185b,stroke-width:2px,color:#880e4f; classDef iot fill:#f1f8e9,stroke:#558b2f,stroke-width:2px,color:#33691e; classDef hardware fill:#eceff1,stroke:#455a64,stroke-width:2px,color:#263238; classDef host fill:#fff3e0,stroke:#ef6c00,stroke-width:2px,color:#e65100; class User user; class Internet,CF edge; class OPN firewall; class SWAG,HA,N8N home; class Jellyfin,Frigate media; class AdGuard,Influx,Grafana,MQTT infra; class Z2M,ESP,ZigbeeDevs,ESPDevs iot; class ZigbeeUSB,Cameras hardware; class DockerHost host;
Deep dive on this subject, coming soon.
Why LinuxServer.io images?
The traditional method of installing Home Assistant can be complex, especially for those less familiar with Linux and Python. LinuxServer.io's Docker container abstracts away much of that complexity. Docker provides containerization, ensuring Home Assistant runs in an isolated environment, preventing conflicts with other software on your system.
As the LinuxServer.io team states: "Our containers are built with stability and ease of use in mind." This isolation also simplifies backups and restores – a critical aspect of any smart home setup. Furthermore, Docker Compose allows you to define your entire Home Assistant environment in a single file, making it reproducible across different systems.
The Hardware Standard (2026)
Stop buying Raspberry Pis for this. By the time you buy the Pi 5, the power supply, the NVMe hat, and the case, you have spent $120+.
- The Brain: Intel N100/N200 Mini PC (Beelink, GMKtec, or generic). It costs roughly the same as a kitted-out Pi but includes a case, power supply, and an iGPU that can transcode video for Frigate.
- The Radio: Home Assistant Connect ZBT-2. This supports both Zigbee and Thread/Matter, future-proofing your network.
If you're looking for gear, hop over to Core Lab's vetted hardware recommendations👇

The Setup: The "Core Lab" Stack
We aren't using command line installs. We are using Docker Compose, managed by Dockge if you prefer.
Prerequisites: Docker Compose
Before we begin, you'll need to have Docker and Docker Compose installed on your system.
- Docker Compose ready to fly
- Basic familiarity with Linux CLI
- 64 bit CPU & 4 GB or more of RAM for the host
- Off we go!
1. The Directory Structure
Keep your house in order. I recommend this folder structure:
/opt/docker/
├── home-assistant/
│   ├── compose.yaml
│   └── config/
Here's a sample docker-compose from Linuxserver.io's page. About as vanilla and simple as you can get, and it'll work!
Deciding on network type for HA:
| Feature | Host Mode (Recommended) | MACVLAN (Advanced) |
|---|---|---|
| Discovery | Instant (mDNS works) | Requires configuration |
| IP Address | Same as Host PC | Unique IP on Network |
| Complexity | Zero | High |
network_mode: host which has the HA docker share it's host's NIC & IP! Critical for detecting Google Cast, HomeKit, Sonos and mDNS etc... Another below will use MACVLAN.Run this command to find your Zigbee stick ID for the compose file:" ls -l /dev/serial/by-id/
  homeassistant:
    image: lscr.io/linuxserver/homeassistant:latest
    container_name: homeassistant
    network_mode: host # Critical for detecting Google Cast, HomeKit, and Sonos
    environment:
      - PUID=1000
      - PGID=1000
      - TZ=America/Toronto
      - DOCKER_MODS=linuxserver/mods:homeassistant-hacs # The important "addon" store we cover below...
    volumes:
      - /path/to/homeassistant/data:/config
    ports:
      - 8123:8123 #optional
#    devices:
#      - /path/to/device:/path/to/device #optional
    restart: unless-stopped

# Core Lab recommendations, mosquitto and zigbee if needed
  mosquitto:
    image: eclipse-mosquitto
    container_name: mosquitto
    ports:
      - 1883:1883
      - 9001:9001
    volumes:
      - /yourpath/mosquitto/config:/mosquitto/config
      - /yourpath/mosquitto/data:/mosquitto/data
    restart: unless-stopped

  zigbee2mqtt:
    image: koenkk/zigbee2mqtt
    container_name: zigbee2mqtt
    devices:
      - /dev/serial/by-id/usb-ITead_Sonoff_Zigbee_...:/dev/ttyACM0
    volumes:
      - /yourpath/zigbee2mqtt/data:/app/data
    environment:
      - TZ=America/Toronto
    restart: unless-stopped
Key Tweaks:
network_mode: host: Don't mess with MACVLANs unless you are very comfortable networking (vlans, subinterfaces). Host mode allows Home Assistant to "see" your Chromecasts and Sonos speakers immediately via mDNS.DOCKER_MODS: HACS - you'll want this custom integration for later! This allows all kinds of further expansion of your HA docker... You can thank me later 😁image: Specifies the LinuxServer.io Home Assistant image.container_name: Assigns a name to our container.networks: This is where you assign one of the networks you created in your original docker-compose.yml file. It could be tied to a vlan, or a NIC, however you created it. Mine is a MACVLAN as described in my docker compose setup guide.bind mount: Maps a local directory (/mypath/DOCKERS/homeassistant) to the container's configuration directory. This is critical for persistence.ports: Maps port 8123 on the host to port 8123 in the container, exposing the Home Assistant web interface.restart: Ensures the container restarts automatically unless explicitly stopped.environment: Sets environment variables, including timezone (TZ), user ID (PUID), and group ID (PGID). SettingPUIDandPGIDcorrectly ensures proper file permissions within the container.
Copy this into your compose.yaml:
  homeassistant:
    image: lscr.io/linuxserver/homeassistant:latest
    container_name: homeassistant
#    network_mode: host #If have issues with mdns etc
    networks:
      yournet_work:
        ipv4_address: 10.0.0.X
    cap_add:
#      - NET_ADMIN
      - NET_RAW
    environment:
      - PUID=1000
      - PGID=100
      - TZ=America/Toronto
      - DOCKER_MODS=linuxserver/mods:homeassistant-hacs
    volumes:
      - /mypath/DOCKERS/homeassistant:/config
    ports:
      - 8123:8123 #optional
#    devices:
#      - /dev/dri:/dev/dri #optional
    restart: unless-stopped
Now that we have the docker running (You did do docker compose up -d right?!) you're next question is inevitably to be, great what next?!
First Boot & Configuration
Once your container is green in Dockge, or you checked the logs with docker logs -f homeassistant, open your browser: http://YOUR_SERVER_IP:8123
- Create your Admin User: Pick a strong passphrase (12-18 characters!). This is the key to your house.
- Location Data: Be specific! Drag the pin to your exact rooftop. This enables "Zone" automations (e.g., Turn on porch lights when I enter the driveway).
- Next, give your home a name, I named mine "Home".
- Chose your home location, if you ever plan on using automation triggers based on location, be as specific as you can. I adjusted the pinpoint to go directly over the middle of my house!
- Set correct timezone, units of measurement etc...
- Analytics: I leave this ON to support the devs, but it is 100% optional. I value my privacy but I also value the fantastic work devs do to make this incredible free software!
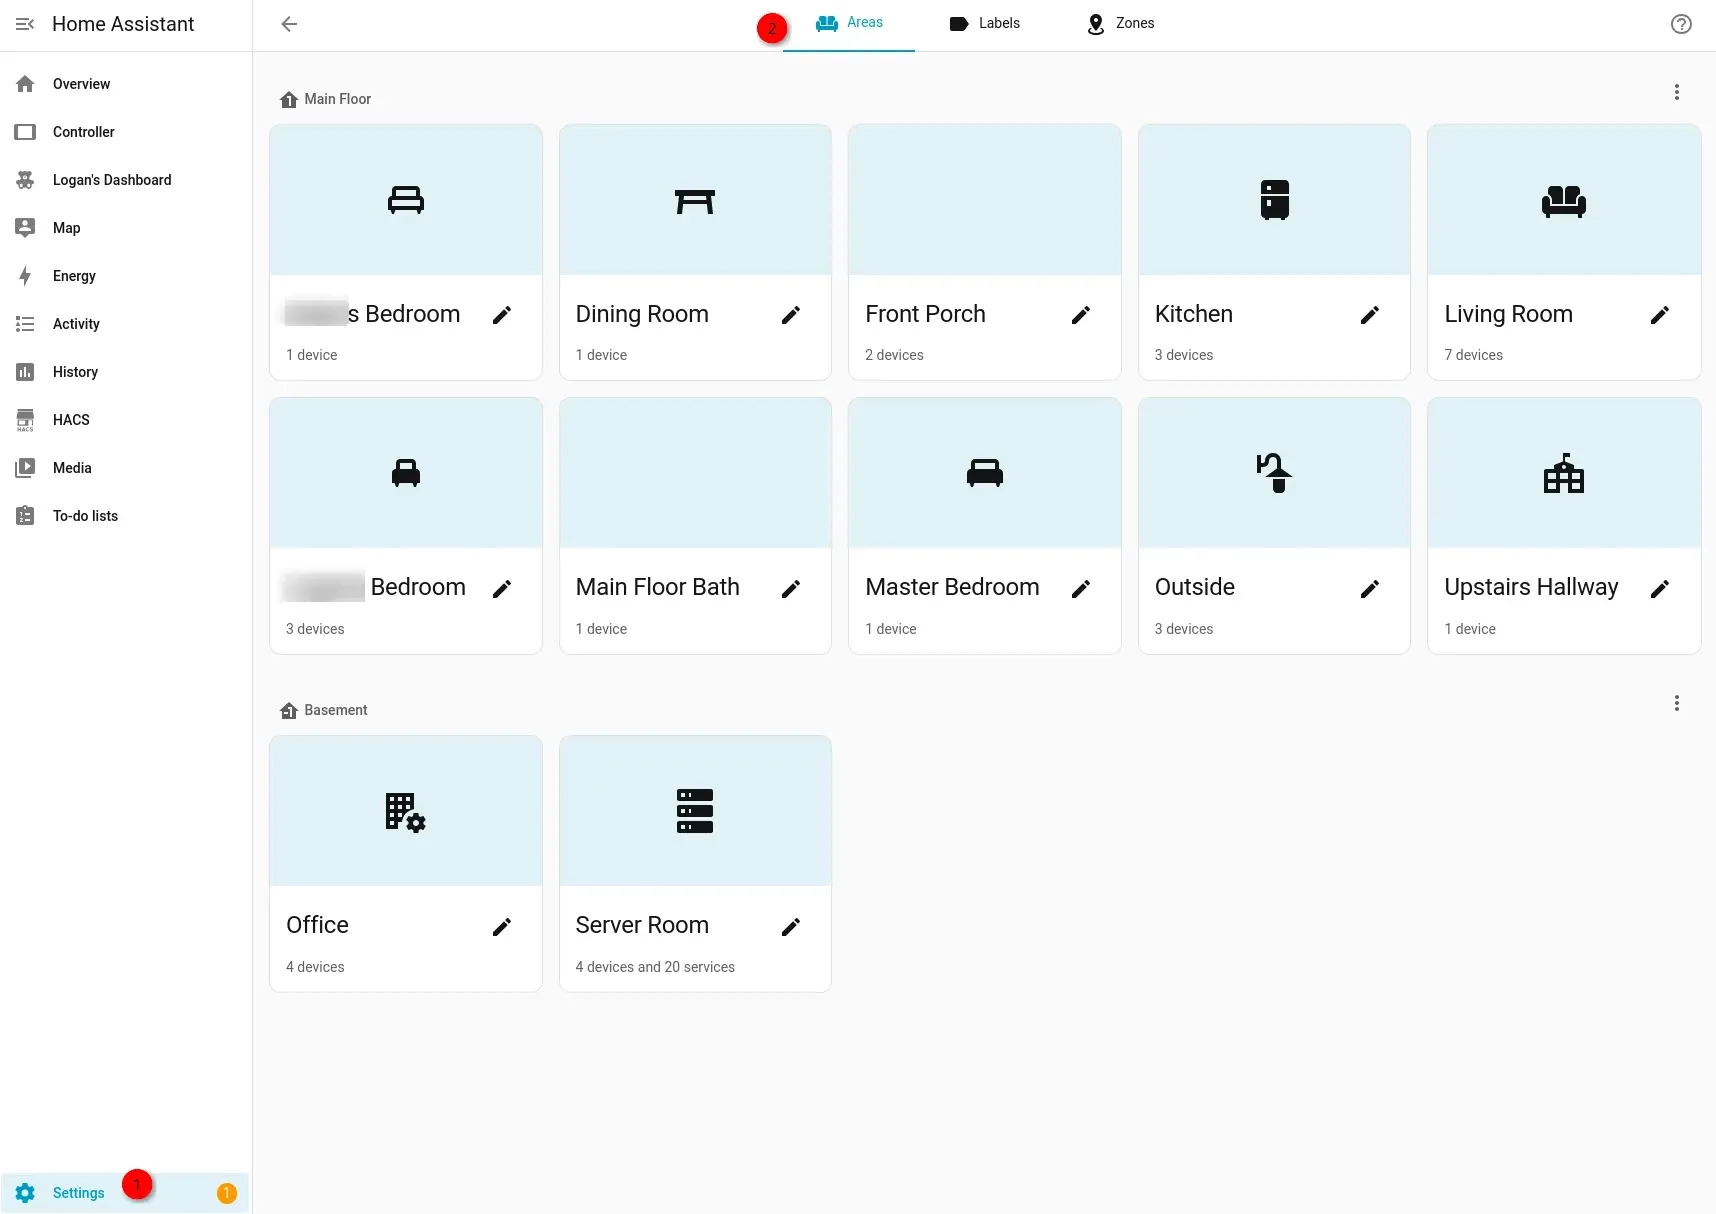
- Setup your rooms and areas, do it right away, this is key to the foundation of the rest of HA. When you add a device/integration, you assign it to a room/space and this will eventually make all your automations easier!
The "Missing" Add-on Store⁉️
"But Joe, where is the Add-on Store?"
It's gone. And that is a good thing. In the Docker world, the "Store" is Docker Hub.
- Want File Editor? Install VS Code as a container.
- Want Plex? Install the Plex container.
- Want Zigbee? Install Zigbee2MQTT.
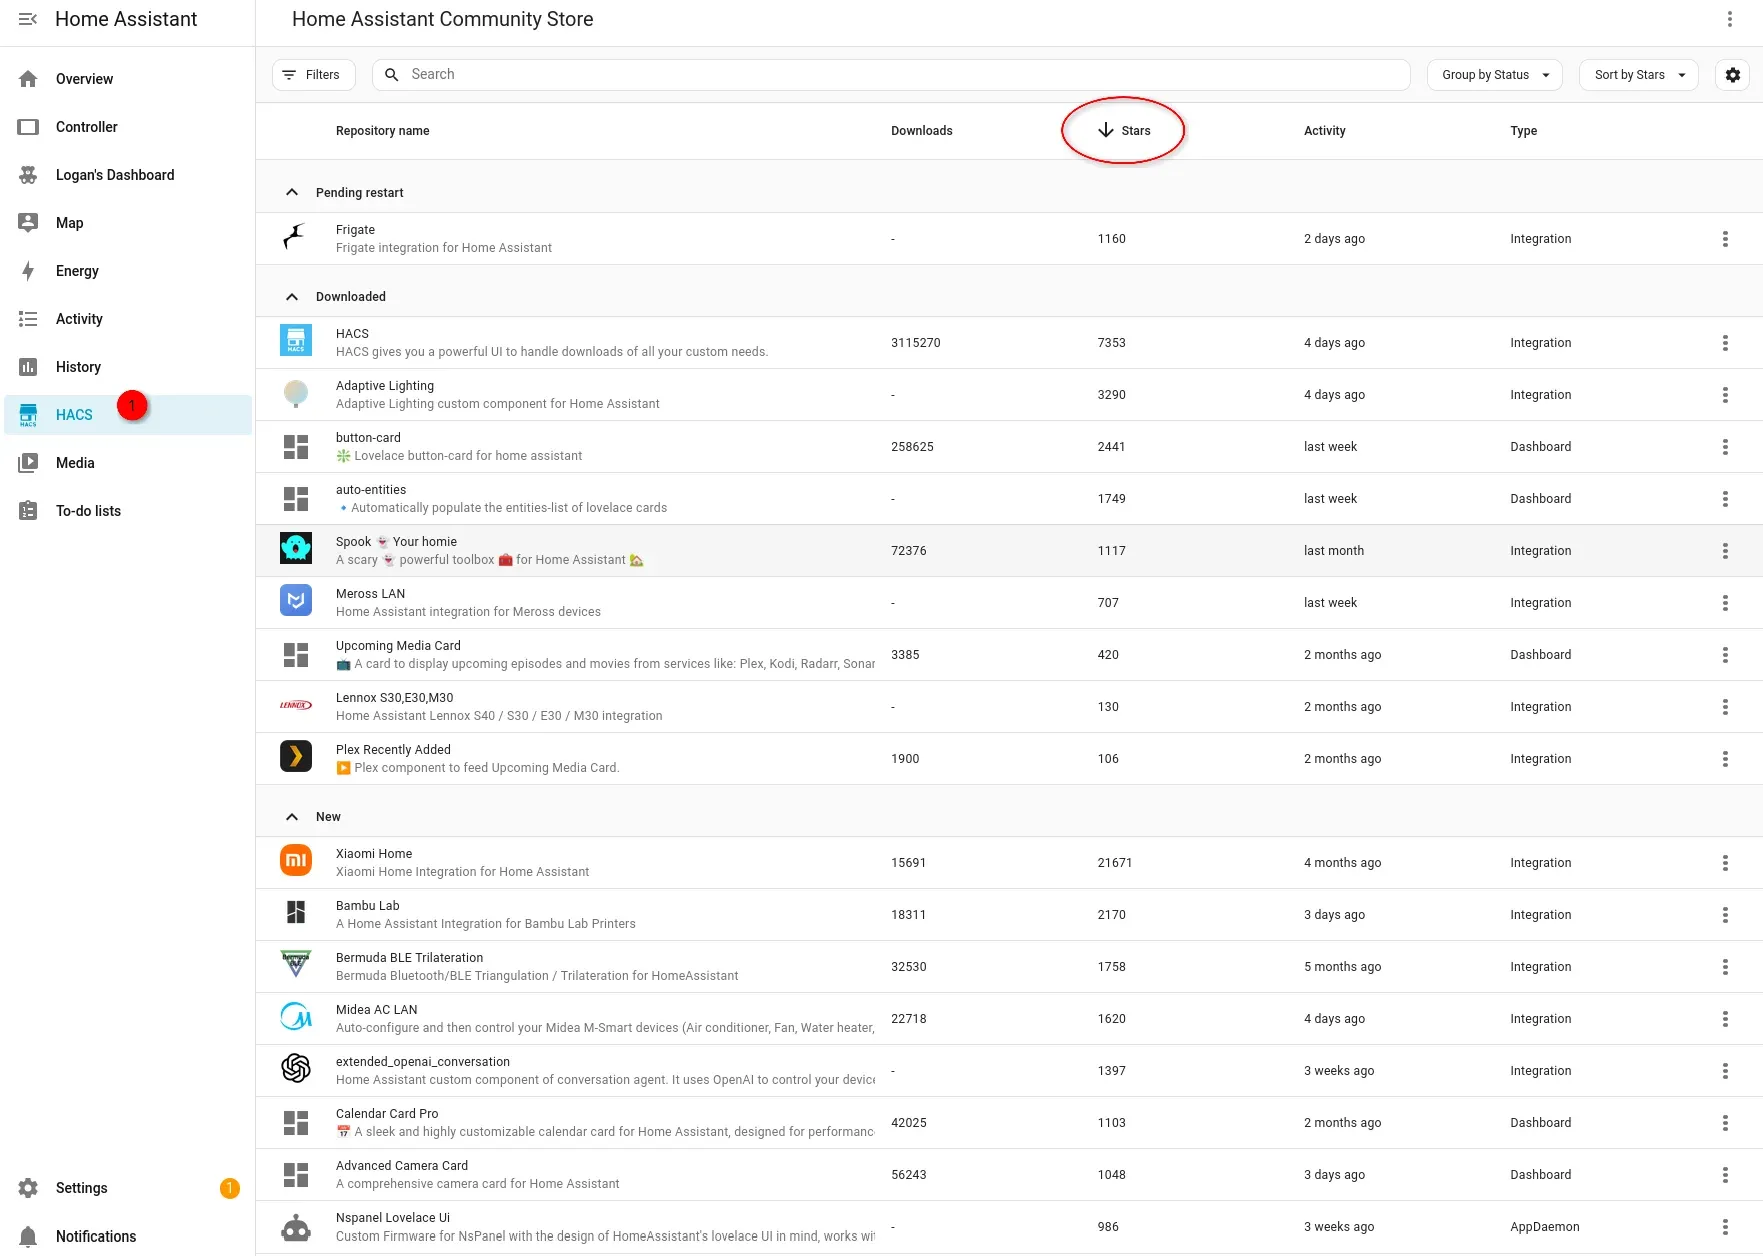
How to get Integrations (The Fun Stuff): Since we used the DOCKER_MODS variable, look at your sidebar. HACS is already there (or waiting in Devices & Services).
If it's not, double check your docker compose and ensure you added this variable in the home assistant environment variables as shown in the compose example above, and here:
- DOCKER_MODS=linuxserver/mods:homeassistant-hacsand then docker compose up -d --force-recreate homeassistant
- Go to HACS > Integrations.
- This is where you download the community-built tools that make HA powerful (like Frigate Card, Local Tuya, or Sonoff LAN).
- Search or Browse: You can search for specific integrations (e.g., "Philips Hue," "MQTT") or browse the available integrations by category.
- Configuration: Each integration will have its own configuration process. This might involve entering login credentials, providing API keys, or specifying IP addresses. Follow the on-screen instructions carefully.
- Entity Creation: After successful configuration, the integration will create new entities representing the devices and services it controls. These entities will appear in the "Entities" list.
😮2. Autodiscovered Devices (Most Common First)
- Automatic Discovery: Home Assistant automatically scans your network for compatible devices. These devices will appear in the "Notifications" panel (bell icon in the sidebar).
- Accept or Ignore: Review the discovered devices. Click "Accept" to add them to your Home Assistant setup. You can click "Ignore" if the device isn't relevant.
- Device Details: Once accepted, devices will appear on your dashboard and in the "Entities" list. Click on an entity to see its details, including its state, attributes, and available controls.
😮My Fav Easy and Great Integrations!
- Plex Media Server, shows right on my HA dashboard if anyone is watching, if server is alive or not, firmware level etc... All at a glance!
- Uptime Kuma w/Dockers! This is how I monitor up/down in HA dashboard with a glance.
- FreeBSD / Router detection - So I know the bandwidth flowing in/out of my network.
- Reolink - For my cameras! Until I figure out how to get Frigate working in here...
4. Configuring a Basic Integration (Example: Philips Hue)
- Add Philips Hue Integration: Go to "Settings" -> "Devices & Services" -> "Add Integration" and search for "Philips Hue."
- Press Button: The integration will prompt you to press the button on your Hue Bridge.
- Select Bridge: After pressing the button, Home Assistant will scan for your Hue Bridge and display a list of available bridges. Select your bridge.
- Name Your Hue Domain: You're prompted to name your Hue domain.
- Entities Appear: After successful configuration, your Hue lights, sensors, and groups will appear as entities in Home Assistant.
🤯5. Creating a First Basic Automation: "Let There Be Light!"
Let's create a basic "Sunset" automation to prove it works.
- Go to Settings > Automations & Scenes > Create Automation.
- Trigger: Select "Sun".
- Event: Sunset
- Offset: -00:30:00 (30 minutes before sunset).
- Action: Select "Call Service".
- Service:
light.turn_on - Target: Choose your Living Room lights.
- Service:
- Save: Name it "Evening Ambience".
Key Tips for Beginners:
- You will go to Settings->Devices a LOT at first!
- HA will also notify you if it detects new devices on your network!
- Read the Documentation: The official Home Assistant documentation is excellent: https://www.home-assistant.io/docs/
- Community Forums: The Home Assistant community forums are a great place to ask questions and get help: https://community.home-assistant.io/
- Start Simple: Begin with a few basic automations and gradually expand your setup.
- YAML Editing (Advanced): Some configurations require editing YAML files directly. Be very careful when editing YAML, as incorrect syntax can break your setup. Always back up your configuration files before making changes.
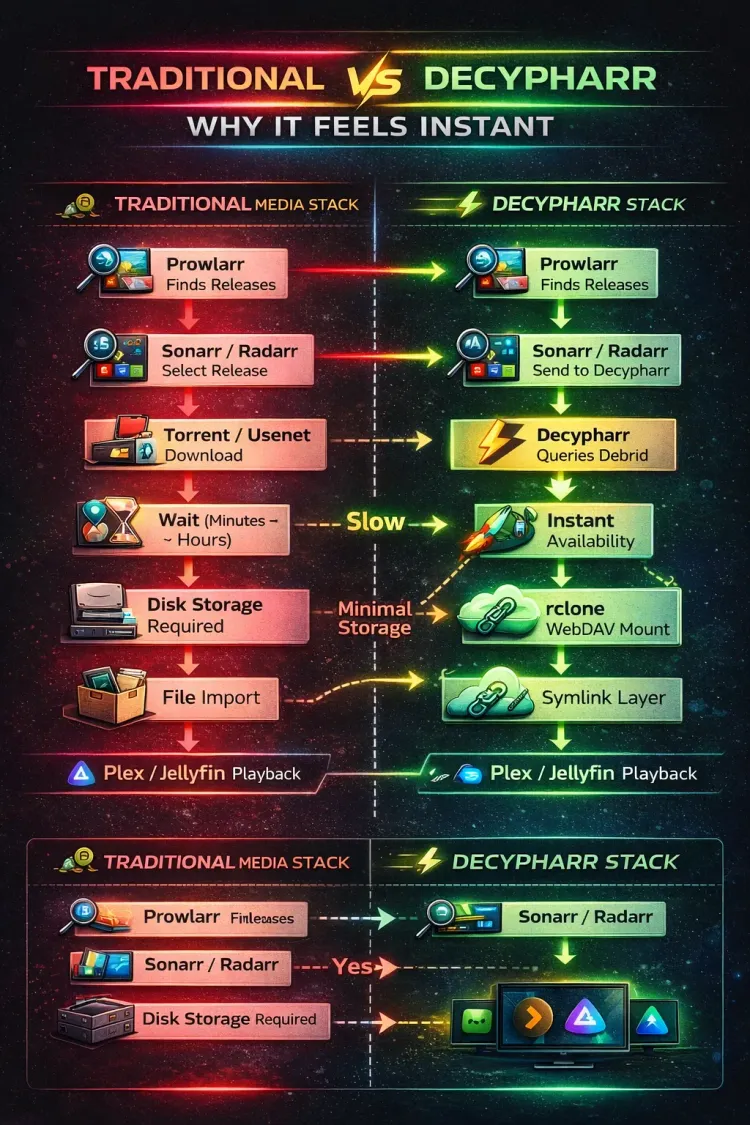
What's Next? (The Roadmap)
You now have a clean, high-performance Home Assistant Core running on x86 hardware. You aren't tied to a VM, and your resources are free for other labs.
Coming up in Part 2:
- The Eyes: Integrating Frigate NVR with your new Mini-PC's iGPU.
- The Access: Setting up a secure Cloudflare Tunnel or a VPN for remote control.
Ready to secure this setup and reach it from outside the house? Hit the SWAG Guide to integrate a reverse proxy!
Home Assistant FAQ
Frequently Asked Questions
- Is it harder to use Home Assistant in Docker than the OS version? The initial setup takes 5 minutes longer (writing the YAML), but maintenance is significantly easier. You can update, roll back, or migrate your entire configuration to a new server by simply moving your
/configfolder and restarting the container. - How do I use "Add-ons" if the Store is missing in Docker? In Docker, you don't use "Add-ons"; you use "Containers." If you want Zigbee support, you deploy a
zigbee2mqttcontainer. If you want a database, you deployinfluxdb. This prevents Home Assistant from becoming a "single point of failure" and allows other apps to use those services independently. - Why is
network_mode: hostrecommended over a bridge network? Home Assistant relies on mDNS and UPnP to "discover" devices like smart TVs, Sonos speakers, and Google Cast. Standard Docker bridging often blocks these broadcast signals. Host mode allows HA to sit directly on your network as if it were a physical device. - Can I still use HACS (Home Assistant Community Store) in Docker? Yes! By using the
linuxserver/mods:homeassistant-hacsDocker Mod in your environment variables, HACS is automatically injected into your container, giving you access to thousands of custom cards and integrations. - Does Home Assistant in Docker support USB Zigbee/Z-Wave sticks? Absolutely. You simply map the device path (e.g.,
/dev/ttyACM0) in yourcompose.yamlfile. This gives the container direct hardware access to your radio sticks.


Member discussion